
Although today WordPress is a powerful and versatile content management system that’s capable of practically anything, it’s still mostly used as a blogging platform. Even if a blog is just a part of your website, you will have to have at least one author that will write new content. But the chance is, you will have several authors who will also get some extra help from guest bloggers if that is something you want to do.
If you deal with authors on your WordPress website, it is just normal that you want to make the blog a better place for them. Because of that, we have prepared several tutorials that will help in customizing your WordPress blog when it comes to authors.
How to change default author permalink
As their name already suggests, permalinks are permanent links, i.e. URLs which lead to your posts, categories, author pages and so on. You can easily set up a basic permalink structure in WordPress general settings but if you want to modify a permalink for author pages, you will need to go a bit more into details.
There might be different reasons for changing the default author page slug. Just for an example, if you are working on a website for a restaurant where you want your chefs to have their own pages and where they will be able to write personal blogs (about food hopefully), you will want to modify the permalink structure. If you have set up everything to go along with your restaurant, why wouldn’t you change “author” into “chef”?
Not only this will look much more professional, but it may actually help you with SEO and bring back much more relevant search results for your potential visitors.
You may have a completely different reason for changing the base slug, but we will stick with our chefs (yeah, we were hungry when writing this, and we’re thinking about cuisine pretty much all the time) in order to show you how to modify the function:
Change default author permalink:
- Open your functions.php file
- Copy and paste the following:
function custom_author_base () {
global $wp_rewrite;
$author_slug = 'chef'; // change this to
whatever you want
$wp_rewrite->author_base = $author_slug;
}
add_action('init', 'custom_author_base');
- Change $author_slug into whatever you want to appear instead of “author” in the personal pages
- Save changes
- Navigate to Settings->Permalinks
- Click “Save changes” without actually making changes on the settings page
Aaaand, you’re done! Now you can navigate to a page by using your new permalinks.
Following our example, new author permalink would look something like this: https://firstsiteguide.com/chef/gordon.
Redirect author archive link to another page
By default, WordPress will archive your posts and organize them by authors. In a multi-author environment, this can be really useful – by simply clicking on author’s name which is usually found on the top or on the bottom of the post, you will be redirected to the archive page which lists all posts written by that person.
But what if you are a single author? That means that a link to your archive page leads to the same blogroll you already have on your homepage or blog page (depending on your site organization) and that doesn’t make sense. Instead, you may want to redirect your users to another page – for example “About me” page where you can tell your visitors more about yourself or provide some extra information about your posts, business or whatever you want.
You can do that easily with only a few lines of code:
- Open functions.php file
- Copy and paste the following function:
add_filter( 'author_link', 'redirect_link' );
function redirect_link() {
return home_url( 'about-us' );
}
- Change the page on the 4th line to any page you want
- Save changes
And that’s all there is. After you have saved changes, anyone who clicks on the author name link will be redirected to the page you have specified in the code. In our example, you would be redirected to https://firstsiteguide.com/about-us.
While this method will redirect you to a new page when you click on the author archive link (name of the author), entering the full URL will still lead you to the default archive pages. If you manually navigate to www.yourdomain.com/archive/john for example, the link will still show all John’s posts. You can leave it so if you still want to have your archive pages accessible or you can redirect the entire URL as well.
Change author of a post without creating additional users
When it comes to writing new articles, most people will start by writing exclusively on their own. There will probably be months before they decide it’s time to hire additional authors who will help them in creating interesting material for the website. It doesn’t matter if you have one loyal author or there are dozens of contributors who have written more than one piece, you’ve probably created accounts for all of them and allowed them to input their material directly into posts and pages.
Sometimes, you will need an article that your authors won’t be able to write. For example, you might have a sponsored post that can help you make money, for which you want to have a different author. There will also be times when a person will need to post only one article on your site.
If that’s the case, there’s no need for creating those extra WordPress accounts just in order to display a post. Instead, you can overwrite your own or one of the author’s names and display the new name only in that single post. If you want more control over it, take a look at the plugin which will let you manage guest authors and assign multiple authors to one article.
Prepare the function:
To do that, we will show you how to hack the custom fields and overwrite author with a click of the mouse button:
- Open functions.php
- Copy and paste the following code:
add_filter( 'the_author', 'guest_author_name' );
add_filter( 'get_the_author_display_name',
'guest_author_name' );
function guest_author_name( $name ) {
global $post;
$author = get_post_meta( $post->ID,
'author', true );
if ( $author )
$name = $author;
return $name;
}
- Save changes
Change author via custom fields:
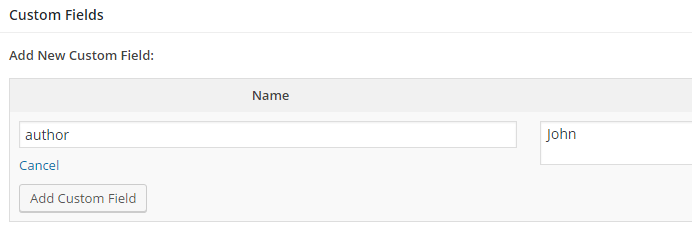
After you have made the changes to the file, you are ready to change the author of specific posts. As we already mentioned above, this will be done by adding a custom field to the post:
- Open a post for which you want to change the author
- Navigate to custom fields
- Add a new field and name it „author.“
- Type in the name of the author in the value field
- Save changes
Once you hit the update button or publish the post, the function will check for the custom field, and if found, the function will automatically change author’s name into one found in the value field.
Quite a handy hack, wasn’t it?
Authors can have their posts styled differently
While browsing through different websites, you may have encountered websites which have posts styled differently. While the posts can be styled based on different conditions (for example, you can change the looks of only the latest post in your blogroll), one popular way of styling your posts is based on authors.
On some websites, you might have seen that each author has his own post color, different bordure or a different link color. In a multi-author environment, this might be a nice idea.
Your readers might find posts from their favorite authors more easily and everything can look really great if you don’t over-exaggerate the styling; you don’t want your blog to look like a circus… oh, well, who are we to judge, you can do whatever you want, of course.
Because of that, we’re not going to style your posts, but in the next few lines, we are about to show you the code which will execute the styles for you. So let’s begin.
Before you can style posts differently, you need to tell your WordPress to find author’s first names.
Find authors’ names:
- Open index.php file or any that contains the loop
- Before the loop, you need to insert this line of code:
<?php $author = get_the_author_meta('display_name'); ?>
- Save changes
Now, WordPress knows how to read the author’s first name and you are ready for the next step. After you have created $author variable and told WordPress to place author’s first name in it (the name which will be placed in the variable is the first name which can be changed in user profile settings), you need to place the variable into post_class code.
This code should be inserted into the loop:
- Open index.php file or the file you have used in the previous steps
- Find the DIV element which contains post-id in itself and replace that line with the following:
<div id="blog-post-<?php the_ID(); ?>"
<?php post_class($author); ?>>
- Save changes
OK, you are done preparing the turf for styling posts for your authors and the fun part can begin. It is time to open your CSS file and define CSS rules for each user. If you remember, we told WordPress to find the author’s first name and use it as a class. That means that you need to name your classes accordingly. Be careful – first names are case sensitive so “John” won’t be the same as “john”.
If you have prepared the names, you can proceed.
Style posts:
- Open style.css file
- Add new classes with user’s first names. For example, if you have two authors, John and Jennifer, the CSS code would look something like this:
.John {
color: blue;
}
.Jennifer {
color: red;
}
- Play around with your styling. In this example, we have changed the color for their post, but as you should already know, CSS is a very powerful tool that allows you to do practically anything – from changing colors and sizes to even animating objects.
- Save changes
That’s it. You can now load your blogroll and see how the changes are taking effect. Please take your time and style posts nicely… oh, here we go again; you can style your posts the way you like it (but please make them beautiful).
Best author biography plugins for WordPress
At the end of almost any blog you have come across, you have probably noticed there is some short info about the author. The information is usually presented in a simple box where a picture, name and few personal details are presented.
By placing the author’s biography in an article, you are connecting with your visitors and you give them a chance to know at least something about the person who wrote the article. You give them a chance to connect with the author and have an even better understanding of the content.
Not only that; author biography plugins can allow your visitors to find all articles written by a specific person and to contact him via e-mail or social networks.
It doesn’t matter what are the reasons for placing one of the author biography plugins on your website, in this article, we’re about to show you some of the best extensions which will help you do just that.
Sexy Author Bio plugin
PRICE: Free
Let’s start the list with a free plugin which will definitely attract you with its name – who wouldn’t want a sexy author bio for themselves? The plugin creates a box which supports one or multiple authors. It is responsive which means you don’t have to worry about resizing the page where your biography is being displayed. The plugin can show up to five social media icons which can link to author’s Facebook pages and many more social media sites you can choose from.
Sexy Author Bio lets you customize many of its features so you can change gravatar icon sizes, font size and color, background, and much more. Once you create your bio box, you will get a shortcode which you can place anywhere you want your sexy biography to be displayed.
- Up to 5 social network icons
- Responsive
- Customizable
Fanciest Author Box plugin
PRICE: $18
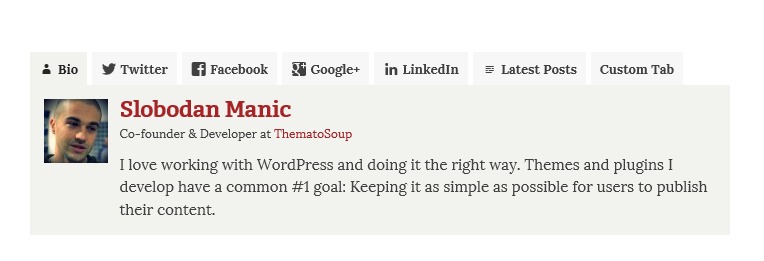
This premium plugin is a great choice for those of you who want more control over their author biography. Whether you need to display your own biography or you have more than one author, the plugin gets you covered. It looks nice and it can display different widgets which let you connect with the audience and increase conversions. Among the biography tab itself and several social network icons you can place in the box, you are free to add latest author posts and a custom HTML which you can customize to your needs.
The plugin comes with a color picker so you can colorize your widgets. It works automatically which means you only have to select where you want your box to appear (for example, before or after a post/page). There is an RSS feed author box, the plugin is translation and retina ready, features random author posts for widgets, lazy load and much more.
- Different customizable widgets
- Social network icons
- Custom HTML tab
Simple Author Box plugin
PRICE: Free
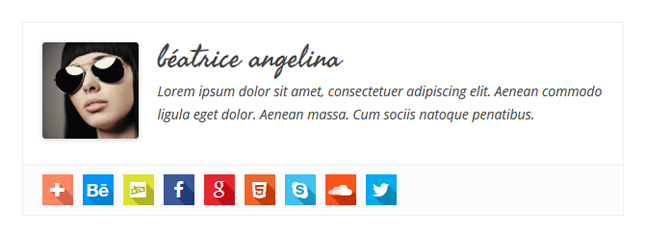
You can get a picture of this plugin simply by reading its name – it is simple, clean and easy to use. For those of you who don’t need too much from a biography plugin, Simple Author Plugin could be a great choice. It creates a stylish and modern looking author bio box where you get to show author’s photograph (gravatar), 30 social network icons to choose from and of course a place for a short biography.
The plugin is responsive which is a great thing for your mobile site and you can set an effect which will rotate the box on mouse-over. The plugin is customizable so you can easily make it a part of your theme, but you have to know it can only be placed at the end of each article – there is no option to include the box on top of your post or in a sidebar/footer as a widget.
- Simple, stylish and modern
- Responsive and customizable
- Can be displayed only at the end of a post/page
If you want to use more features, then check out their PRO version.
Email authors when their articles are published
When you’re an admin or author with the privilege to publish your own posts, you don’t need any extra notifications about it – you’ve just published your own post, right? But if you’re an author/contributor without those privileges and you’re not logged in to the WordPress admin all the time so you can’t see the status of your posts, it would be nice to receive a message when your post finally goes live.
Instead of thinking about sending a private message to an author whose text has been approved or proof-read, you can automatize the whole process.
There are numberless plugins which can help you control that, but in this short tutorial, we are about to show you a simple function which will send emails instead of you.
Without any extra conditions, let’s create a simple function which will find the author of the post, his email, post title and send the email after the post gets published:
- Open functions.php
- Copy and paste the code:
function wpr_authorNotification($post_id) {
$post = get_post($post_id);
$author = get_userdata($post->post_author);
$message = "
Hey there ".$author->display_name.",
Your post, ".$post->post_title." has just been published.
You can now visit your own text and enjoy it embedded
into the site!";
wp_mail($author->user_email, "Your article has
been published", $message);
}
add_action('publish_post', 'wpr_authorNotification');
- Change the text of the message
- Save changes
If you don’t want everyone to be notified about the post, you can check for the user role and execute the code only if, for example, the post author has a Contributor role or a specific username.
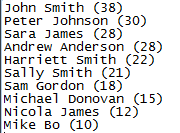
For example, you can send the email notifying a user about the post only if that user is John:
if ( $author='John' ) {
add_action('publish_post', 'wpr_authorNotification');
}
If you want more control over notifying your users, see how to automatically notify members of your new posts by using a plugin. Along with that, you can let WordPress notify you of any post changes.
Create a customized top list of authors on your blog
When there are multiple authors on a website it is important to allow people to browse through different articles written by different authors. That’s why WordPress already has the feature implemented which sorts post archives for each author.
In this short tutorial, we’re about to show you to create a top-list of authors by displaying a simple list on the sidebar.
Sometimes, you will want to create a top list of authors’ names and display it in the sidebar. Of course, you won’t be doing that manually by counting authors’ posts or sorting them alphabetically. Luckily, WordPress is ready for sorting authors on your site which means you won’t have any trouble creating the list. The basic function looks like this:
<?php wp_list_authors( $args ); ?>
If you use this function, by default, WordPress will display all authors and sort them by their name. This can be good enough if you want to display a simple list of all the authors who are working on your site, but what if you wanted to sort them out differently? Maybe you wanted to show authors with the most posts or order them by email address on the contact page?
In that case, you will want to focus on $args variable which stores an array of parameters that you can easily change. If you want to learn more about the function and all the parameters, you should visit the WordPress Codex page dedicated to wp_list_authors function.
Create the top list of authors:
In the following lines, we’re about to show you a function which sorts authors by their post count and shows only the top 10:
- Open sidebar.php
- Copy and paste the following function:
<?php
$args = array(
'orderby'       => 'post_count',
'order'         => 'DESC',
'number'        => '10',
'optioncount'   => true,
'show_fullname' => false,
);
wp_list_authors( $args );
?>
- Save changes
If you have taken a peek at WordPress Codex page, you have seen all the other parameters which can be used in the array. By adding any parameter in the array, you can change the way the function sorts your authors. Feel free to play around with those parameters and watch how the top list changes.
If you haven’t done any changes, the function will display top 10 authors (ordered by their post count) in descending order and will show the number of posts next to each author’s name. Also, author’s name will be automatically linked to that author’s personal archive page which lists all posts written by that person. How cool is that?
While this top list can look good on your sidebar, it will help your new visitors find authors who contributed the most to your website. On the other hand, this top list might start up a healthy competition between authors and can act like a game where only those with the most articles can be listed in top ten. If you were just two articles short to be on top, wouldn’t you work just a bit harder to have your name on top?
Show author statistics in a widget
When there are more than just a few authors writing for your site, things become much more interesting. Not only that you’re about to have a significant increase in the number of articles, but you will also attract a broader audience to your site and have the topic covered from different points of view.
While your authors are diligently writing, you can give them extra credit by showing their statistics right in the widget. Instead of simply adding an author box on the bottom of each post, you may show the authors’ avatar, the number of posts he or she has written so far, the number of views per post, etc.
To help you with that, we’re about to show you a great plugin which will set you up in minutes.
Author and Post Statistic Widget
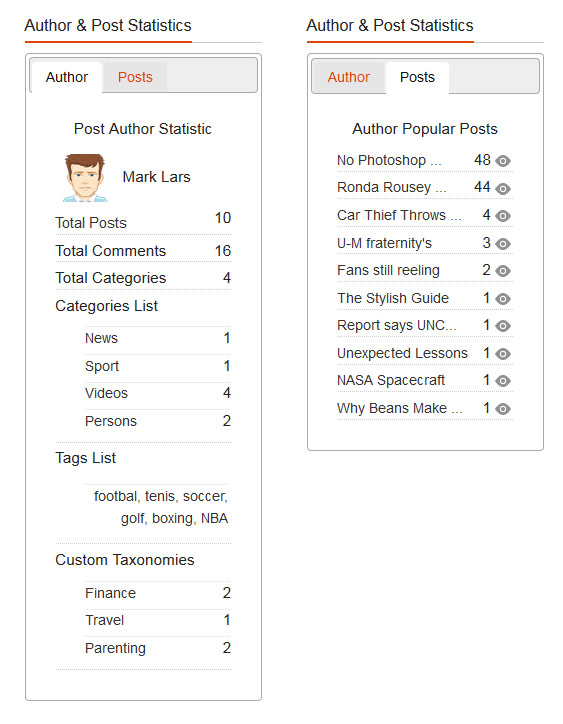
This free plugin goes by the name of Author and Post Statistic Widget and it can be easily installed from the WordPress plugin repository:
- Navigate to Plugins->Add New
- Search for “Author and Post Statistic Widget”
- Install and activate the plugin
- Navigate to Appearance -> Widgets
All you have to do now is to select one of the newly installed widgets and drop them onto your widget area.
Widgets:
In the free version, you get the following widgets:
- Active Users – Shows a list of authors who are active on your site. It lists usernames with a link to their profiles and shows the number of published posts
- Popular Authors List – Shows a list of the most popular authors on your site and adds a post and comment count next to authors’ names. You can choose the date interval from which posts will be selected
- Popular Posts – Displays a list of the most popular posts. The widget shows your posts and adds a view count next to them. It allows you to choose date interval from which posts will be selected
- Popular Posts List – Displays a list of the most popular posts, and next to previously mentioned view count, it also shows comment count. You can choose to show posts from last 7, 30, 90 and 365 days
- Author and Post Statistic – Shows a list of authors and all of their posts
All of the widgets can have their names changed and can be dragged around your sidebar and/or footer area (depending on your theme). Also, every widget has its own set of options which allow you to additionally customize author and post statistics. You can even add your own CSS style to change the looks of widgets and there are functions and shortcodes ready for you to use them in your everyday posts and pages.
If all of that is not enough for you, this plugin can be extended into PRO version which costs $14 -$55 and adds a number of different graphical statistics to your dashboard. PRO version also comes packed with new shortcodes which allow you to show additional statistics about your authors and posts.
Wrapping up
If you have a blog, you won’t be able to run it successfully without having at least one active author. Since you will probably have more than just one author, take the time and make their experience as great as possible. We hope these tips and tricks helped you with that.
2 comments on “How to Change Authors in WordPress (+ Author Plugins)”
Leave a Reply

How to add a icon before author name and date.
By default, WordPress uses Gravatar to show author images. But if you want to allow different images on your site, check out a free plugin WP User Avatar which allows you to upload additional photos. Then you can use the shortcode generated by the plugin to add images to your posts and pages right next to author name and date or actually anywhere you want!