Looking just a few years back from now, we had been all fascinated by the fact that more than 25% percent of all websites on the internet were powered by WordPress. That simple fact seemed impressive, but today, the numbers have increased, and some statistics say that can thank their existence to our beloved WordPress.
So, it does not a surprise that even you have started your site on WordPress. But what you might haven’t realized back then is that there are actually two variants of the popular CMS, and there are some quite significant differences between the two that you may experience only a few weeks or months after that first login.
WordPress.com is a commercialized version which is a great option to start with. But when the first steps are behind you and when you realize all the drawbacks of the .com variant, you will start banging your head against the wall because you haven’t started your blogging journey “the right way”. Still, don’t worry; moving your blog from WordPress.com to a self-hosted version (also known as WordPress.org) is not such a big problem.
Why it is a good idea to move your blog from WordPress.com?
While WordPress.com is a great tool for beginners, sooner or later you’re going to outgrow it. The platform simply doesn’t let you have complete control over your site, and that usually becomes a huge problem for many bloggers.
WordPress.com comes with restrictions. It will put a wall between you and your blog – it won’t let you show the creativity you can accomplish with a self-hosted version. It won’t let you have all the themes and plugins (unless you pay to enable this option), and it will be very hard to earn any money from the blog hosted on WordPress.com. Their Terms of Service clearly indicate, “Automattic reserves the right to display advertisements on your blog unless you have purchased an Ad-free Upgrade or a VIP Service account.”
Prepare the environment
One of the great things WordPress.com has done for you is hosting. You didn’t have to worry about where your site is and who hosts it because everything has been handled by the team of experts at WordPress.com.
But now that you’re starting a journey on your own, it is time to get the best hosting you can.
And trust us when we say that getting the right host can mean a big difference during the entire time you work on the site. So, get the best host you can right now and avoid problems you might easily have in the future if you decide to move from one host to another just because you had to rush and save a buck or two.
Get hosting and domain
If you have done any research on WordPress and hosting, we are sure that you are overwhelmed with the information and the sheer number of choices. The number of smaller hosting companies grow like mushrooms after the spring rain and it’s getting harder and harder to find the one that will be suited well for you.
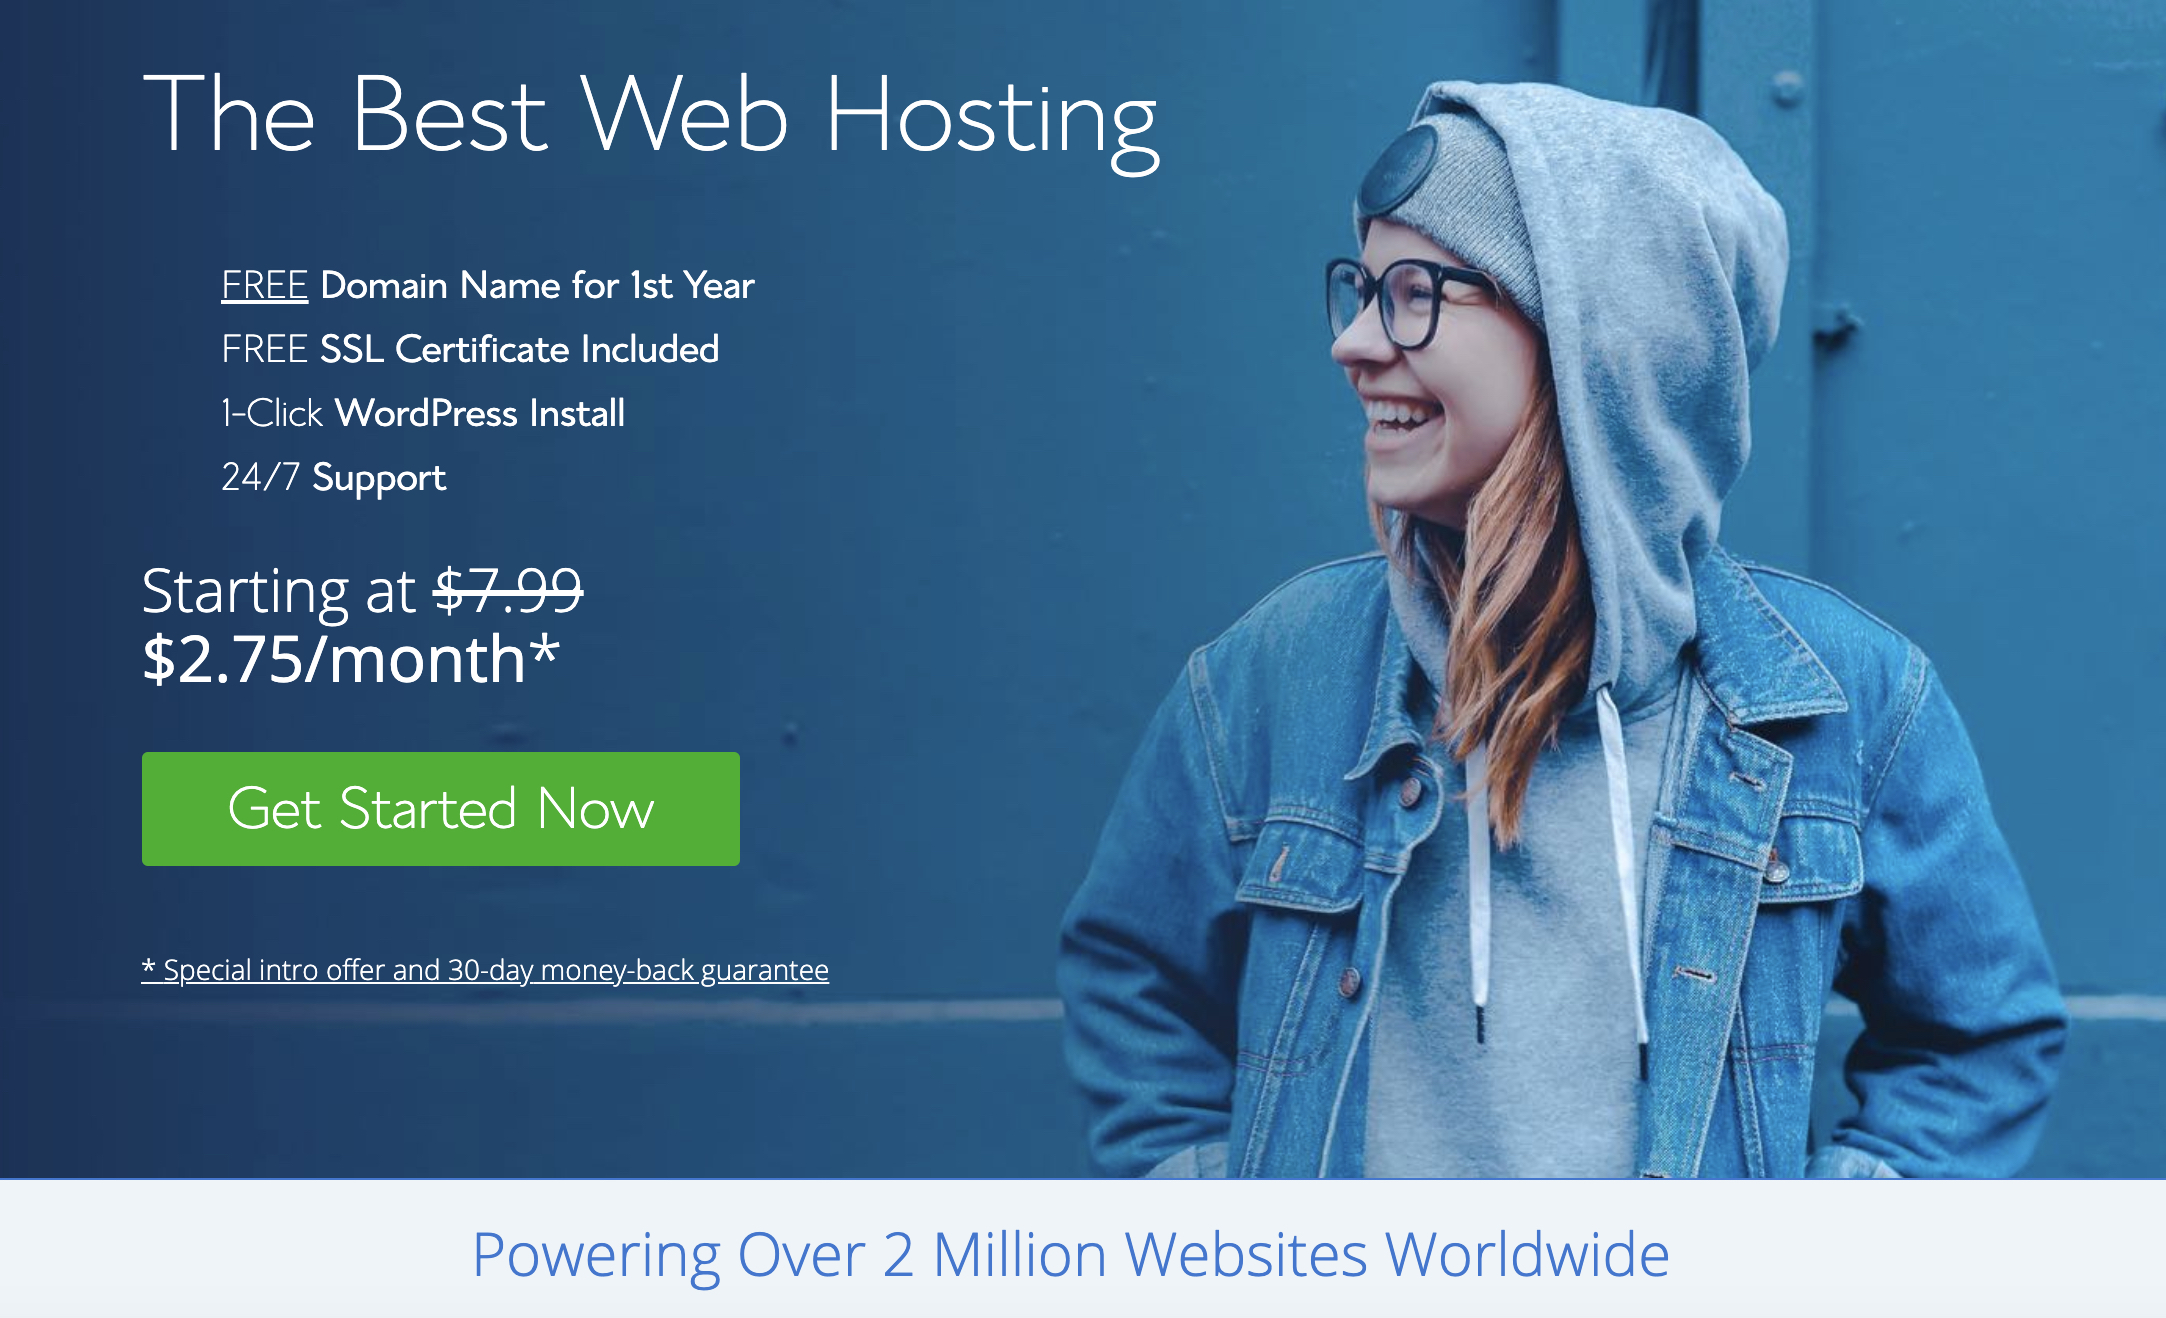
We know it’s hard to choose the right host, so we have done some heavy lifting and tested some of the most popular web hosting services. If you don’t have the time to thoroughly inspect each and everyone out there, we strongly recommend Bluehost which has proven as the most reliable hosting company for WordPress sites.
If you don’t have experience with setting up a hosting account, let us quickly show you how to do that:
1. Visit Bluehost – Click this link and find the “Get Started Now” button that will take you to the next step
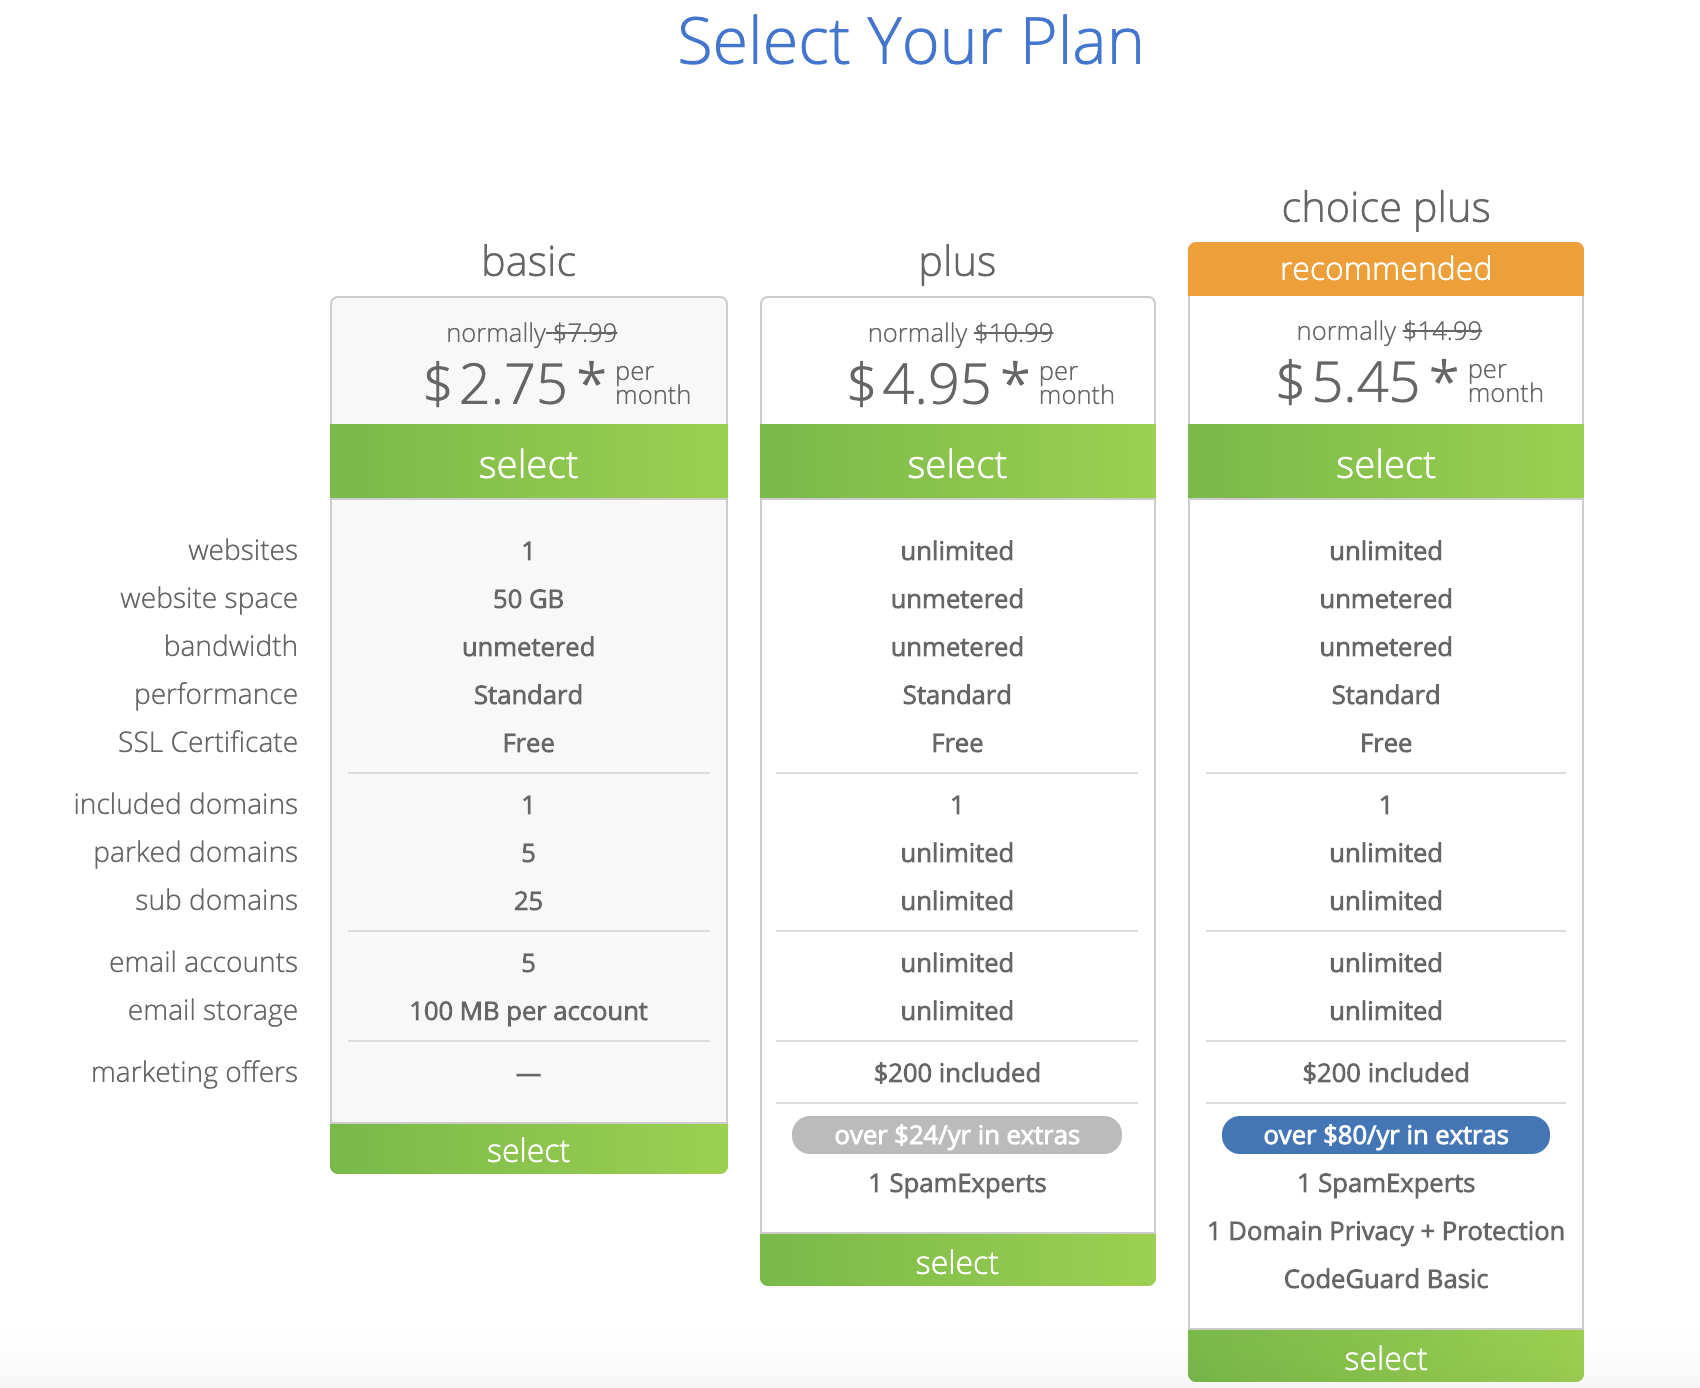
2. Choose a hosting plan – Bluehost gives you several options to choose from. If this is your first time registering an account, we suggest going for the Basic one. It will be more than enough to get your site going, and you can still investigate all the features later and upgrade the plan if necessary.
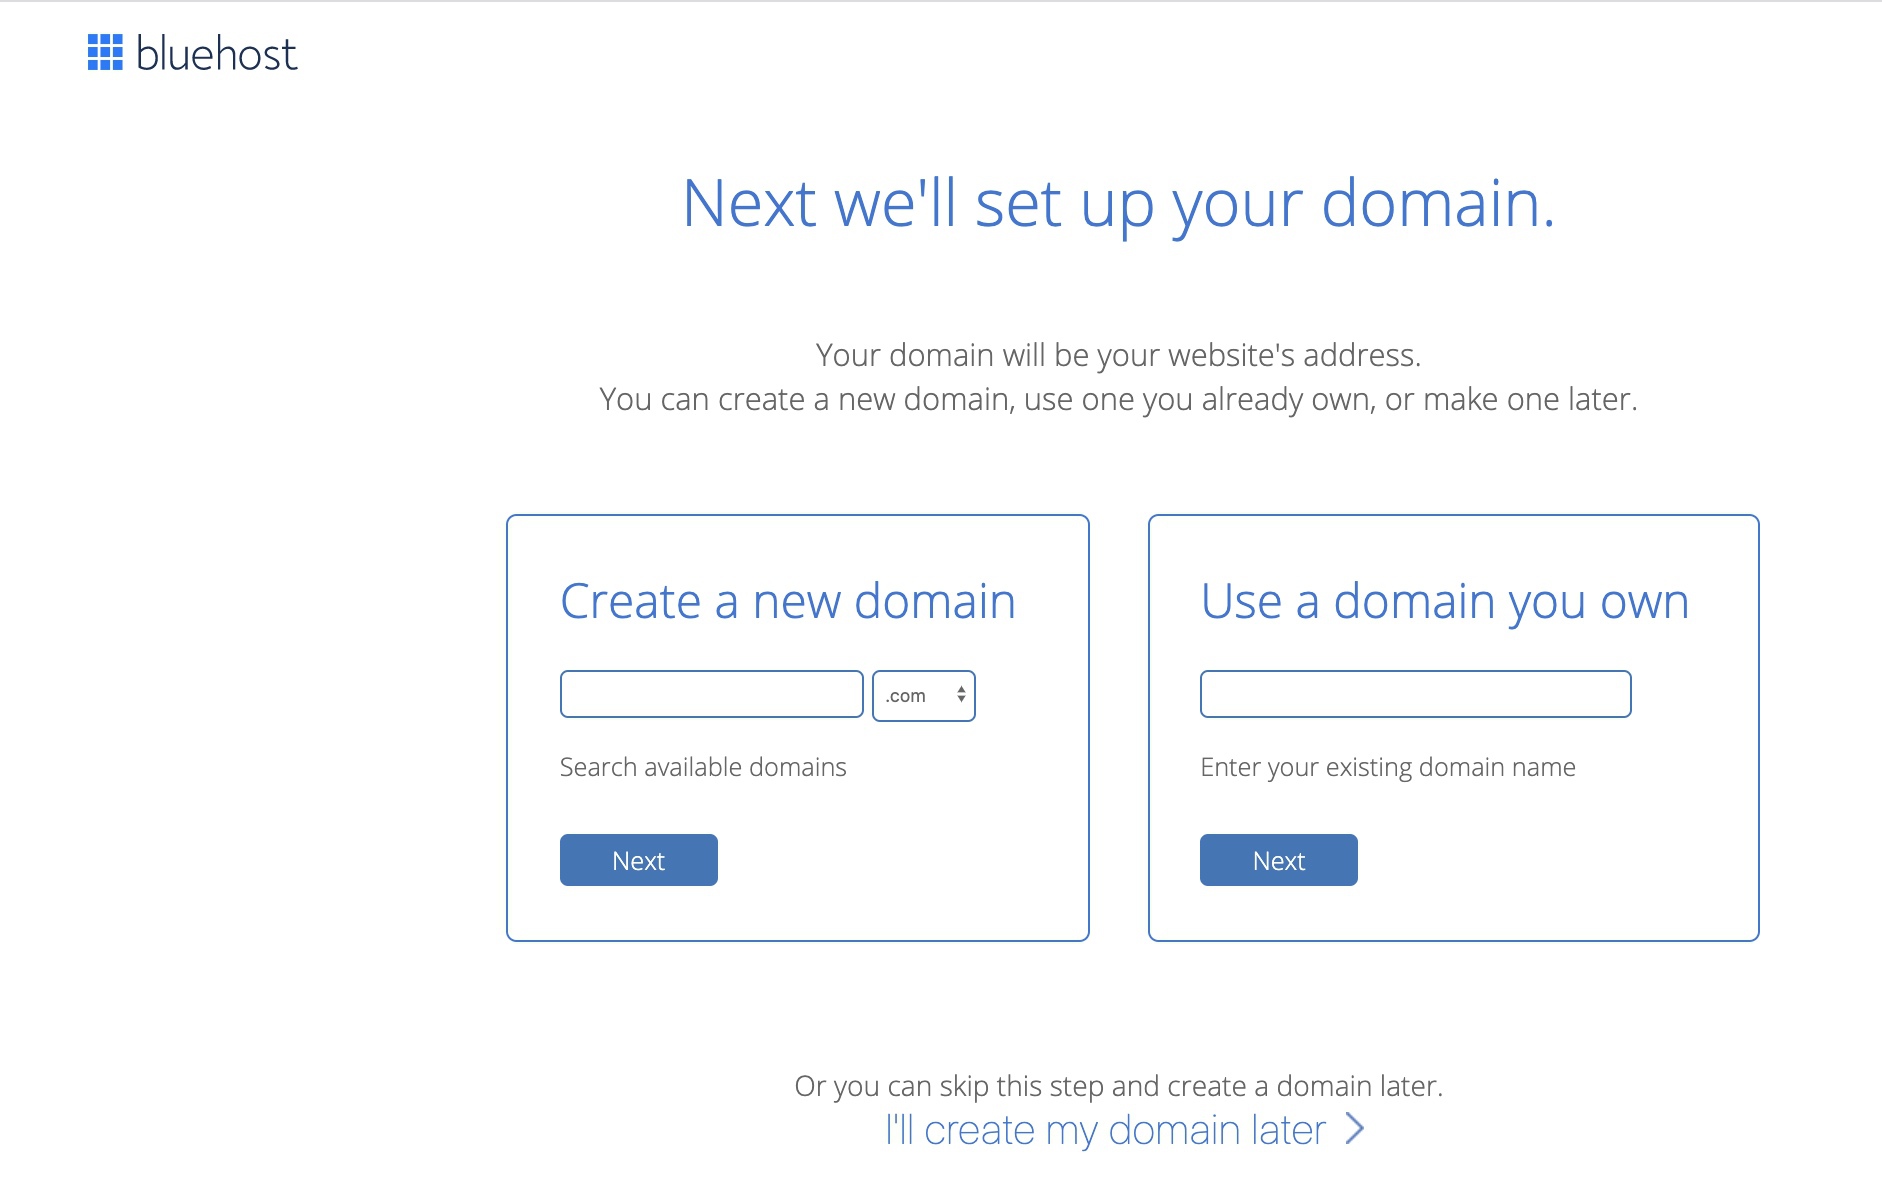
3. Take care of the domain name – If you already have a domain, here you will be able to transfer it and assign it to the new blog. If not, simply type in the desired domain, and Bluehost will let you know if it’s available. It might be hard to get that perfect domain name because so many have been already taken, but let Bluehost make some suggestions, and don’t forget to read our guide about choosing a domain name for your new blog.
4. Register for Bluehost – Once you have transferred or chosen the domain name, you will have to enter your personal and billing info. Not everyone’s favorite part, but you will be done in a few minutes.
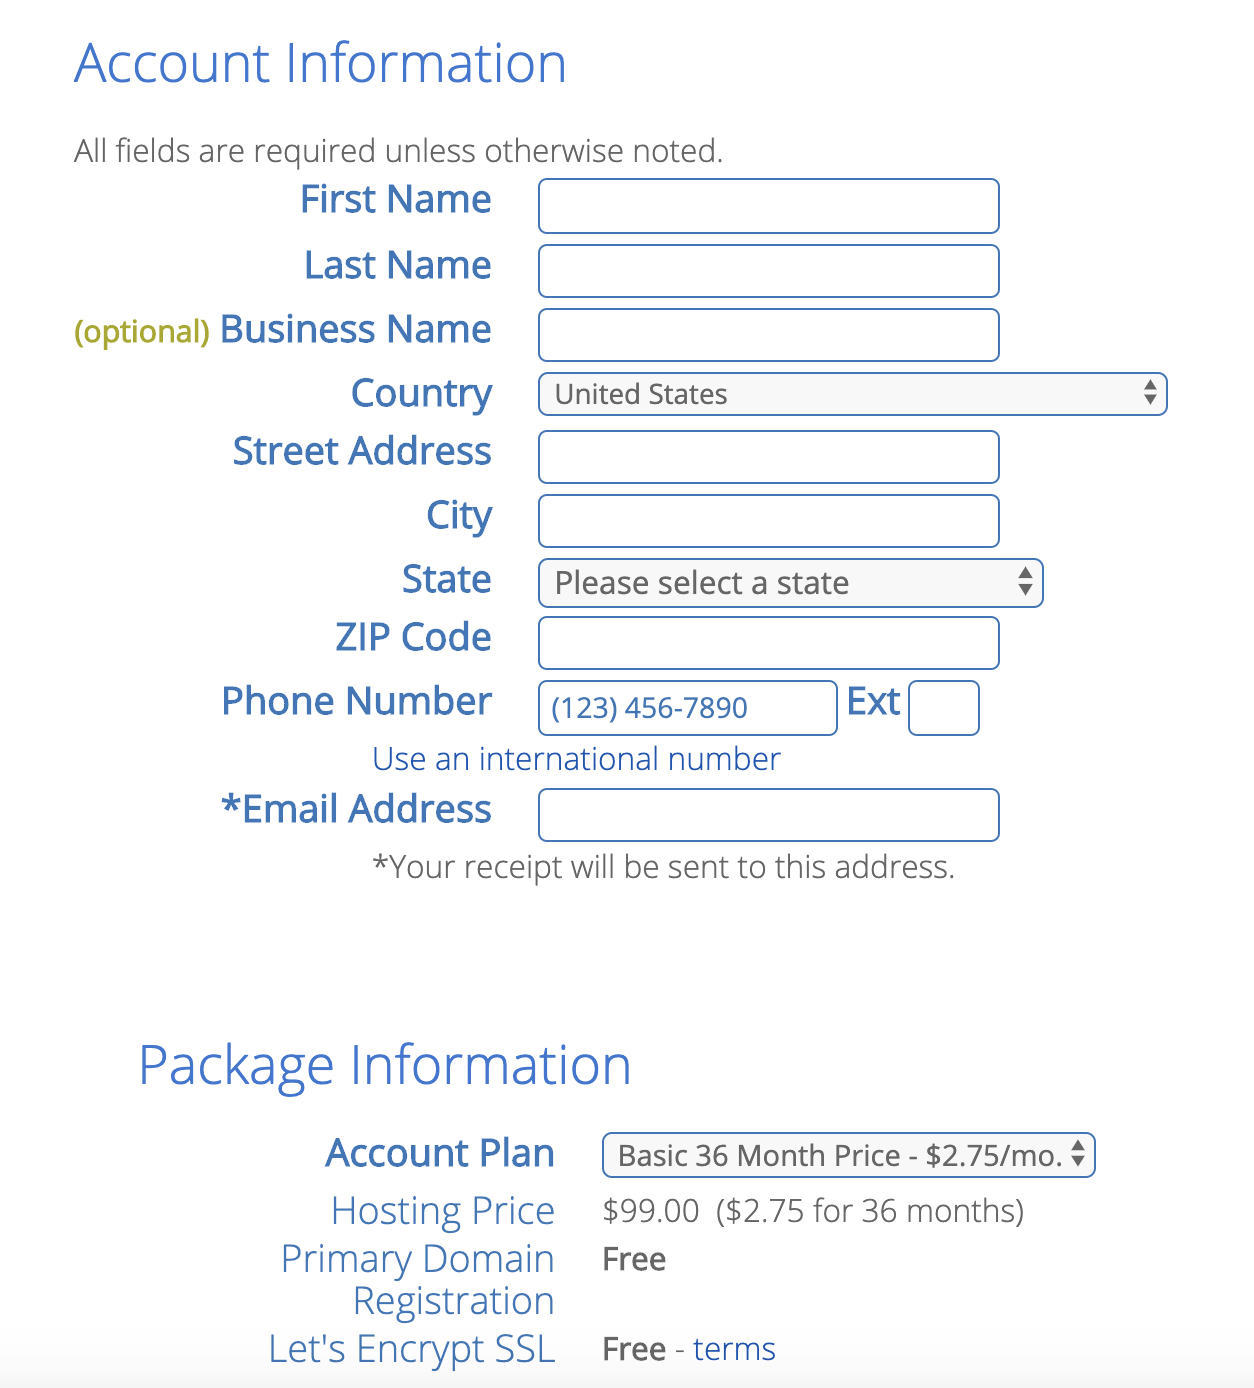
5. Select additional options – If necessary, select some additional hosting options. We suggest taking 12-month hosting option since it will make the price lower but it’s totally up to you. You can also uncheck everything else because you will be able to go back to your Bluehost account anytime and choose them if they become a necessity.

Install WordPress
At this point, we will have to make an assumption that you have prepared your hosting account and everything’s ready for WordPress. If you need a few more minutes to finish up your account, take your time and get everything done. This guide will wait for you.
If you have been reading about WordPress, you may have ended up on articles that show you a bit complicated ways of installing WordPress manually. Well, with Bluehost, installing WordPress is as easy as pressing a few buttons:
- Log in to your Bluehost cPanel account
- Navigate to the Website section
- Choose “Install WordPress”
- Click the Install button
- Choose the domain name to install it to (in the field next to it, you can enter a subfolder such as ‘blog’ or leave it blank if you want the site’s main page to be the blog)
- Click “advanced options” if you want to change the email address, username, and password for the new WordPress installation
- Read through the license and service agreements and check the boxes if you agree with everything (you have to agree in order to continue)
- Click the Install Now button
Well, there’s not much more to it. You have successfully installed WordPress and prepared the environment. It is now time to move your blog to self-hosted WordPress so you can start working like a pro.
Let’s transfer your blog from WordPress.com to WordPress.org
We can now proceed with the migration and get your blog moved to the self-hosted WordPress option that will finally put the blog into your own hands.
Export Your WordPress.com blog
The migration process can be split into two parts. Before you can import everything into the new hosting environment, you first have to export the old blog and prepare the files.
1. Log in to your WordPress.com blog
2. Open the dashboard and locate Settings -> General -> Export
Here you will have two options. Choose the first option which will let you export the entire content. If you want to export only the specific post or pages, choose the little arrow icons next to the button that will open new options.
Once ready, click on the “Export All” button that will start preparing the file. After a few seconds, you should get a confirmation message with the download link. Click on the “download” link to get the ZIP file which contains an XML file with all your posts, pages, comments, custom fields, terms, navigation menus, and custom posts.
If you want to export your media (images, videos, audio, and documents), choose the second options and repeat the process.
And that is everything you had to do in order to export your WordPress.com site. You should have ended up with the aforementioned XML file saved on your computer (don’t forget to extract it from the ZIP file) that you should have prepared for the next step – importing your site into the new environment.
Import your WordPress.com blog
Earlier, we showed you how to get a hosting and install WordPress and it’s finally time to go to the new an environment so you could set it up and complete the entire migration process.
- Go to your new domain by navigating to https://yourdomain.com/wp-admin
- Log in to your new site (you should have the username and password set up from the time you installed WordPress. Hopefully, you have remembered the credential or saved them somewhere. If not, you should have received an email with the details, so check your inbox one more time.)
- On the dashboard, locate Tools -> Import
The page will show you several importing tools that are usually used by the users. You can ignore all but the last “WordPress” option. These tools don’t usually come up pre-installed with WordPress, so you will have to click on the little “Install now” link below the options.
After a few seconds, you should see the WordPress Importer tool installed and active. Immediately after that, the little link will change into “Run Importer”. Click on it; you will be redirected to a new page.
This page will show a few details about the uploading limits. Just in case the file you have previously exported is larger than the limit mentioned here, you will have to take care of that. No, don’t sweat, that’s not such a problem if you’re hosting the site with Bluehost, so relax and let us show you how to increase the file upload limit in a few steps.
How to increase the file upload limit
Alright, let’s change that limit so you can import the blog without problems:
- Login to your Bluehost Control Panel
- Open the File Manager
- Chose to go to the Web Root and click Go
- Scroll in the right-hand panel and find file php.ini -> right-click on it
- Select Code Edit in the pop-up menu
- Click Edit at the bottom of the pop-up
- Use the keyboard shortcut to open the find pop-up window
- Windows and Linux: Ctrl + f
- Mac: Command (⌘) + f
- Type upload_max_filesize in the search field and hit enter
- This will highlight upload_max_filesize = 50M. Change 50M to the size you need. For example 256M
- Open the find pop-up, again and in the Search text field type post_max_size and press enter
- Highlighted will be post_max_size = 50M. This will need to be changed to the same number as what was put in for upload_max_filesize
Now you can proceed with the upload. Depending on your internet connection speed and the file size, it may take even up to a few minutes until the file is successfully imported by the tool. All you have to do here is have patience. If it’s slow, go grab a cup of coffee or your favorite juice, and don’t reload the page until everything is ready.
Unless you want a fresh start, we suggest importing authors. This option will transfer all the authors you have had on the WordPress.com blog. Still, if your OCD doesn’t allow you to do that, you can create new authors and assign them the old posts. There’s not really much difference so it’s completely up to you.
You probably want your attachments imported as well, so don’t forget to put a check on the “Download and import file attachments” checkbox.
After clicking the “submit” button, you should see a success message telling you everything’s done. This ends the importing part of the guide.
Export and import Blogroll links
Before we start with the import process, do you even know what Blogroll links are? If the links that are usually found on the sidebar of your website is the first thing that crossed your mind, you’re right!
Although you could have had any type of link there (your site, friend’s site or a popular blog you liked to read), the name stuck from the early beginnings when bloggers used the space to link to their friends and other influencers.
Now, if you used only a few links on your old site, you may easily skip this step as you can retype those links in a simple text widget and recreate the entire thing. But if you have more than a few links and want to import them instead of going through the copy/paste mayhem, let us show you how.
- Visit your WordPress.com blog by adding /wp-links-opml.php at the end
http://example.wordpress.com/wp-links-opml.php - Save the file by pressing CTRL+S or Command+S if you’re using a Mac computer
- Install Links Manager plugin (usually, it is not advisable to install plugins that haven’t been updated for such a long time, but this one simply didn’t need any updates and it’s completely safe to use)
- Once activated, you should see a new “Links” menu item in the WordPress admin bar
- Go to Tools -> Import
- Choose Blogroll to install the OPML importer
- Click on “Run Importer” link
- Choose the file you have saved to your computer earlier
- Select “Import OPML file” button

There shouldn’t be any problems, and you should see a success message telling you the import has been successfully completed. And that’s pretty much it; you can now have the same exact links that you have been proudly showing on your WordPress.com blog.
Redirect old users, set to private or delete the blog
When it comes to handling the old WordPress.com blog, you have three options. You can set the old blog to private so only you (and those chosen ones you selected in the options) can see it. You can delete the entire blog, or you can leave the blog online and redirect the traffic to the new one.
We would suggest the latter option if you had been running a successful blog. It will allow you to keep all of the regular visitors, instead of losing them on the “page not found” message. But if you have had it for only a couple of days or weeks, and you simply didn’t put enough effort into it, you can also make it private or completely delete it. The decision should really be as easy as that, so don’t overthink it.
How to set your, now old WordPress.com blog, to private?
- Go to your WordPress.com and log in
- Navigate to Settings -> General -> Privacy
- Select the “Private (Your site is only visible to you and users you approve.) option
- Save changes
How to delete your WordPress.com blog?
- Go to your WordPress.com site and log in
- Navigate to Settings -> General -> Site Tools
This option deletes all your posts, pages, media, and data and gives up the site address so someone else can use it.
Click on the little arrow on the right site, after which you will see the confirmation message. If you’re sure you want to delete the site and everything you’ve done with it, confirm the process by clicking on the red “delete site” button
How to redirect your old blog to the new one?
If you would like to keep the old visitors, and automatically redirect them to your new blog, that’s great. The option is definitely something you should consider, but unfortunately, it is not free.
When you have a self-hosted site, you just need to edit one file to make redirections. Or you simply install a plugin that does that for you. But the problem with WordPress.com is that you don’t have access to the necessary file. That’ not by chance – the file is restricted so you could pay for the redirection. This service will cost you $13 per year, but you won’t have to worry about your site being redirected to the new domain.
- Make sure you’re logged in to your WordPress.com site
- Visit this site redirection link
- Choose a site you want to redirect (your old wordpress.com site)
- Choose the destination site (your new domain you selected when choosing a hosting)
- Click on the “Go” button after which you will have to enter your payment details.
Usually, people aren’t sure for how long should they be redirecting the visitors to the new site. Unfortunately, there’s not a correct answer since everything depends on the site you’re running. But we would suggest to keep it redirecting for at least one year.
After that one year, regular visitors should already know about your new domain, and you should already have enough new content to keep Google and other search engines busy.
What to do after the migration?
If you are reading this part, we have to assume you have followed all the above steps. That means you have successfully moved your WordPress.com blog to WordPress.org and have started a new, more serious blogging life.
This isn’t the end, it is just the beginning, so you have to start the right way.
Check and test for errors
As soon as everything is done, you should test your site and check for errors. Nothing fancy here – just go to your blog and see if everything is in place.
Open your posts, pages, and comments to see if everything’s imported correctly. Navigate to Appearance -> Menus to see if your old menu is nowhere, and don’t forget to open your homepage to see what it looks like. If it’s all there, you’re ready to continue. Just in case if it’s not, you should repeat the export/import process in case you have missed a step that didn’t let you have everything from the old blog.
Choose a theme for your new blog
A simple theme sets the entire tone of your website. This is the right time to change the design of the old site and get something you really like. But don’t forget that your visitors have to like it to.
Choosing a theme isn’t such an easy task. There are a ton of free and premium ones you can go for. It’s easy to prolong the guide and talk about the themes, but we don’t want to derail here – we already talked about this, so take a look at our list of best WordPress theme providers for your new blog
Install the plugins you want and need
Now that you’re running a self-hosted site, you can do whatever you want with it. One of the greatest parts is installing the free and premium plugins that can improve your site in a matter of a few clicks.
WordPress plugins allow you to enhance your blog and add a feature or two.
Take care of your site
Now that you have to take care of your own site, make sure you are always doing the best you can do to have it maintained.
Don’t forget to check our tips on how to improve the speed of your website and check some great tools that will help you keep everything running smoothly.
FAQs
The old blog is entirely in your hands. You can redirect it, set it to private, or completely delete it if you no longer want it. Please get back in this guide to see how to achieve the result you want.
If you have been using WordPress.com for a long time, the chances are that you have dozens or hundreds of subscribers. If you want to keep them, that’s possible but you will have to use the Jetpack plugin.
If you have done everything from this guide, you don’t have to be without a site at all! While you’re doing the transfer, your old WordPress.com blog will be active all the time, which means the visitors will be able to open any of your posts as nothing happened. Because of that, we suggest redirecting/deleting/setting to private the old blog only once you have successfully set up the new one.
No, you don’t have to get a new domain. You can simply transfer the existing domain from your old WordPress.com blog to the new host. In that case, just make sure that while getting a host (registering for a plan) you add your old domain in the options instead of registering a new one. After that, you will have to change nameservers as well.
Conclusion
Happy blogging! We don’t want to take too much of your time – we know you are impatient to continue your blogging journey, so relax, log back into the transferred site, and don’t forget to keep the content fresh.
Yes, now that you have started on your own, it might be harder to keep everything nice, but if you get stuck somewhere, don’t forget to visit our numberless tutorials on WordPress that will teach you a lot.

Great article. Thanks for sharing!
Thanks George.