The WordPress Dashboard displays a quick overview of the blog/website when a user logs in to the admin area. The Dashboard allows you to post articles, add plugins to enhance the website’s functionality, add categories, customize themes, and much more.
Often known as WP Admin, the Dashboard is the control center of your entire blog/website. It is where you can customize settings, manage content, and change styling. If you’re a beginner, it’s essential to learn how a user can access wp-admin, how a user can effectively control and modify their site through wp-admin, and many other uses.
In this article, you’ll learn about the Dashboard screen options, the tabs that you see on the WordPress Dashboard menu, how a user can log in to the WordPress Admin area, how to change site colors, how to update your profile in the admin area, and how can you change the Dashboard themes and layout.
How to login into your WordPress website
How do you login into the WordPress admin panel? To access the WordPress admin panel, otherwise known as the Dashboard, you will need to login to your WordPress website. To access the login page, add /wp-admin or /wp-login.php to the end of your domain, for instance, abc.com/wp-admin or abc.com/wp-login.php. Once you are on the login page, enter your username and password that you had selected while initially installing WordPress on your website. Now click on the login button. After you login successfully to the WordPress admin panel, you will see a screen with different widgets, blocks, and menus. This is your Dashboard Main Screen.
Dashboard – main screen
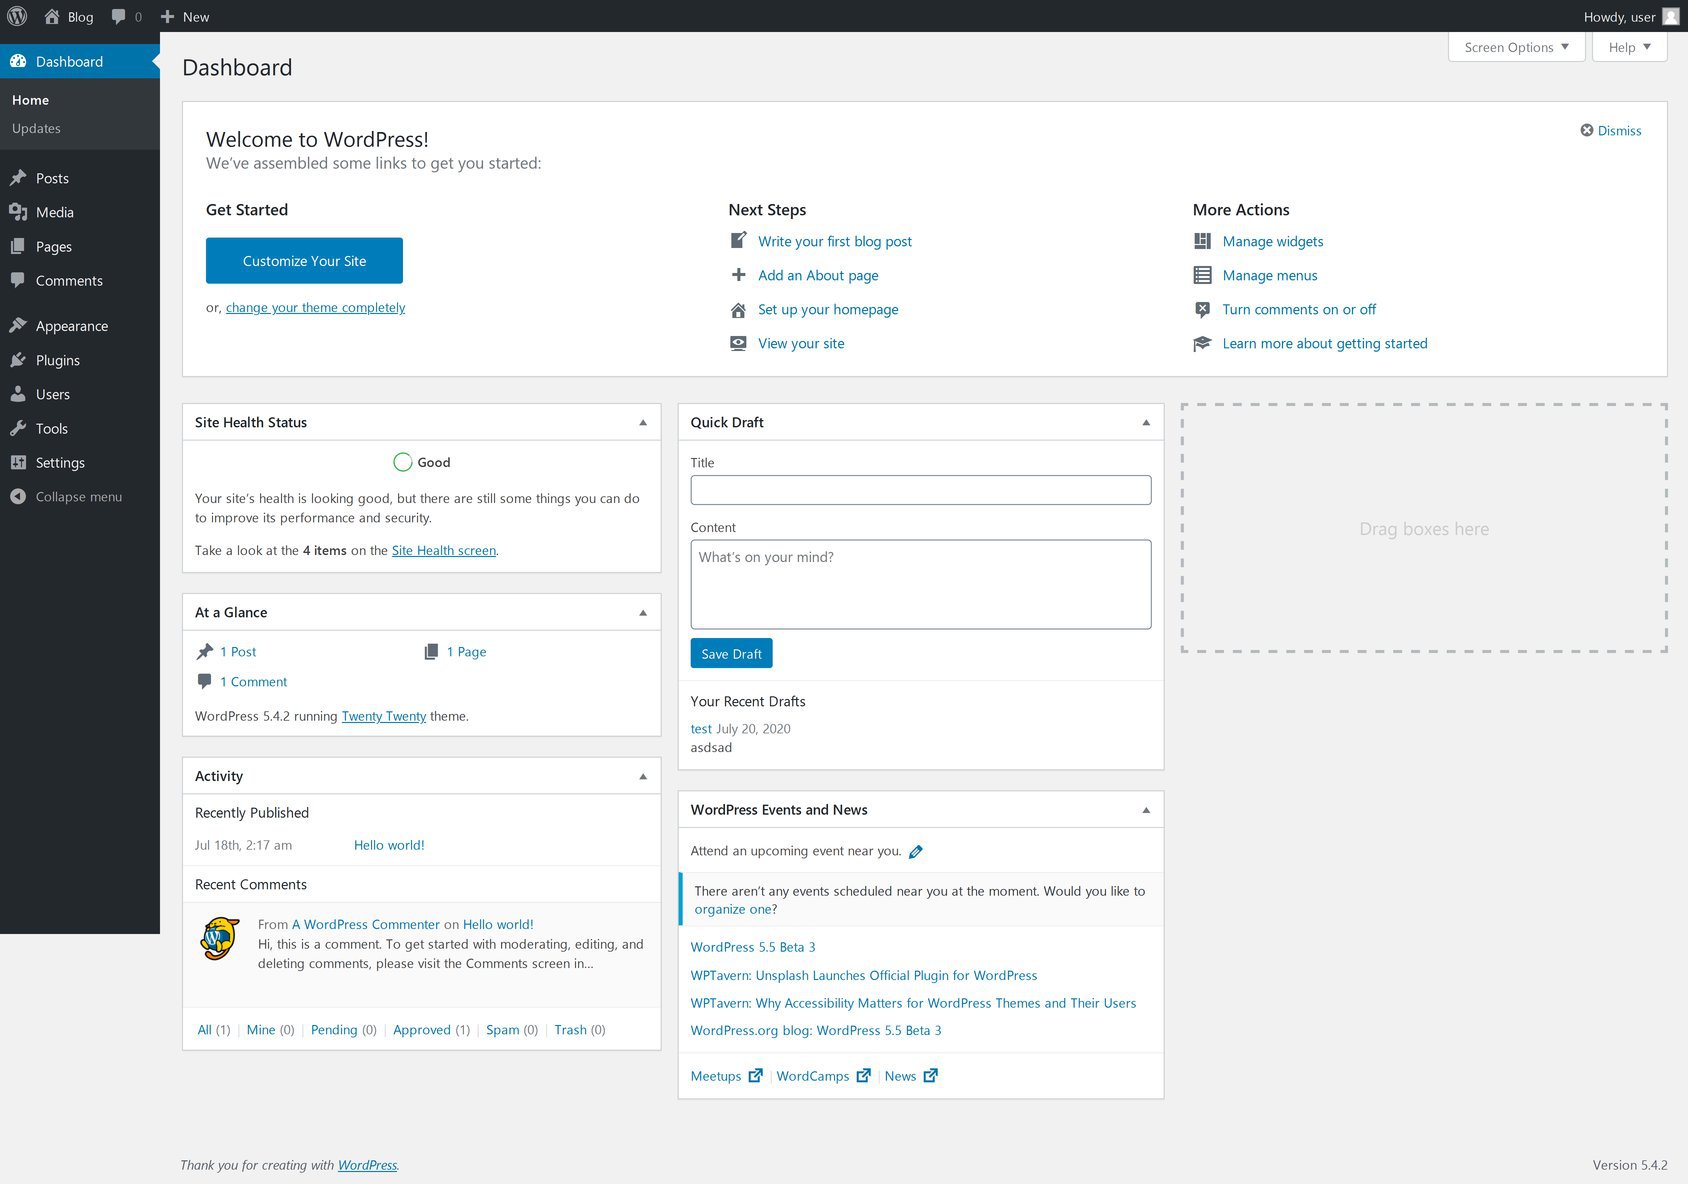
The WordPress Dashboard is the first screen that a user sees after a successful login into the admin portion of the website. It is a collection of different widgets, elements, and menus that helps manage your website content presents a variety of information and displays a quick overview of your website functions. Hover your cursor to quickly navigate between different sections of your site from within the Dashboard screen.
Now, let’s explore the different components of the Dashboard main screen.
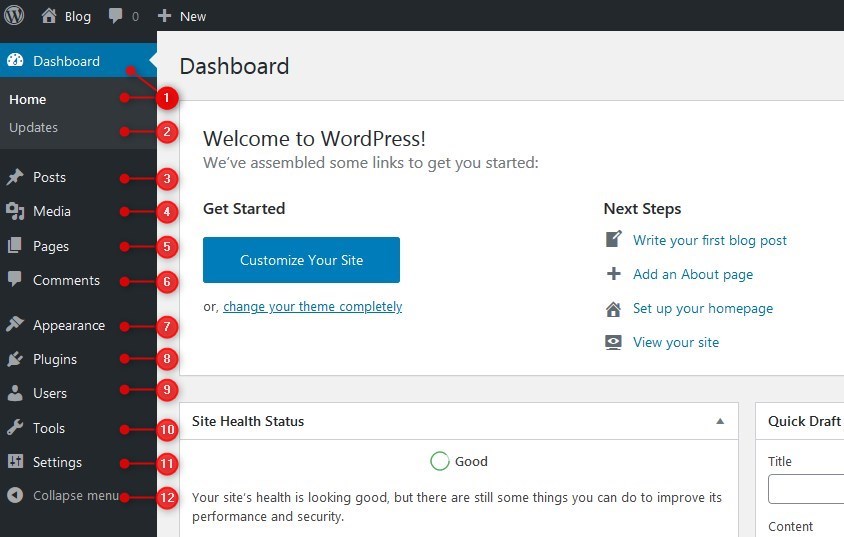
1. Dashboard menu
The WP admin Dashboard shows a navigation menu on the left side of the screen that comprises different menu options such as posts, media, pages, comments, appearance tab, plugins, users, tools, and settings. With your Dashboard menu, you can quickly navigate to different sections of your website to manage them.
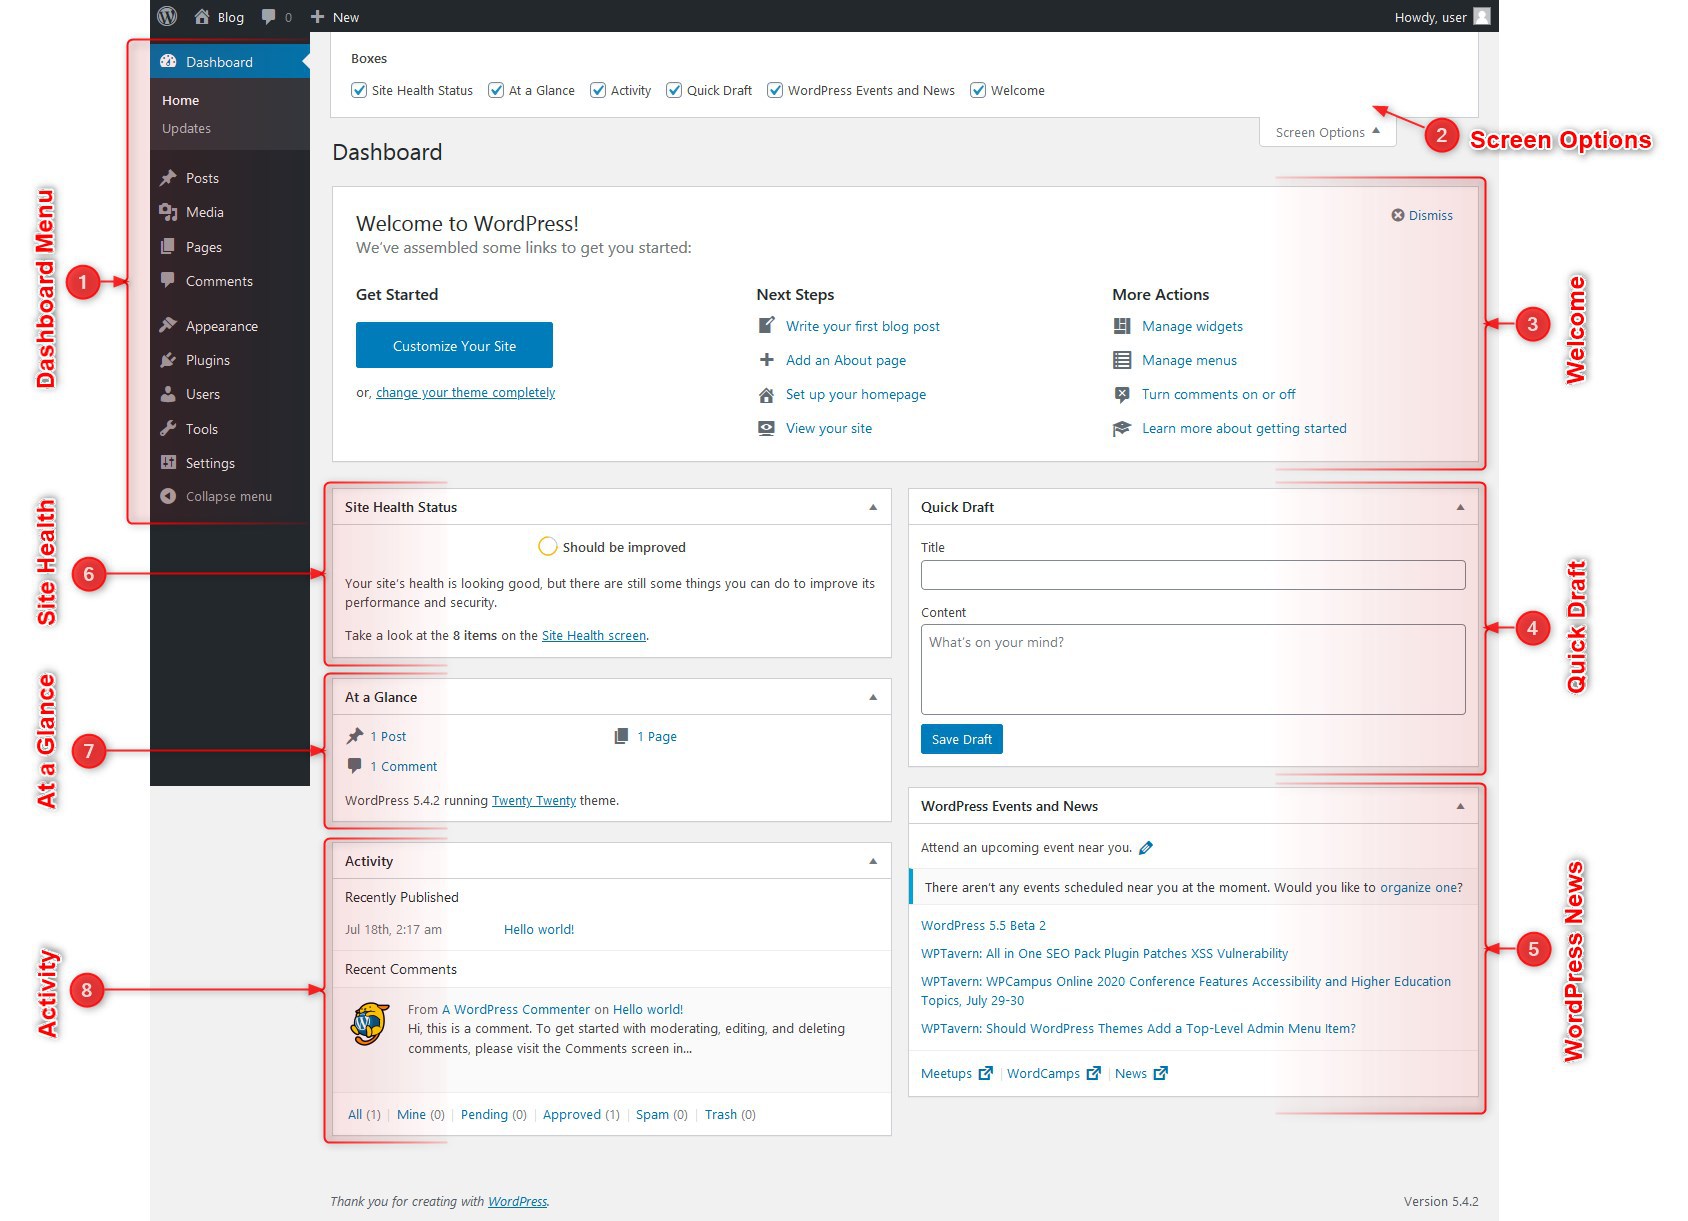
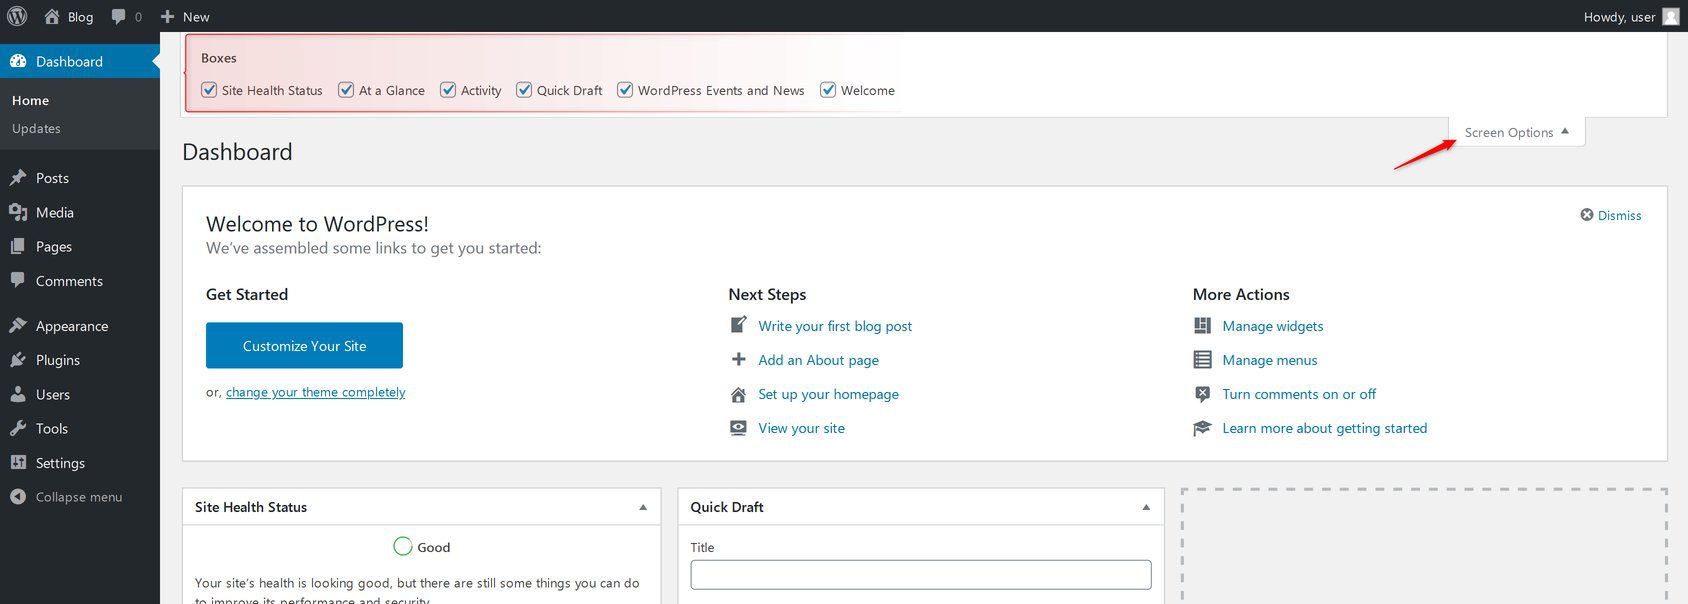
2. Screen options
By default, WordPress shows six widgets on the WordPress admin panel. They are: “Site Health Status,” “At a Glance,” “Activity,” “Quick Draft,” “WordPress Events and News,” and “Welcome.”
“Screen Options” allows you to display or hide these widgets on the admin screen with one simple click. To view a widget, just check the box in front of the widget name in the screen options area. Similarly, to hide a widget uncheck the box in front of the widget name.
3. Welcome to WordPress
The Dashboard Main Screen consists of three columns. The column on the left includes the “Customize Your Site” button, which allows you to customize your site or change your theme settings completely.
The center column provides links for writing your first blog post, creating an about page, setting up the home page, and viewing your website’s front end. The column on the right provides useful links to manage widgets and menus, settings related to comments, and links to the WordPress setup guide.
4. Site Health status
This widget helps site owners to monitor their WordPress website’s speed, performance, and security. Site Health helps users to identify issues and assists them in fixing those issues. Site Health scores your WordPress health after running a series of tests. It rates the results with three different labels (Good, Recommended and Critical). When you click on the “Site Health screen,” you’ll see two pages (Status page and Info page) that show your website’s results and statuses.
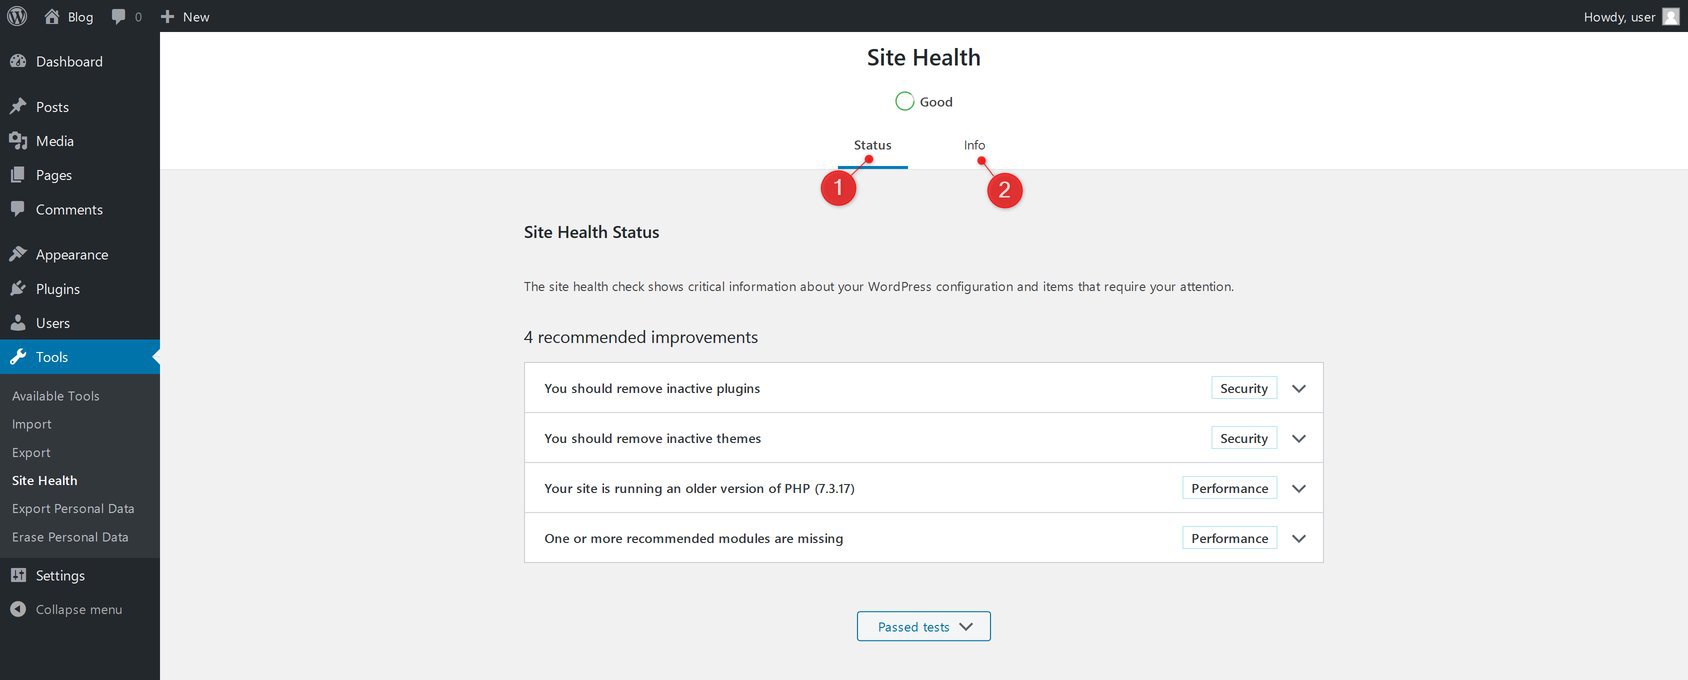
If you’ve passed tests, your site health will be labeled as “Good.” If you see “Recommended,” It means some changes are required yet not necessary. If you haven’t passed the tests, site health will be labeled as “Critical.” It means there are some significant issues that you must consider fixing immediately.
5. Quick Draft
Quick Draft is a mini post editor that allows you to quickly create a draft for your new website posts. To create a quick draft, just enter the title and content. Then click on the “Save Draft” button, and the post will be saved as a draft, which you can edit later from the “Posts” section. Recent drafts will also be shown in the “Quick Draft” widget.
6. WordPress news and events
This widget displays the latest news and events about WordPress, such as the new updates, alerts, upcoming events, and meetups shared from the official WordPress blog.
7. Activity
This block shows recently published posts and the latest comments on your blog. It also gives you the quick links to go to different comments sections so that you can approve, reply, edit, spam, or trash comments, all at the bottom of the widget.
8. At A Glance
The “At A Glance” section gives an overview of the total number of published blog posts, pages, and comments on your site. When you click on the individual links, you’ll be taken to that specific screen. “At A Glance” also shows the current version that you are running of WordPress, as well as the active theme selected for your site.
9. Toolbar
The Toolbar is displayed at the top of each Admin Screen. It has links to functions such as adding a new post, see pending comments and edit your profile. Many Toolbar items expand when you hover your mouse over them to display more options.
What options do you see on the Dashboard menu?
The WordPress Dashboard provides a navigation menu that contains menu options such as posts, media libraries, pages, comments, appearance options, plugins, users, and tools, as well as settings on the left side. This is where you’ll update and configure your site using different options.
Your Dashboard makes it very convenient to customize the settings of your website with a few clicks. It lets you manage different sections of your site and change the entire look of your website by changing the theme or adding new functionalities via plugins.
Now let’s take a look at each menu option briefly.
The WordPress Dashboard Menu options are listed below:
1. Dashboard or Home
When you click on your Dashboard, it will show the Dashboard “Homepage”, which is your WordPress admin screen, as we discussed earlier in this article.
2. Updates
The “Updates” section will notify you if there are any updates available for your WordPress, such as installed themes or plugins. It will update them from within the “Updates” section. You can also update the themes and plugins from their respective sections, but you have to do it from the “Updates” section to ensure that the WordPress version is also updated.
3. Posts
This is where a WordPress user can view all of their posts, create new blog posts, edit old posts, delete posts, and manage categories and tags.
4. Media
Media Libraries allow you to upload new images, documents, and other types of files to your WordPress website. You can view, edit, and update the media library files that have been uploaded from within the “Media” section.
5. Pages
Click on this menu option to view all of the pages created on your website, create new pages, update your existing pages, or delete pages.
6. Comments
This tab shows the latest comments on your blog posts. It allows you to approve, reply, edit, mark spam, and trash a comment. A WordPress user can manage all of their website comments from within this menu.
7. Appearance
This is the most important menu option for customizing settings, managing widgets, changing or editing a theme (Theme Editor), and changing the background image on your site.
8. Plugins
Plugins add or enhance the functionality of your WordPress website. This menu option shows installed plugins on your site. It lets you add or delete plugins, edit installed plugins, and activate or deactivate plugins.
9. Users
The “Users” menu option shows all of the existing users of your website or blog. You can also add new users, edit user settings, delete a user, and manage users’ roles based on their responsibilities.
10. Tools
This menu option allows a WordPress user to import data from different platforms like Tumblr, RSS, and LiveJournal, etc. Similarly, you can also export the data from your WordPress website. Users can also erase personal data from the WordPress site or export personal data. As well, site owners can monitor their WordPress website’s performance, security, and speed within this menu option. Site Health assists users to identify site issues and helps them fix those issues.
11. Settings
The settings tab allows users to configure their site. With this option, you can customize your site title and URL, set default user roles, set default categories, identify the page where your latest posts should appear, moderate comments, and much more.
12. Collapse menu
At the bottom of the WordPress Dashboard menu, you will see an option named “Collapse menu.” Clicking this option will hide the menu item names and will just display the menu item icons. Click again to expand the menu.
How to change the appearance of the Dashboard
Screen options
Screen options allow you to hide/show certain widgets that you see on your WordPress Dashboard screen. To hide/show specific widgets, click on the “Screen Options” button present on your Dashboard screen’s right top corner. Clicking the “Screen Options” will show a dropdown menu. This menu contains the names of the widgets that are present on the Dashboard screen, along with a checkbox in front of each widget name.
To hide a widget, just unmark the checkbox in front of the widget’s name, and the widget will disappear from the admin screen.
Similarly, if you want to show a widget, just mark the checkbox with a tick, and the widget will appear again on the admin screen.
Option to change Dashboard colors
Don’t like the default color scheme of the WordPress Dashboard and want to change it? Don’t worry! WordPress allows users to change the color scheme of their admin panel.
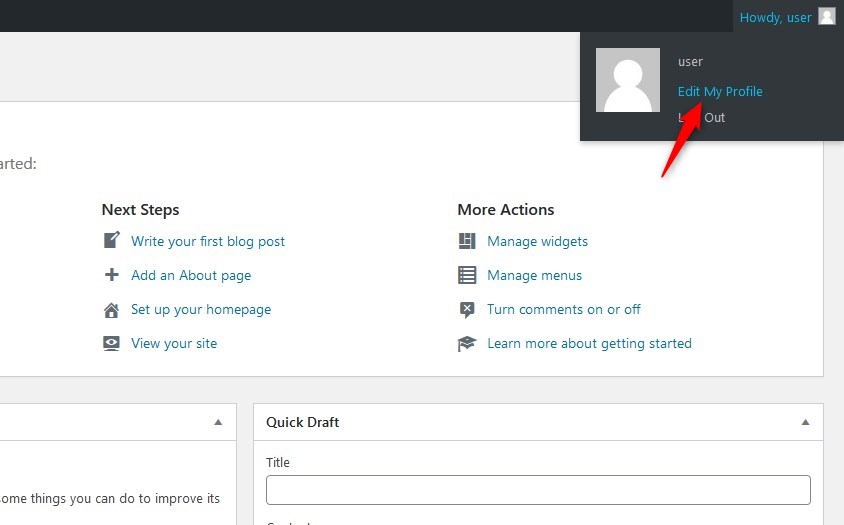
To make the change, hover your mouse over the username that you see in the top right corner of the admin screen; a dropdown menu will appear. From the dropdown menu, click on the “Edit My Profile” option.
You will be redirected to a new “Profile” page which contains the options specific to the logged-in user.
On the “Profile” page, you will see the option “Admin Color Scheme” that controls the Dashboard’s color scheme.
By default, WordPress provides eight different color schemes from which you can choose.
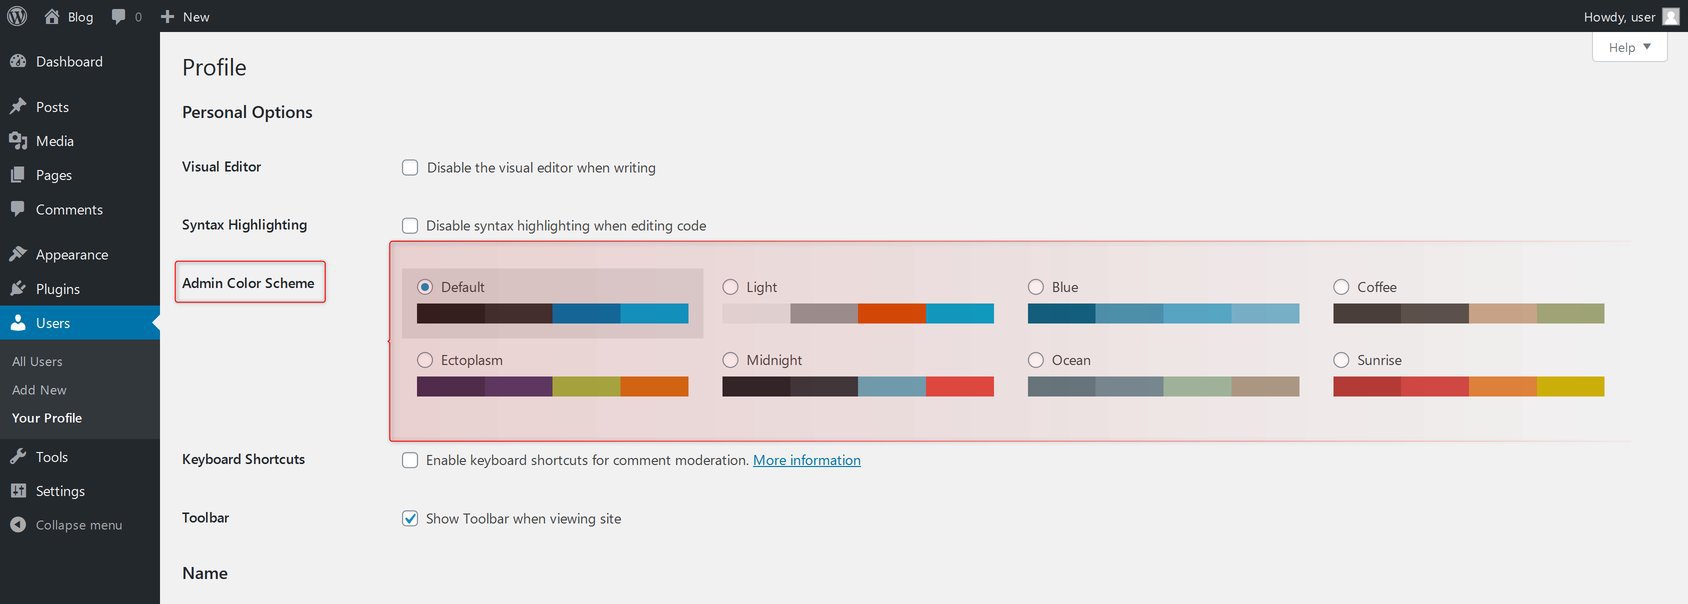
Choose your preferred color scheme from the provided selection, and the color scheme for your WordPress Dashboard will be changed.
Conclusion
In this article, we’ve discussed different Dashboard screen options, how a user logs in to their Dashboard, the Dashboard menu, helpful links in the admin panel, and how to change your Dashboard appearance.
WordPress’ Dashboard is user friendly, and once you’ve spent a little time exploring the different menus and options of the admin panel, you’ll feel much more comfortable. WordPress is the easiest to use CMS (Content Management System) and makes it simple for the user to design a site and add content.
If you are facing any difficulty in customizing Dashboard settings, feel free to ask us about it in the comment section below!
One comment on “The WordPress Dashboard: Admin Area and Panel”
Leave a Reply

[…] admin bar appears to all logged in users, both on the dashboard (your admin area) and on the site (pages that are visible to the public). Please note that the […]