A one-page website is a site with just one page which the user can scroll through. A lot of one-page websites still have a primary menu. People can click on the menu items, but instead of going to another page, they go to another section on the same page. We already showed you how to make a website, but in this article, we’re going to show you how to create a one-pager with WordPress!
The benefits
A one-page website can be a good solution if you’re looking for something fast. One-pagers have many advantages, for example, the site doesn’t have to reload to get to another section. Users can easily navigate between sections and find what they want fast. With a one-page website, you also have control over what order people see your content. You may want to show all the benefits of your product or service first and at the end show them the pricing, or maybe the other way around.
Excellent solution for small sites
The one-pager is ideal for sites that just have to give a little information about each subject. Let’s say you have six main items you want to talk about each with one or two paragraphs. If you divide this content over six different pages, it could give the impression that your site is underdone.
If you put all these items on one page with a logical order in distinctive sections, it not only provides a better user experience, but it also gives the impression of a good informative site.
Image-driven
Most one-page websites use a lot of relevant images. Dividing these pictures over different pages with just one image on each one can again give the impression your site is a little bit underdone. As you can imagine a one-page website with different images relevant to each subject which the user scrolls through gives a way better feeling.
Better mobile experience
One-page websites often have a very good mobile phone experience as the site doesn’t have to reload after every page transition. People can find what they need on any device fast, and it’s not even a problem if they disconnect whilst on your website. Since the page is already loaded, they will still be able to go to the different sections. This way your site can even feel like a mobile app instead of a normal website. As a matter of fact, there are apps in the App Store that use this method.
When not to use a one-page website
If you’re serving massive amounts of content, it could make your one-pager very long and hard to scroll through.
If you have a big site, we don’t advise you to use a one-pager just so it doesn’t have to reload every time you go to another page.
Creating a one-page website with WordPress
If you think a one-page website is for you, then read on. After this, you will be able to create your very own one-page website.
Disclosure: FirstSiteGuide is supported by our readers. When you purchase via links on our site we may earn a commission. We test and try all the products that we recommend.
Setting up WordPress
Even if you are not familiar with WordPress and setting up servers, don’t get scared. Getting your own hosting plan with preinstalled WordPress will take just a few minutes of your time. But even before that, you can set up a local server with XAMPP and try creating your one-page site without spending a penny.
Yes, creating a local server has its benefits, but if this is your first time hearing about XAMPP, prepare yourself for a bit longer process of getting it ready for WordPress. Still, if you follow the steps we prepared for you, you shouldn’t have any problems, and you can start working on your private WordPress installation in under fifteen minutes.
How to set up XAMPP for Windows and install WordPress
Before getting your hands dirty, you should know what XAMMP is in the first place. XAMPP stands for Cross-Platform (X), Apache (A), MariaDB (M), PHP (P), and Perl (P). It is a free distribution of software that helps you run your own private servers. It contains server application, database, and scripting language that you need to install WordPress successfully. Usually, servers run by XAMPP are used for testing purposes, so that you can freely practice your web design skills without having to pay for hosting or letting everyone see your website playground.
How to install XAMPP for Windows
Now, let’s stop with the theory, and let me show you how to set up the entire thing. Although the Cross-Platform part of the name means that the software works on Linux and Mac computers as well, today we are going to focus on Windows:
- Go to Apache Friends website
- Download the latest version by clicking the button and save it to your computer
- Run the installer when downloaded
- On the welcoming screen, click Next
On the next screen, the setup will ask you to select the components you want to install. You can leave everything as is and install all components. But if you just want a basic WordPress installation, it will be enough to leave MySQL and phpMyAdmin options selected. Just in case you develop the need for any other component in the future, you will be able to add ones afterward through the Control Panel. For the purposes of this tutorial, you can uncheck all other options as you won’t need them for creating the one-page website.
- Choose a folder where you want to install XAMPP. It can be any folder you want, and you can leave the default one as well. Just remember its location
- On the next screen, uncheck “Learn more about Bitnami for XAMPP” option because you will install WordPress manually
- Click Next
Now give the installer a few moments to transfer all the files and set up the environment that you will use for your WordPress site. After a few seconds, the installer will unpack everything and finish the installation.
- Leave the “Do you want to start Control Panel” option checked
- Click Next
Hopefully, everything went without problems. If so, you should see the Control Panel opened without any red text showing errors. You should also see that Apache and MySQL are marked in green which means they are up and running. To check if your server is running fine, go to your browser and visit this URL: http://localhost.
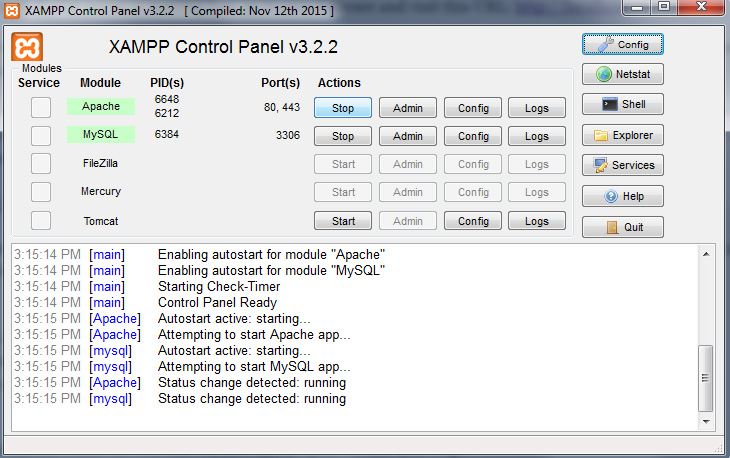
If everything is ok, you should see a simple web page welcoming you to XAMPP for Windows. If the page has loaded, you can stop holding your breath because that means that XAMPP is set up correctly and that you can move on to the installation of WordPress.
Unfortunately, other applications that you might have running on your personal computer may interfere with XAMPP. For example, Skype is known for having problems with XAMPP so if you’re experiencing issues, try shutting it down and then try to open the XAMPP Control Panel. Sometimes, it will be necessary to open up a few ports for XAMPP to work correctly, but unfortunately, that’s a whole other domain and we can’t cover everything in this tutorial.
How to install WordPress using XAMPP
Alright. We will have to assume that you have the environment ready. Now it’s time to install WordPress on your local machine so that you can log in and start building your one-pager. For starters, you need to create a database that WordPress uses to store all the information:
- Open XAMPP Control Panel
- Click the Admin button in the MySQL section. This will open a new window with phpMyAdmin
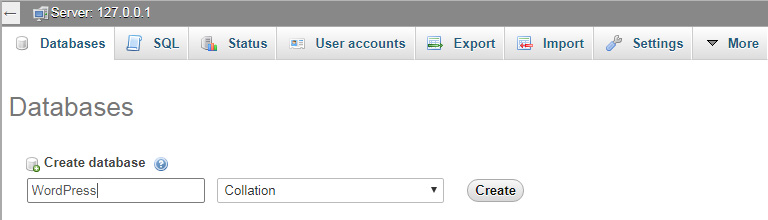
- Choose Databases tab on the top-left menu
- Enter the name for your database, for example, WordPress
- Click Create button
This part wasn’t that demanding, right? You can now close the browser window and prepare for the next step.
- Download the latest version of WordPress
- Go to the XAMPP folder (the folder where you installed XAMPP from the previous steps)
- Open the folder and navigate to htdocs folder
- Unzip WordPress archive there
You should end up having a new WordPress folder in the htdocs folder. You can rename this folder to anything you want. This will also be the part of the address of your local installation. For the purposes of this tutorial, let’s call it WordPress which will open your site from http://localhost/wordpress. It doesn’t really matter what name you use, so feel free to change it to your liking.
- Open that folder and find wp-config-sample.php file
- Rename it to wp-config.php
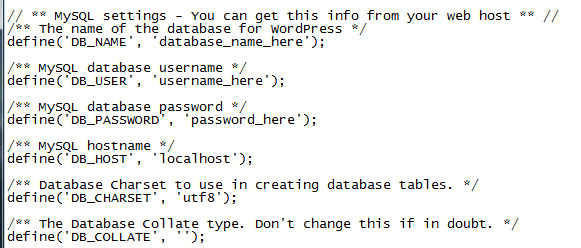
- Open the file and find the part with the information about MySQL settings (take a look at the screenshot)
- Replace”database_name_here” with the name of your database, which in my case is “WordPress”
- Replace “username_here” with “root” and leave “password_here” empty
- Save the file and close it
Finally, you are ready to conclude the installation process. Please open your browser and navigate to http://localhost/wordpress (or change the name if you have used another one for the WordPress folder when you extracted it). WordPress will now ask you for the language which you need to select. After that, click the Continue button. Then enter the username and password details, and click Install WordPress.
This is it! You can now finally log into your test site and start working on your first one-page website. The first step will be choosing a theme.
Picking a theme
You can use any theme for a one-page website. For this example, We’ll be using the free SiteOrigin North theme that can be found in the WordPress theme repository. Go to Appearance -> Themes -> Add New in your WordPress dashboard and type in “SiteOrigin North”. It should be at the top of the list now.
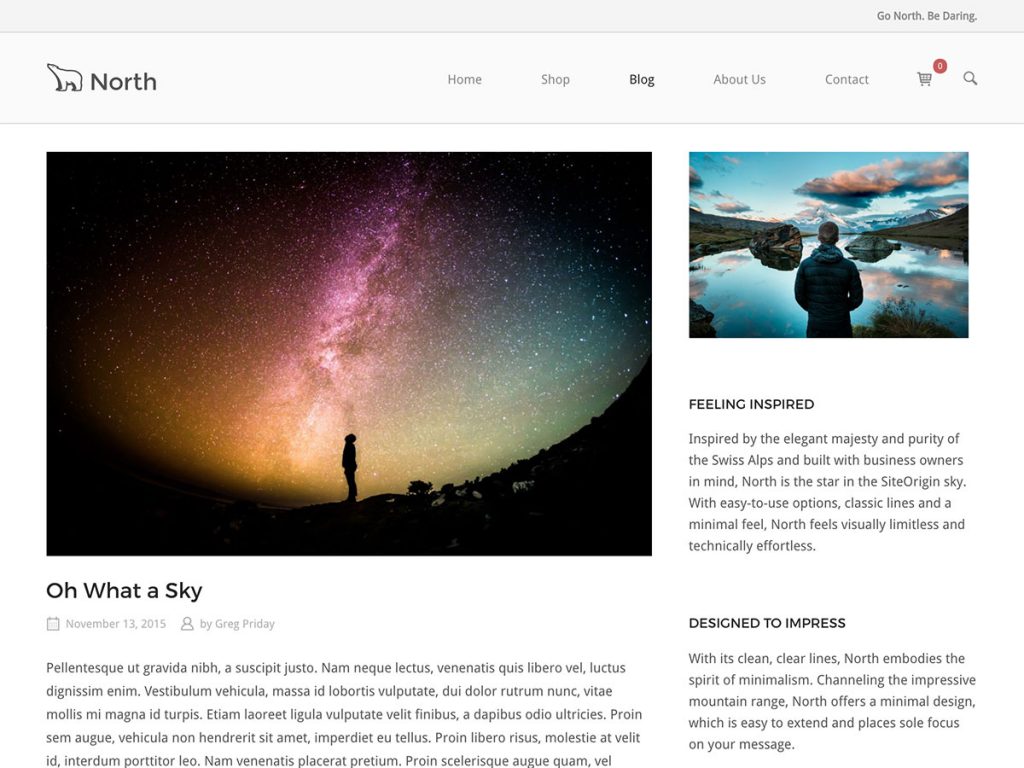
It’s a simple, but well designed, responsive theme that also works very well with BigCommerce and WooCommerce. It’s made by the developers of the page builder plugin we’re going to use for the site in this example. Again, feel free to use another theme; the transition effects when you click a menu item will work either way. We advise you to use a theme that has a sticky menu, so your site’s visitors won’t have to scroll to the top of the page again to click on a menu item that brings them to a different section.
The plugins
Most important for creating one-page websites are the plugins you use. We’re going to install a page builder named SiteOrigin and a widget extension for this plugin. Both are completely free and hosted in the WordPress plugin repository. Go to Plugins -> Add New in your WordPress site’s dashboard and type in page builder by site origin. The plugin will appear at the top of the list, install and activate it. You can install the widgets bundle plugin on the same screen, type in siteorigin widgets bundle in the plugin finder. Make sure both plugins are activated.
Since version 2.3 of this page builder, they added the one-page website scroll feature. This is what we need to get the website scrolling whenever someone clicks on a menu item with the ID of a row as “href” attribute (link). We’ll explain how this works later in the tutorial.

Start building!
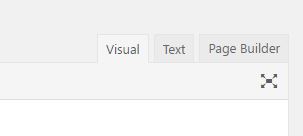
Now you have the plugins activated, and we’re ready to build our page. First, add a new page or edit a page. Go to the tabs at the top of the page editor and click on the newly added “Page Builder” tab.
SiteOrigin Page builder has many presets, so we won’t need to build an entire design from scratch. You’ll see some buttons above the page editor, one of them is the “Layouts” button, click it.

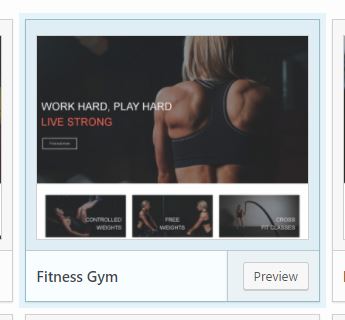
You’ll now see a screen with all kinds of layouts; these are the presets you can use. You can also import and export layouts, but we don’t assume you have these yet. For this example we’ll pick the “Fitness Gym” design, of course, you can pick any design you want or start from scratch. Click on the chosen design and click the Insert button in the bottom right corner. If you already had content on the page, you can choose to insert it before or after the content or replace it altogether. For us, it doesn’t matter since we have an empty page.
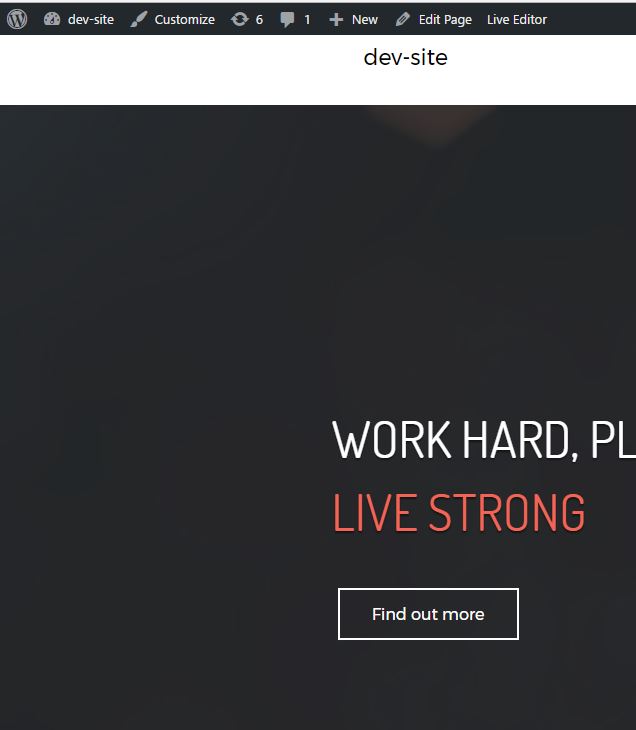
Go ahead, save the page and visit it. If everything went right, we could add our IDs. Switch to the “Live editor” mode by clicking on the link in the WordPress admin bar at the top of the page you just created.
When you hover over the elements on your site, you can see exactly which widget represents which element. Go to the first row after the SiteOrigin hero at the top, click on the tool icon, and edit row. On this screen, go to “Attributes” and add your row ID. We’re going to give ours an ID of “activities”.
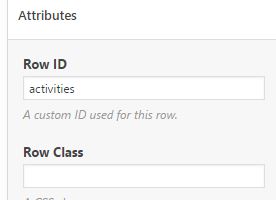
Give every row a different, unique ID. When you’re done, save the page.
Configuring your menu
We’re not done yet. We now have to create our menu items, so when a user clicks on one of the items, the page navigates to that specific section of your site. Go ahead and create a new menu in Appearance -> Menus in your WordPress dashboard. We’re only going to create custom links in this menu. In the image below I’m creating one for the row I just added the “activities” ID to.
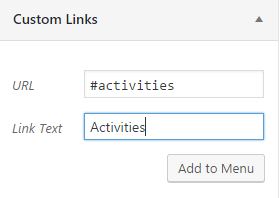
You see that the URL of the custom link is now the same as the ID of the row element. SiteOrigin page builder is programmed to recognize this and will know that it has to scroll to the specified section.
It’s very important that you don’t forget to put the hash in the URL of the menu item, this is the format of an HTML ID attribute. However, do not add in the hash in the Attributes -> Row ID section in the customizer, SiteOrigin page builder, already knows this is an ID.
My result
Congratulations! We’re done already, you can now build your very own personalized one-page website easy and fast with just two plugins and any theme. It will keep your site fast and very user-friendly. Building this site took us less than an hour, it’s the easiest and fastest way we found to build a beautiful one-page website. The best thing is that it’s free.
The truth is that setting up your own testing environment with XAMPP may take time and burn a few brain cells if you’re doing it for the first time, but you will quickly learn to appreciate the local server that can run WordPress. Then, just by having two plugins and a theme of your choice, even complete beginners will be able to create their own one-page website.
If you have followed all the steps from this tutorial, you should not have any problems, and your one-pager should be up and running nicely. Once you successfully create the page, you can start upgrading it and customizing it to your liking. Don’t forget to check our other WordPress articles and tutorials that will help you shape your site in any way possible.
4 comments on “How to Create a One-Page Website with WordPress”
Leave a Reply

It is a very simple and useful tutorial for beginners. Thank you!!!!
Thanks a lot Dorottya. Let us know if you have any questions or need some help.
Hello Anya, A short question: If I want to change the customer’s logo, where and how should I upload the new ones to see in the icon list? Thanks in advance for the answer.
[…] How To Create A Beautiful One-Page Website With WordPress […]