Website design used to be the exclusive domain of professional IT experts. This is no longer the case. Technology has improved year after year and has gradually opened up access to the World Wide Web to casual internet users.
Still, even with modern web design digital tools, you have to know a few things before you can craft a custom website for yourself or your business. At the very least, you have to know how to follow the nine simple steps we are about to share in this tutorial.
How to Design a Website in 9 Simple Steps
- Step #1: Define the website purpose and your goals
- Step #2: Come up with the structure and plan for your site
- Step #3: Choose the platform to build your site
- Step #4: Select a theme or template for your website
- Step #5: Design your logo and establish your brand style
- Step #6: Optimize for mobile and check on all devices
- Step #7: Site content and graphic elements
- Step #8: Prepare and optimize for SEO
- Step #9: Launch your website
Even if you are a complete beginner, don’t worry. These nine steps aren’t difficult to follow, and even if you decide to explore each step more closely (which I encourage you to do), you should be able to complete the creation of your first simple website in a matter of hours.
Step #1: Define the website purpose and your goals
All websites are not created the same. While technically they all work similarly and run on the same technology, it is very important that you understand what you are about to build. A website can serve many purposes.
Here are a few options:
- One-page website or resume;
- Simple brochure or portfolio site;
- Small business website;
- A website with a blogging section; or
- eCommerce or online store site.
Creating a simple brochure website can be quite different from starting a blog with dozens of categories. And those options can be completely different from building even the most uncomplicated eCommerce website where you will sell digital or physical goods.
Because of these differences, it is vital to establish your goals and have a vision for your site.
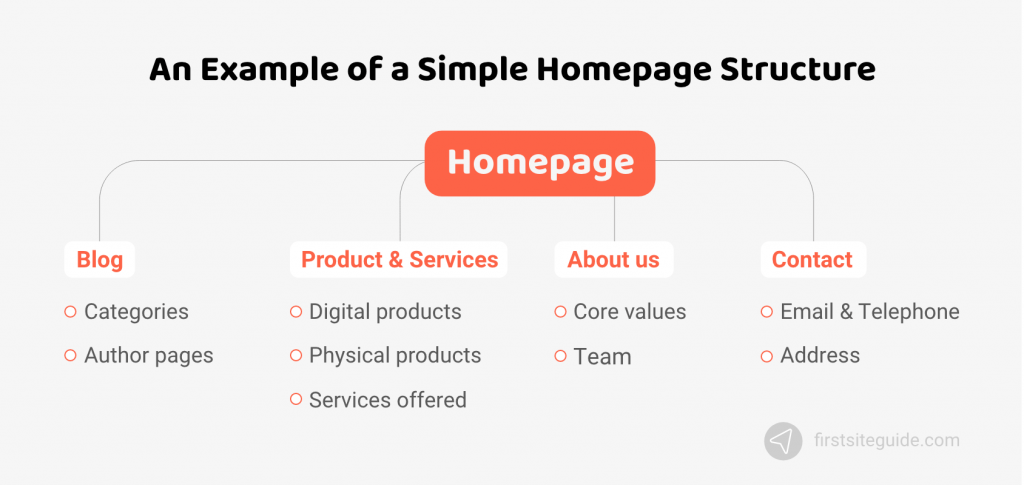
Step #2: Come up with the structure and plan for your site
Once you’ve established your goal and understand what kind of a website you want, it is time to work it through. If it is a simple site or blog, you do not even have to put it on paper. Simply envision it, and make a structure in your head.
Here are few questions that you might want to ask yourself that will help you to move in the right direction:
- Do you want your site to be a one-pager with only a few sections or a regular website with separate pages?
- Do you want to have a blog on your site as just another section, or do you want only a blog with a couple of categories?
- Do you plan on selling anything through your website?
- Do you have a budget, and how much are you willing to spend on your new site?
However, if you’re about to build something more complicated, I strongly suggest putting everything down on paper (or a digital draft). Write down what you expect your site to have, and even draw the layout you are imagining or saw on another existing site.
Ideas can pop up any time, so it’s worth it to consider a quality note taking app to help you save your ideas down the road. These questions and notes will help you to understand your needs and wishes and prepare you for choosing the platform to power up your website.
Step #3: Choose the platform to build your site
Now that you have a vision of your site and a simple plan established, it is time to decide on the platform to help you build and maintain your website.
Since you’re a beginner, I would recommend going for one of the popular content management systems. Creating a custom website can be fun and get you impressive results, but it takes years until you can actually be a well-versed web designer. On the other hand, more than ten popular website builders can do pretty much everything a beginner would need.
If you choose to create a self-hosted website, you can’t go wrong. However, be prepared for a steeper learning curve and more options that will require extra time to figure out.
There are also more straightforward solutions like Wix, Weebly, Squarespace, and others that we have already reviewed and compared on Firstsiteguide.com. So take your time, put your structure and plan into perspective, and let it lead you to the right platform for your new website.
If you do not have the time for a detailed examination, let me help you:
- Want to start a simple small business website – try Wix or Squarespace.
- Need more customizable options and to include a blog – go with WordPress website.
- Are you selling a couple of products and need online store – check out Shopify.
Step #4: Select a theme or template for your website
Finally, it’s time for the fun and creative parts. After you have settled on one of the platforms, it is time to choose a theme or template that will define your new website’s layout and look.
Most of the popular website builders come with similar options – there will be free or premium (paid) templates to select, and those will instantly mold your website into existence. Most of them will even let you import demo content, which enables you to start a site with existing content instead of starting from scratch.
What’s particularly interesting here is that most of the popular platforms come with drag and drop editors. This means that you can simply select an element, grab it with your cursor and place it on a location on the layout. One of the best drag and drop editors is Wix’s editor, which allows you to create anything you want. There are also some worthwhile third-party editors for WordPress such as Divi.
Free options are usually functional, but if you’re looking to select a more polished-looking design with easier modifications, a premium theme is worth considering. Not only will premium themes and templates look better, but they will come with some extra features that allow you to create an even better website.
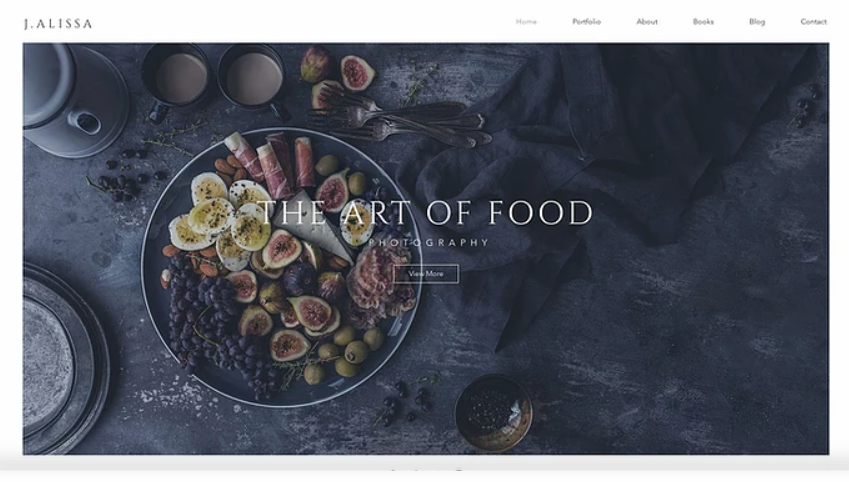
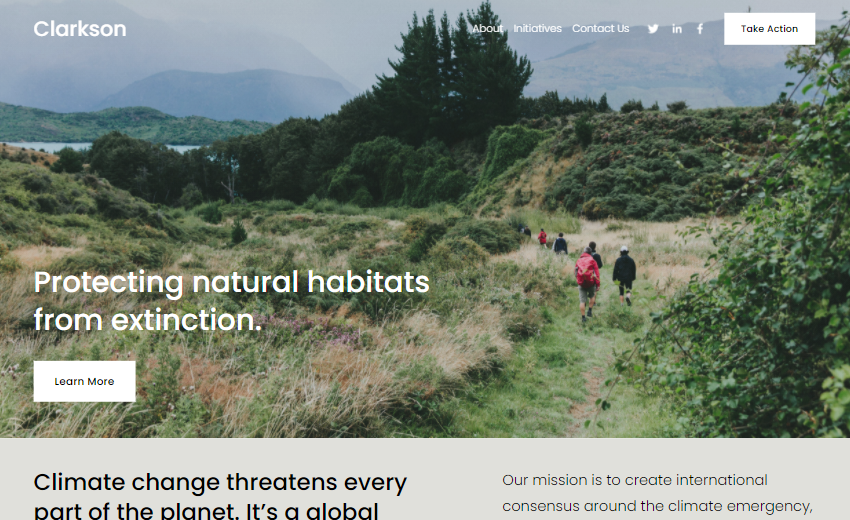
Examples of beautiful template selections using different website builders:
1. Wix template – J.Alissa
2. Squarespace template – Clarkson
3. WordPress theme – Divi
Step #5: Design your logo and establish your brand style
Creating your logo can be a fun and entertaining experience. There’s no need to hire a professional designer. Simply choose one of the free logo makers online, answer a few questions, choose your preferred colors and keywords, and a tool will generate some ideas. You can then easily modify any of your ideas until you create a perfect logo for your website and brand.
To help you get started, here are a few of the most popular services that will allow you to create your first free logo:
Now, let’s focus on some of the finer details of your website. Explore your theme/template options and start modifying them to your taste. Choose fonts you like, set colors you want, and place your newly created logo right up there in the header. This is the time and place to be creative, so don’t rush it. Explore the new platform and your theme/template, and don’t be afraid to change a setting or two to see the results.
Here are some interesting services that can help you to choose colors and fonts:
Step #6: Optimize for mobile and check on all devices
Having a website that doesn’t work on smartphones is not an option in 2024. People are more connected to their phones than ever, and online visitors will mostly load your site from their mobile devices.
Your mobile settings will vary depending on the platform that you have chosen, but the good news is that all of them will have some considerations for mobile viewers. However, don’t take the default mobile optimization for granted. Make sure to check your website on several different mobile devices, as every smartphone and tablet is different and can display your website differently. Play around with various plugins and add-ons until you get the perfect mobile results.
We have already written about how to make your website mobile-friendly, so make sure to read more about it.
If you already have a website and want Google to check to see if it’s mobile-friendly, simply open this website and enter the URL of your website. Google will quickly check it, and let you know the details. This free tool will even show you what your site looks like on mobile, and suggest changes if necessary.
Here are a few other similar tools that will help you to test the mobile version of your website:
- Bing Mobile Friendliness test
- Mobi Ready mobile-friendly checker
- RankWatch
- Browserstack Responsive
- W3C Mobile Checker
Step #7: Site content and graphic elements
By now, your site layout should be ready. Your logo will be complete, your colors chosen, and your fonts selected by using a dummy text or the demo site content. Now, it’s finally time to create your content.
Every website needs a copy, so take your time and write the information you want to present to your users. This is the first thing people will read on your site, so make sure that it’s well-written and that there are no grammar or spelling mistakes. You can use free tools like Grammarly or ProWritingAid to help you out.
If you plan on writing a blog, you can start with your first post. Try out different options available on the platform of your choice and play around. This is your first post, so no one expects it to be perfect. However, do take care of your writing style, grammar, and spelling.
Photos, images, and videos are an essential part of every site. If you have something custom, that’s great! But if not, be careful about what graphic elements you post online. Most of the imagery available through Google is under copyright, which means that you cannot put it on your site without permission. Still, there are plenty of websites like Unsplash that offer royalty-free images you can freely use for your website.
Besides Unsplash, which is definitely the most popular one, here are some other sites offering free stock photos that you can use:
Step #8: Prepare and optimize for SEO
Do you know what an average person does when looking things up online? Yes, you’re right – they Google it. So, to make sure that your website is reachable to a broader audience, you will have to make it Google-friendly.
This process is known as SEO (search engine optimization), and the idea is to make sure that your content follows Google’s and other search engines’ guidelines. Truth be told, this process can be quite challenging and lengthy if you are competing with professionals. Luckily, you can start doing SEO even as a beginner. Just follow our guidelines, and you will be one step closer to a better position on Google.
Here are a couple of well-known SEO services that could help you to kickstart your new website:
Step #9: Launch your website
This is it. So far, you have been creating a website under the shadow of your platform. The changes have been saved, but your site still isn’t available to the public. Before hitting the Publish button, make sure to test it thoroughly.
Open your site in different browsers and view it from other devices. Send a link to a friend, and ask them to take a look. Fix any reported mistakes, and publish your site.
Congratulations!
Website design trends in 2024
Similar to fashion, trends in website design change year after year. If one specific color was popular last year, that does not mean that it will remain popular. Here is a quick summary of website design trends in 2024:
- Multimedia experience – internet speeds have gone up, so it’s ok to load your site with quality images and videos.
- Retro fonts – if you can find a font that reminds you of the 50s, that’s the one.
- Emoji – they’re popular on social media, so you should use them on your website as well.
- Light colors – the hit color combination is yellow and grey.
- Creative product photos – it is not enough to just upload an image. It would help if you found a creative way to show your product.
- Parallax effect – Parallax animations continue to be trendy and are expected on your site.
- Neomorphism – this means a “minimal way to design with a soft, extruded plastic look”. (Source: Uxdesign)
- Scroll animations – do something with your site when people scroll. Everyone loves it.
- New questionnaires – it is not enough to ask people something. It has to look good and be amusing.
FAQs
If all you want is a simple website or blog, it is possible to create your first site completely free of charge. There are several popular free website builders available that can help you with that. On the other hand, if you need something more complex, or want to make sure that your website is fully controlled by you, you will have to opt for premium options. In that case, a website can cost you anything from a few bucks to a few hundred dollars per month.
Unless you’re building a complex business website that needs professional care, you can rely on yourself and build your own website. There are more than a dozen great website builders online that will let you be a master of your own website. You just need to have enough time and the will to learn and play around with the settings.
When it comes to building your first website, I recommend using a free website builder like Wix, Weebly, WordPress.com, or Squarespace. If you have any experience and want more from your website, you should start with self-hosted WordPress to give you more options and freedom when it comes to building and maintaining your site.
WordPress is the most popular content management system in the world. It powers up more than a third of all of the world’s websites. If you have time to learn and maintain your own website or need something more complex, I strongly suggest WordPress, which will allow you to create better website projects than the free website builders. On the other hand, if you do not have time for the technicalities or need simple websites, website builders might be more comfortable for you, and therefore a better solution.
Conclusion
The modern hectic online world has its drawbacks. But when it comes to web design, there have only been positive developments. Beginners can now design their own custom websites in a matter of hours, and they can choose from dozens of free and premium website builders.
If you follow and explore this tutorial more closely, it will help you to design your website at the same time, without spending a fortune.
