What is Gravatar? How to Create and Use it?
When starting a blog, simple icons that represent individuals probably won’t be on top of your list to check out. But after just days of blogging and starting to connect with people, it’s hard not to notice that most of the bloggers and commenters have their pictures associated with the name. Those little images that represent a person are called avatars, and they have a long history in the online communities.
Even before WordPress (and blogging in general) has become so popular, avatars were present on forums, different discussion groups, and gamers were often using avatars as their digital personas. With Gravatar, things changed for the blogging community.
What is Gravatar?
Instead of having a different avatar for each website where you write and participate in discussions, Gravatar allows you to set up a globally recognized avatar. The popular service was created by Tom Preston-Werner, but in 2007, Automattic acquired it and started using it for WordPress-related projects. Now millions of users utilize it on an everyday basis.
How Gavatar works
Gravatar is tightly connected to your email address. Once you register a free account with Gravatar, the service will let you upload a picture that you want to use as your avatar. Whether it’s your actual photograph or an icon you just happen to like, this image will represent you on all sites that use the service. You may leave comments on other WordPress sites with your new avatar, write guest blogs, and have the picture shown on your own blog, of course.
You get to upload an image up to 2048 pixels wide. No matter the size of the image, Gravatar will always make it squared and usually display in 80×80 pixels size. Although this is the default dimension, we suggest using somewhat larger images. Some websites and services might go around the default options and scale up the default output. You don’t want your avatar to be blurry.
Now, every time that you log into a WordPress website with the email address attached to Gravatar, it will automatically pull the info from your profile and identify you to the readers. That’s cool, isn’t it?
Why should you use the service?
For starters, Gravatar will help people recognize you more easily. Instead of showing a name with a mystery person icon (that gray one that just displays a silhouette), you can let people know what you look like.
People will be more likely to remember you. This is especially important if you tend to write on various blogs and comment a lot.
Additionally, Gravatar allows you to fill in the details about yourself. Just by clicking that little image next to the authors’ or commenters’ names, you can find out more about the individual, see their website and social profiles. Not only this make the author more influential, but it allows you to connect with others outside the blog you’ve found them on.
How to set up your Gravatar profile
Now that you know more about the service, we are sure that you are interested in having your own profile. Let’s go step by step and create a new account.
Already have a WordPress.com account?
For starters, you should know that Gravatar requires you to have WordPress.com account. This may sound confusing to individuals who run their blogs on the self-hosted version. But don’t worry. You can quickly register a free WordPress.com account even without creating a site with them.

If you already have a WordPress.com account, you can skip the registration process and immediately log in.
- Go to Gravatar website
- On top of the page, find a bar that holds WordPress.com sign-in button
- Click on the button
- Fill in your username and password
- Click on the “Log in” button
Now you will be able to set up your Gravatar image and edit the profile.
Register a free WordPress.com account
By registering a free account with WordPress.com, you get to use VaultPress, Akismet, Polldaddy, Gravatar, and IntenseDebate. Known as WordPress.com Connect, it lets you use one account for all those services.

- Go to Gravatar website
- Click on the “Create your own Gravatar” blue button
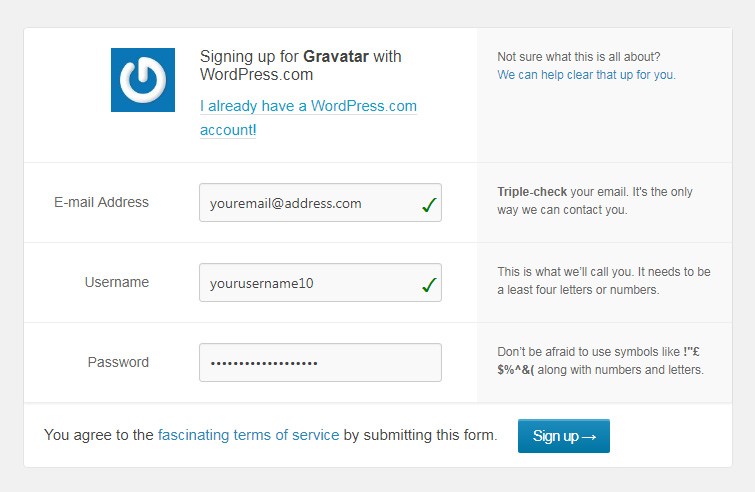
- Fill in the desired email address, username, and password
- Click on the “Sign up” button
After that, you should receive a confirmation email to the address that you filled in. So, navigate to your inbox, open the new email, and confirm the registration by clicking the link. After that, you should see a new screen that will require you to log into your new WordPress.com account.
Set up your Gravatar image
If this is your first time with Gravatar, you obviously don’t have a picture yet. The service will nicely warn you about that and offer a link to upload your new Gravatar image.
- Click on the “Add One By Clicking Here” link
- Select a photo from your computer and upload it
- Crop if needed
- Select a rating – we suggest using G or PG because other two are usually blocked on most of the sites
After setting up your image, you can quickly test it out by leaving a comment below this article. If everything’s ok, you should see your new image associated with your name.
Editing your Gravatar profile
Just like with the most services, you can easily edit the information about your profile. With Gravatar, you will be able to change and modify your image as well as the profile information.
My Gravatars
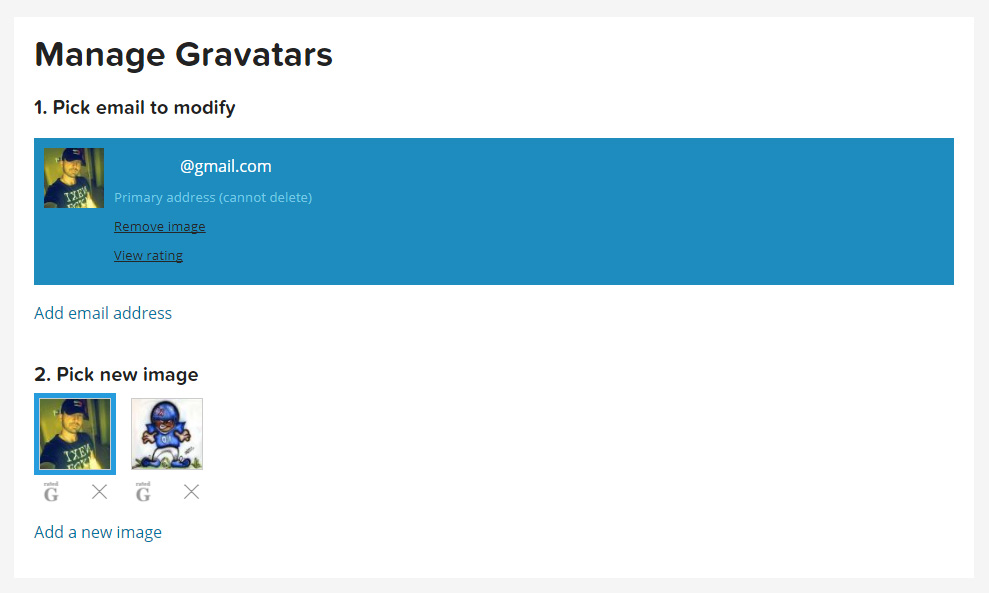
After logging in, you will be immediately taken to “My Gravatars” tab. There you will be able to add additional emails which you can control from the same account. Also, once you add the first image, it will be very easy to change your Gravatar or add new images so that you can switch between them more quickly.

To add a new image, click the “Add a new image” link and repeat the steps from earlier. Once you have more than one image attached to your Gravatar, you will be able to quickly select the one you want and change it anytime you desire a new avatar.
My Profile
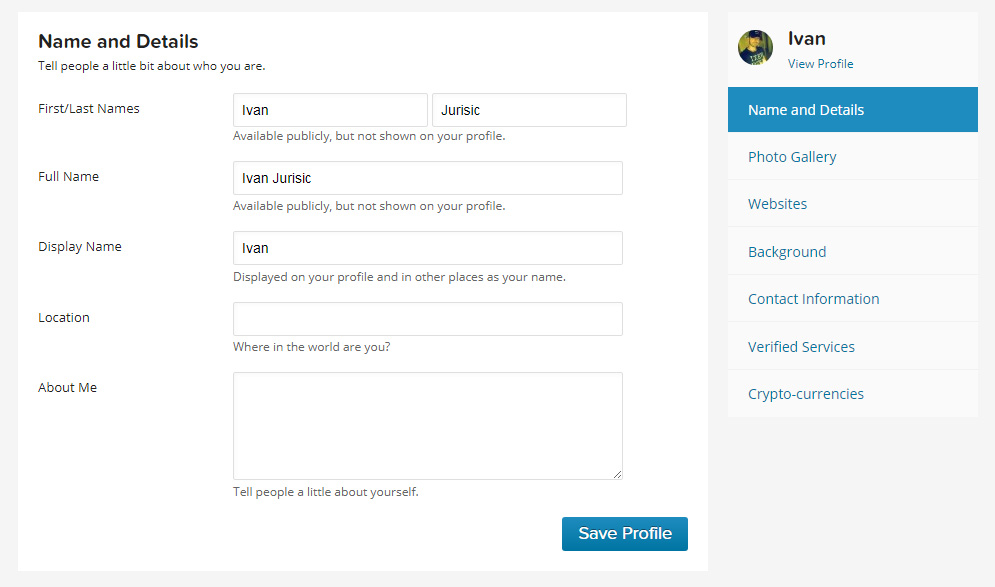
As we mentioned earlier in the article, Gravatar is much more than just an image. To get the most out of the service, you should fill in other information about yourself. To start adding the info, open the “My Profile” tab.

Here you can add details about yourself, add more pictures to the gallery, change backgrounds and much more. But one of the most important options allows you to add links to your websites and social media. By doing so, you can prove your identity and connect with your readers.
Yes, you should use Gravatar
Since you’ve started a blog, you probably want something out of it. Whether it’s just a hobby and a way of connecting with people, or a way of earning a paycheck, you have to make it the best you can. So, when publishing new articles and commenting on other blogs, you will want people to recognize you.
Use your photo, add details to your profile, and you can allow yourself to forget about the whole thing. Gravatar will automatically connect the dots and show your profile on WordPress.com, self-hosted sites, and even some 3rd party platforms and services that use Gravatar through various extensions.
