While working with WordPress, everyone’s first instinct is to start with the creation phase immediately. However, before you start creating, you should take a look at your WordPress website’s basic settings. Those settings can help you to control your website’s overall functionality.
Developing your knowledge of WordPress settings ensures that you will maximize your use of the software, and helps you to create your website exactly the way you want.
In this article, we will see how all of these settings function and how we can manage these settings.
Video: WordPress Settings
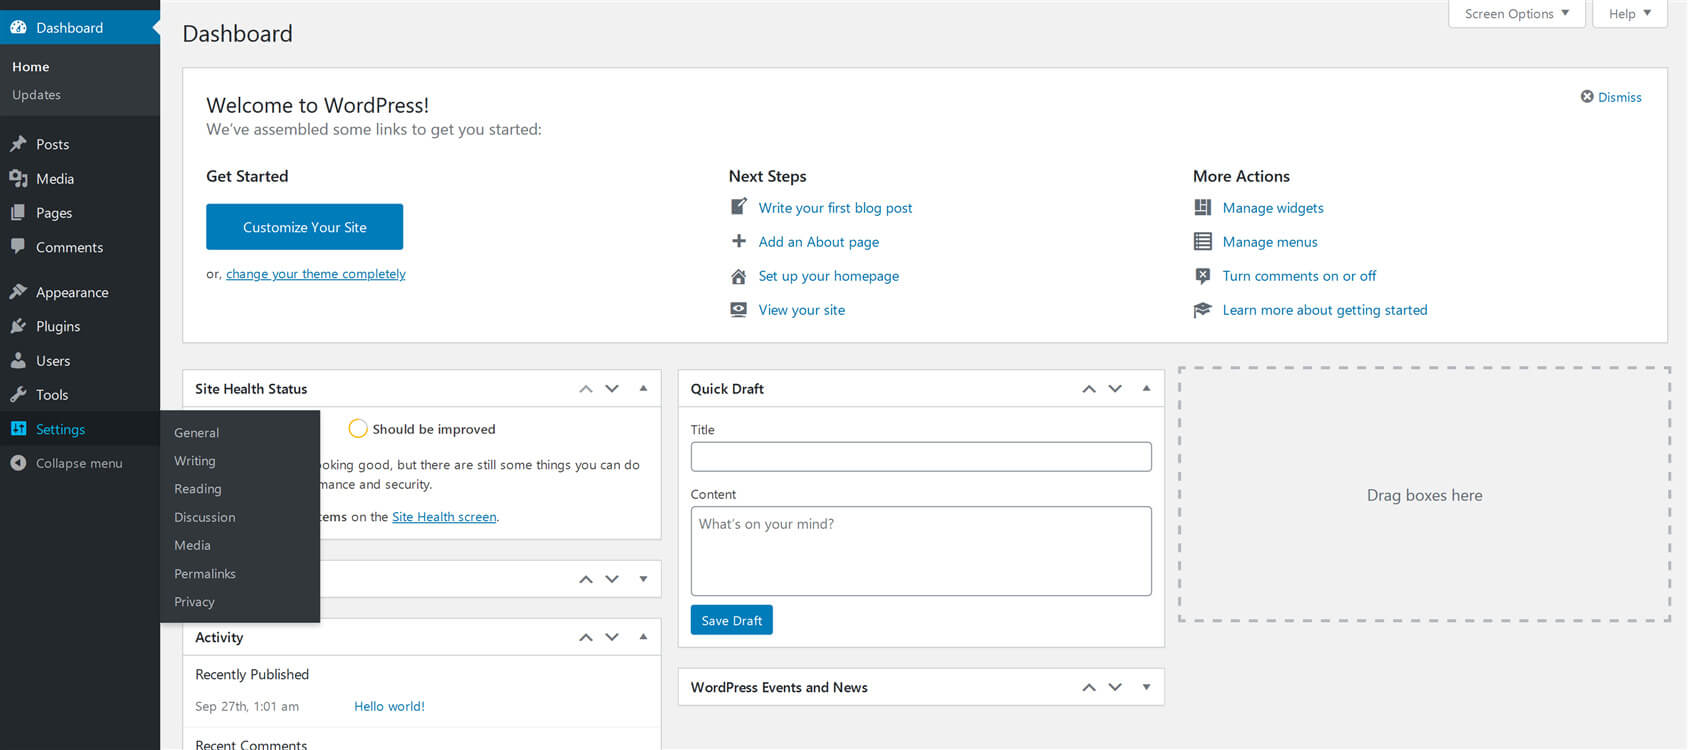
General settings screen
The general screen setting is the first section in the WordPress settings. It mainly controls your website’s most basic configuration settings where you can view and edit basic information about your website.
This location is where you can set the title for the very first field, and then add the tagline, edit date format, time format, WordPress URL, site address, membership option, new user role, site language, when the week starts on, and time zone.
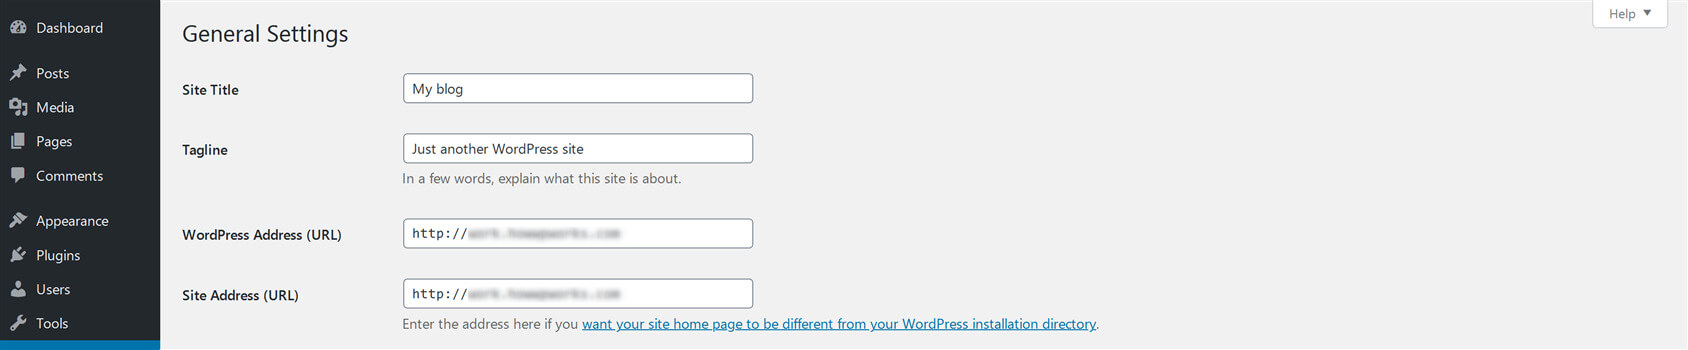
Site Title
In this setting, you will enter the title of your website or blog. Most browsers will show this title at the top of the page. WordPress also uses this title for recognizing your site for future use.
Tagline
The tagline is used to explain about the purpose of your website in a few words. It is a small introduction to your site, like a motto. It must be a short phrase or a sentence that should be eye-catching and represents your whole site in one word or sentence.
WordPress Address (URL)
In the “WordPress Address (URL)” field, you need to enter the full URL of the location where all the files of your WordPress are present e:g wp-admin, wp-content, wp-includes, and wp-config.php, etc.
For example, if you installed WordPress in a directory with the name “blog”, then the WordPress URL would be https://example.com/blog (where example.com is your main domain).
Site Address (URL)
Your Site Address (URL) is the address that visitors use to access your website. This is the address that users type in their browser to visit your website.
Note: Most of the time both the WordPress Address (URL) and Site Address (URL) are the same for a website.
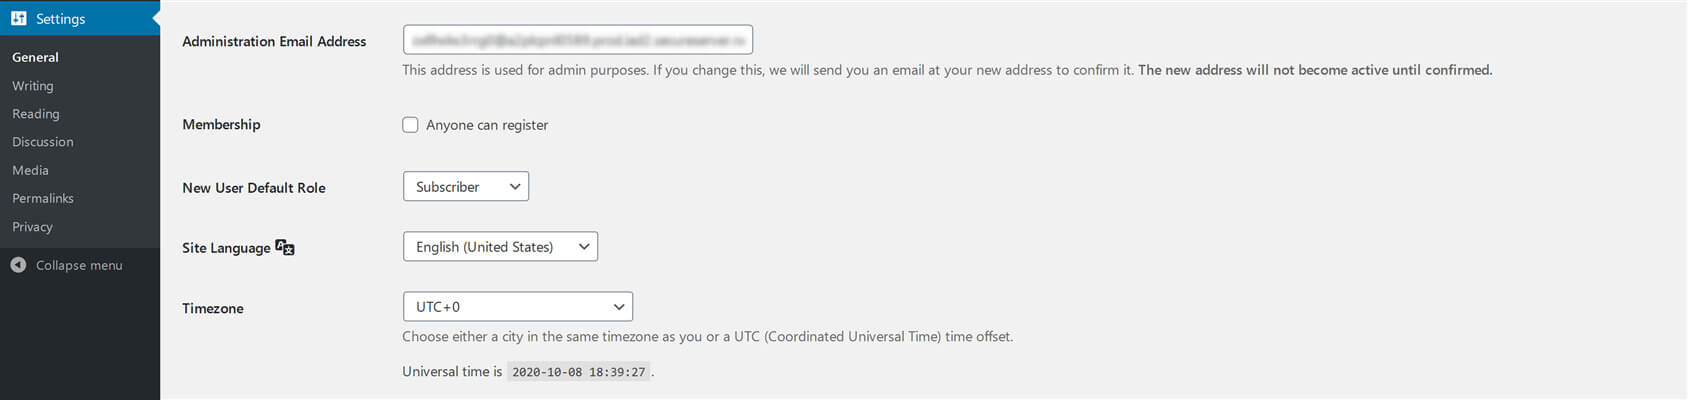
Administration Email Address
In this section of general settings, you need to enter the email address to which you want to receive emails from WordPress about different events that occur on your website. This email address will never be displayed on your website.
Membership
If this option is enabled, then anyone will be able to create an account on your website. If you enable this option, make sure that you set the role of new users to subscribers. This will make sure that new users just have the most basic permissions on your website.
New User Default Role
This Dropdown menu allows the Administrator to select the default role which is allocated to a new user. This new user default role will only be assigned to new registered members or other users which are added through the administration. Here the valid choices are Administrator, author, editor, subscriber, and contributor.
Site Language
WordPress has options to select a language choice. This setting allows you to select the WordPress dashboard language.
Timezone
This dropdown option allows you to choose a timezone for your website. You can either choose a city in the same timezone as you live in or you can choose a UTC (Coordinated Universal Time) time offset.
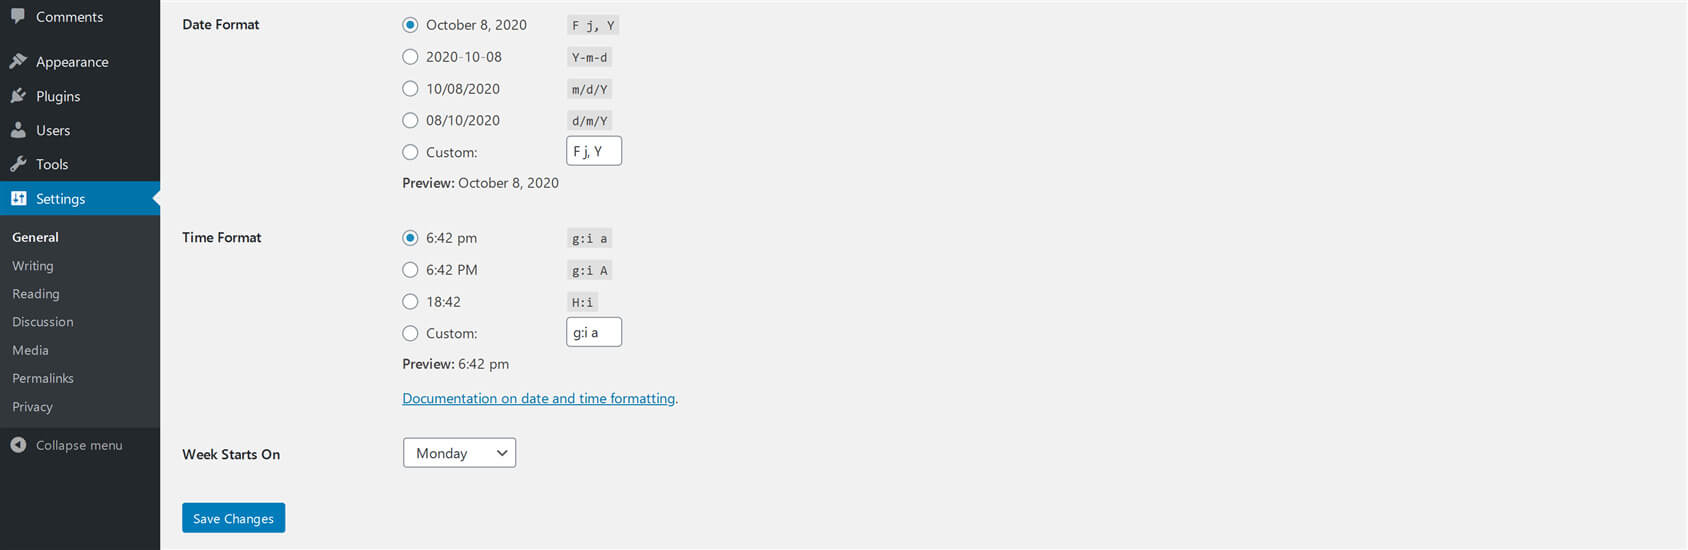
Date Format
“Date Format” option allows you to set a date format for your website. You can select any predefined format by selecting the radio button. You can also use a custom format.
Time Format
“Time Format” option allows you to set a time format for your website. You can select any predefined format by selecting the radio button. You can also use a custom format.
Week Starts On
In this setting phase, select your start date for the WordPress calendar from the drop-down menu. Monday is displayed by default in this setting e:g monthly calendar will show Monday first in the dropdown column. If you want to change the day, then you can make changes from that menu.
Writing settings screen
Writing screen settings are important and allow you to set some default values that can become handy when creating a new post.
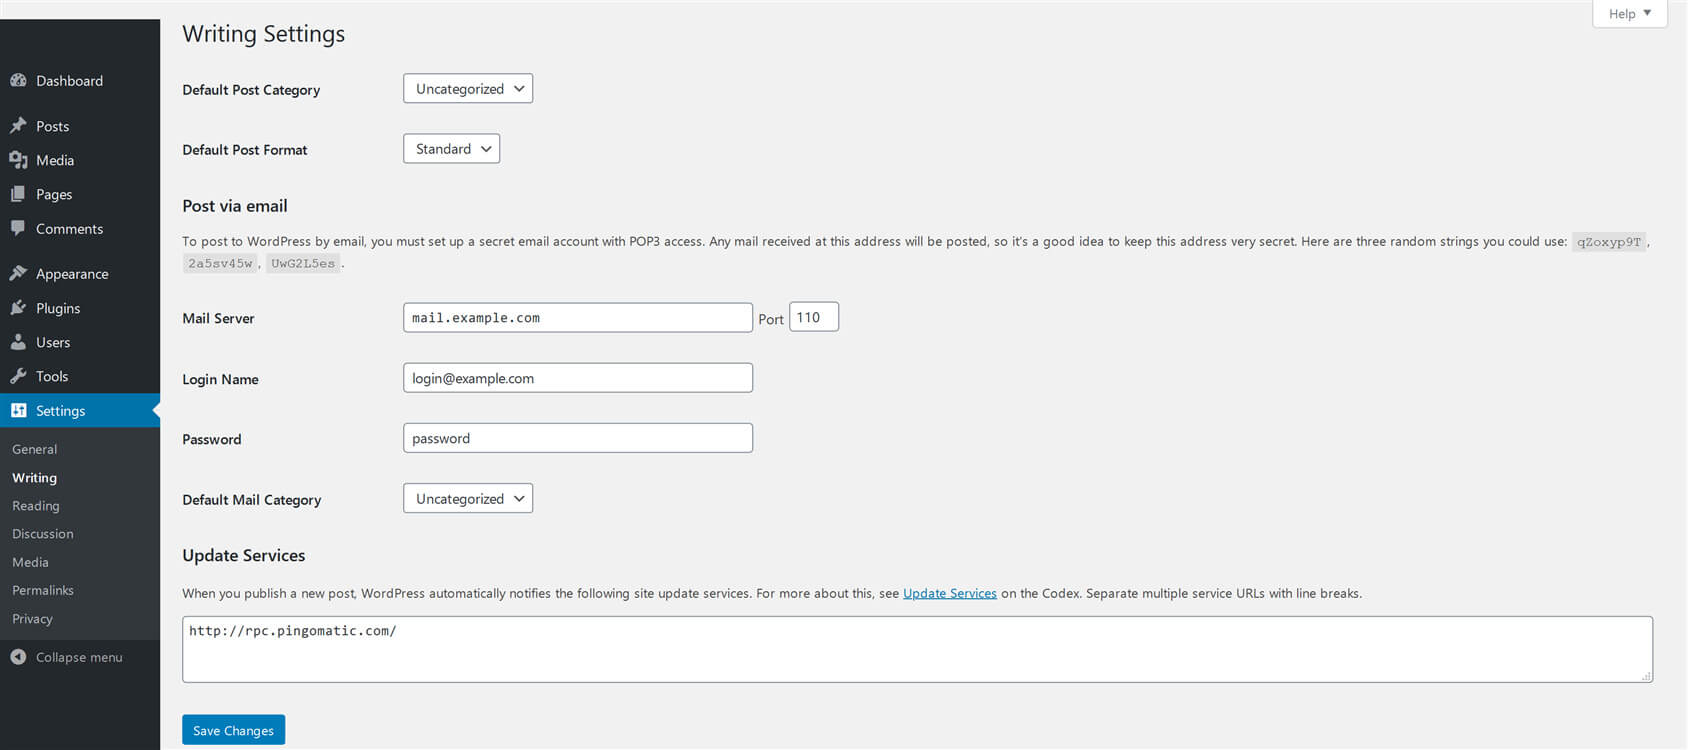
Default Post Category
The category selected in this drop-down menu would be assigned to the post if you missed assigning any other category while writing your post. Additionally, if you delete any category, the posts in that category will be assigned to the default post category.
Default Post Format
This default post format that you select in the drop-down menu is used by themes to use different styles for different types of posts. These settings are only available if the theme supports the post formats.
Post via email
This option is given so that you can create and publish your blog posts via emails. For this purpose, you need to send an email to a specific address that you would have to create.
This option can be useful if your content is very simple, and you don’t want to login to your WordPress dashboard again and again.
Update Services
Here you can enter a list of services that should be notified every time you publish new content.
Reading settings screen
WordPress reading screen setting has very few options, but still, it is very important in WordPress. On this settings page, you can choose what to display on the front page of your website i.e. the latest posts or a static page.
Settings on this page also allow you to adjust the number of posts that are displayed on your main blog page.
Furthermore, you can also modify syndication feed features to dictate how the data from your website is sent to the reader’s device.
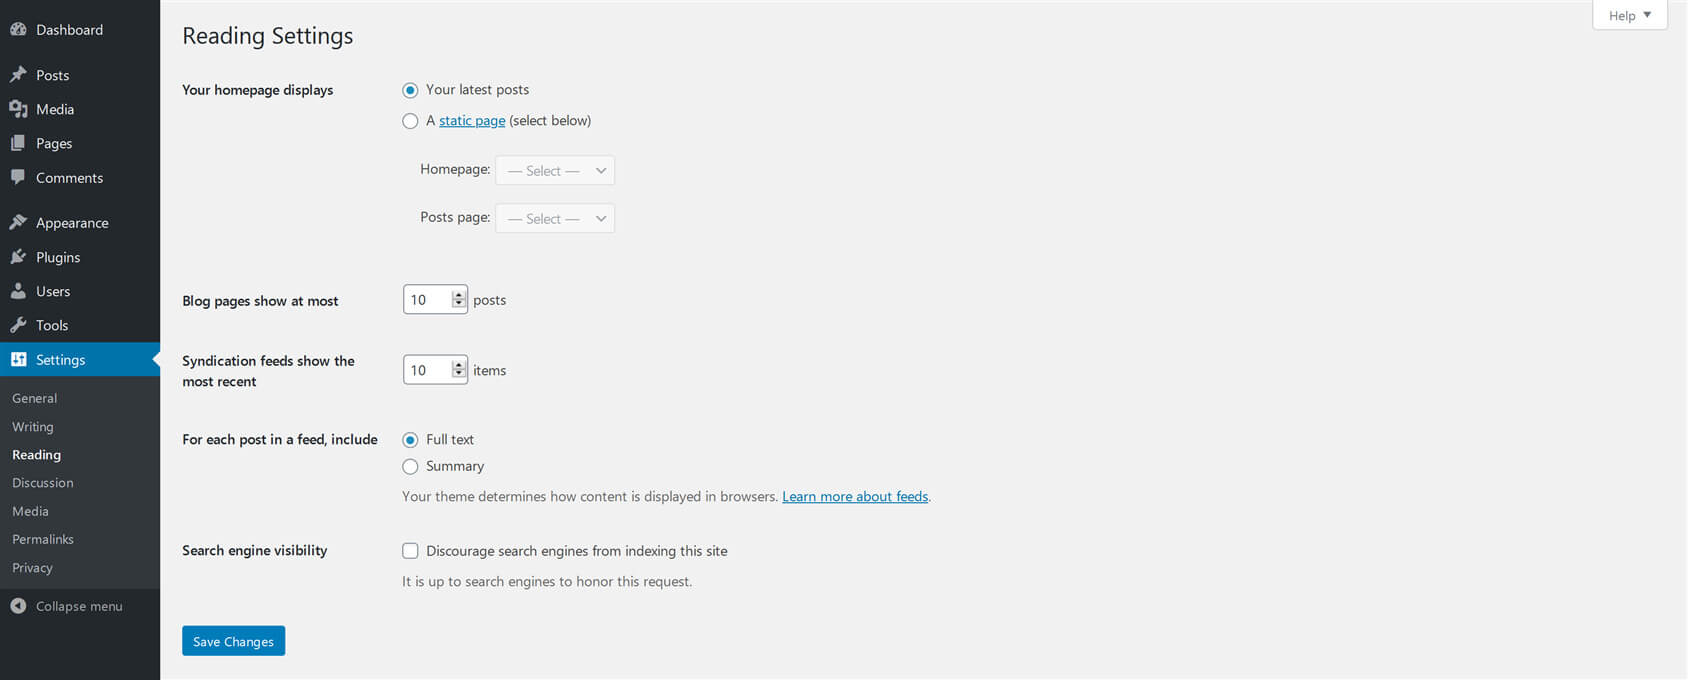
Your homepage displays
This setting is used to determine whether you want to display your latest posts or a static page as your website’s front page. By default, your latest posts are shown on the website’s front page.
If “Your latest posts” radio button is selected, then the latest posts will be displayed on your website’s main page.
To set a static page as the front page of your website, select the radio button with the label “A static page”. Selecting this option will give you two options “Homepage” and “Posts Page” with a drop-down.
From the “Homepage” drop-down, select the page that you want to show as the front page for your website. Any page that you will select from the drop-down will be set as the main page of your website.
Now from the “Posts Page” drop-down, select a page on which you want to show the latest posts. Here, an interesting fact is that if the selected page is password protected, visitors or viewers will not be prompted for a password. Also any other template which is assigned to this page will be ignored, and the display of the posts will be controlled by the theme’s index.php or home.php if it is present.
If you don’t select a page from the “Posts Page” drop-down, then your posts will only be accessible via other navigation types like category, tags, or archive links, etc.
Blog pages show at most
This field controls the number of posts that you want to display per page on your website’s blog page.
Syndication feeds show the most recent
In this field, enter the number of posts which viewers will see when they will download any of your website’s feeds.
For each post in a feed, include
This option defines whether your website’s feed will include the full posts or just a summary of the posts.
Select the “Full text” radio button if you want to insert the full content of the posts or select the “Summary” radio button if you just want to include a summary of the posts.
Search engine visibility
Search engines are one of the biggest sources of traffic for any website, but sometimes you don’t want your website to be indexed by the search engines, especially when your website is in the development phase. This option “Search Engine Visibility” helps you to do that. If you check this option, search engine bots will not index your website, and it will not appear in search results anymore.
Discussion settings screen
The discussion screen settings allow you to configure different options related to the comments section on your website, like whether the comments are allowed or not, trackbacks or pingbacks are allowed or not, what creates comment spams, etc.
With this screen setting, you can also control the settings to get notifications via email, which are sent by your blog when specific events on your website occur.
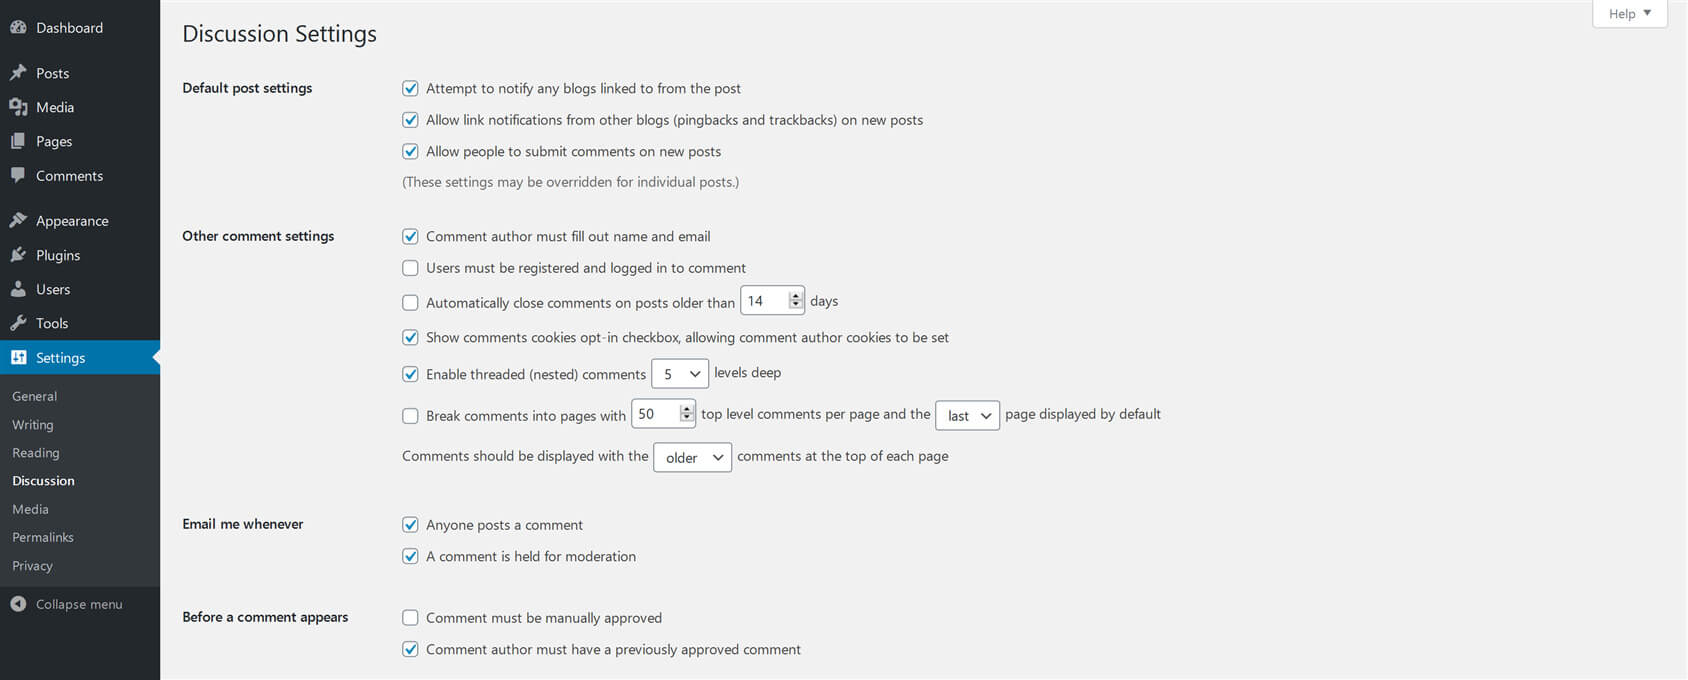
Default post settings
- Attempt to notify any blogs linked to from the article.
If you check this option, WordPress will send a ping to any site or article you are linking to in your post, and it will show up in the comment section of the other website if they allow the pingbacks. - Allow link notifications from other blogs (pingbacks and trackbacks) on new posts.
You need to check this box if you want the pings from the other sites. This option allows linking notifications from other blogs (pingbacks and trackbacks). Pingbacks and trackbacks will appear in the comment section if you check this box. - Allow people to submit comments on new posts.
If you want to allow comments on your posts, then check this box and remember that these settings can be overridden for any specific post.
Other comment settings
This section has the following options:
- Comment author must fill out a name and email.
In this setting, when you check this box, it is required for the user to fill the name and email address while commenting. - Users must be registered and logged in to comment.
When you select this option, only those users who are registered on your website can comment on posts. If it is not selected, then any user (registered or non-registered) can comment. - Automatically close comments on articles older than “specific” days.
This checkbox should be checked only when you want to take the comments for a specific time (according to your requirement) and once the specified time is passed, new comments will be disabled on the post. - Enable threaded (nested) comments.
If you check this option, users can get replies to their comments, and they can reply or chat with others. - Break comments into pages with top-level comments per page and the page displayed by default.
When your page is getting a significant number of comments, you can select this option and split comments into different pages. - Comments should be displayed with the comments at the top of each page.
By using this option, you can organize the comments in ascending and descending order.
Email me whenever
There is another feature of “email me”. This will give you control over whether the author and administrator should receive an email notification when a specific action is performed.
Check the box of “Anyone posts a comment” so that every single comment which is posted will create an email to the writer of that post.
Check the box of “A comment is held for moderation” if you want WordPress to send an email notification that a comment is being held for moderation.
This can be very useful if your blog/post has multiple visitors or authors, and each will be authorized to allow or reject comments. You as the owner of the website can view which comment is allowed or which comment is rejected.
Before a comment appears
Settings in this section provide you more control about how and when comments should appear on the posts.
- A Comment must be Manually Approved.
If you want every comment to be approved manually, then you should enable this option. - Comment Author must have a Previously Approved Comment.
Enable this option to make sure that comments are only allowed if the email address of the comment’s author matches the email address of a previously approved comment. If not, the comment will be held for moderation.
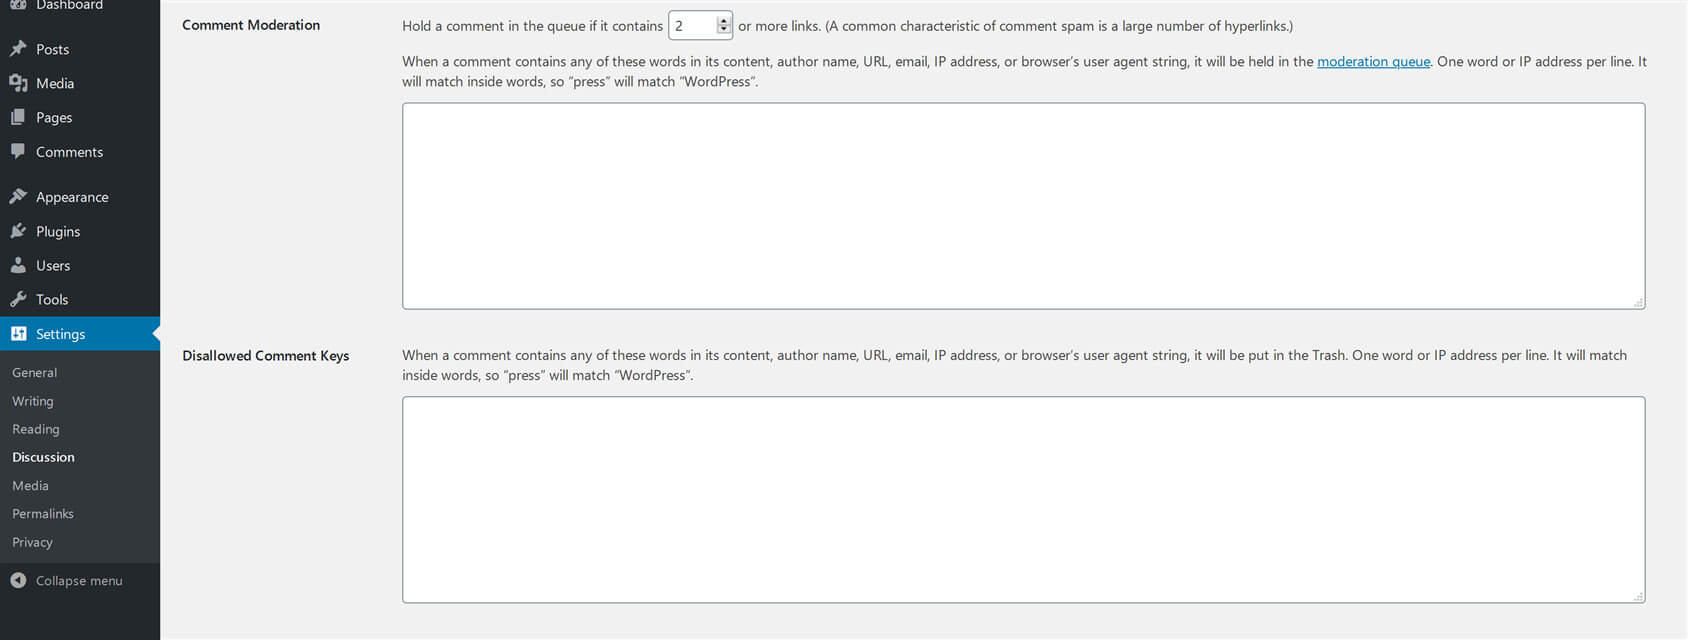
Comment Moderation
You can set a specific number of links that are allowed into a comment.
Disallowed Comment Keys
Here you can enter your spam words or sentences. All the words that you don’t want your viewers to write into the comments, email, and URLs, etc. You can filter the comments later.
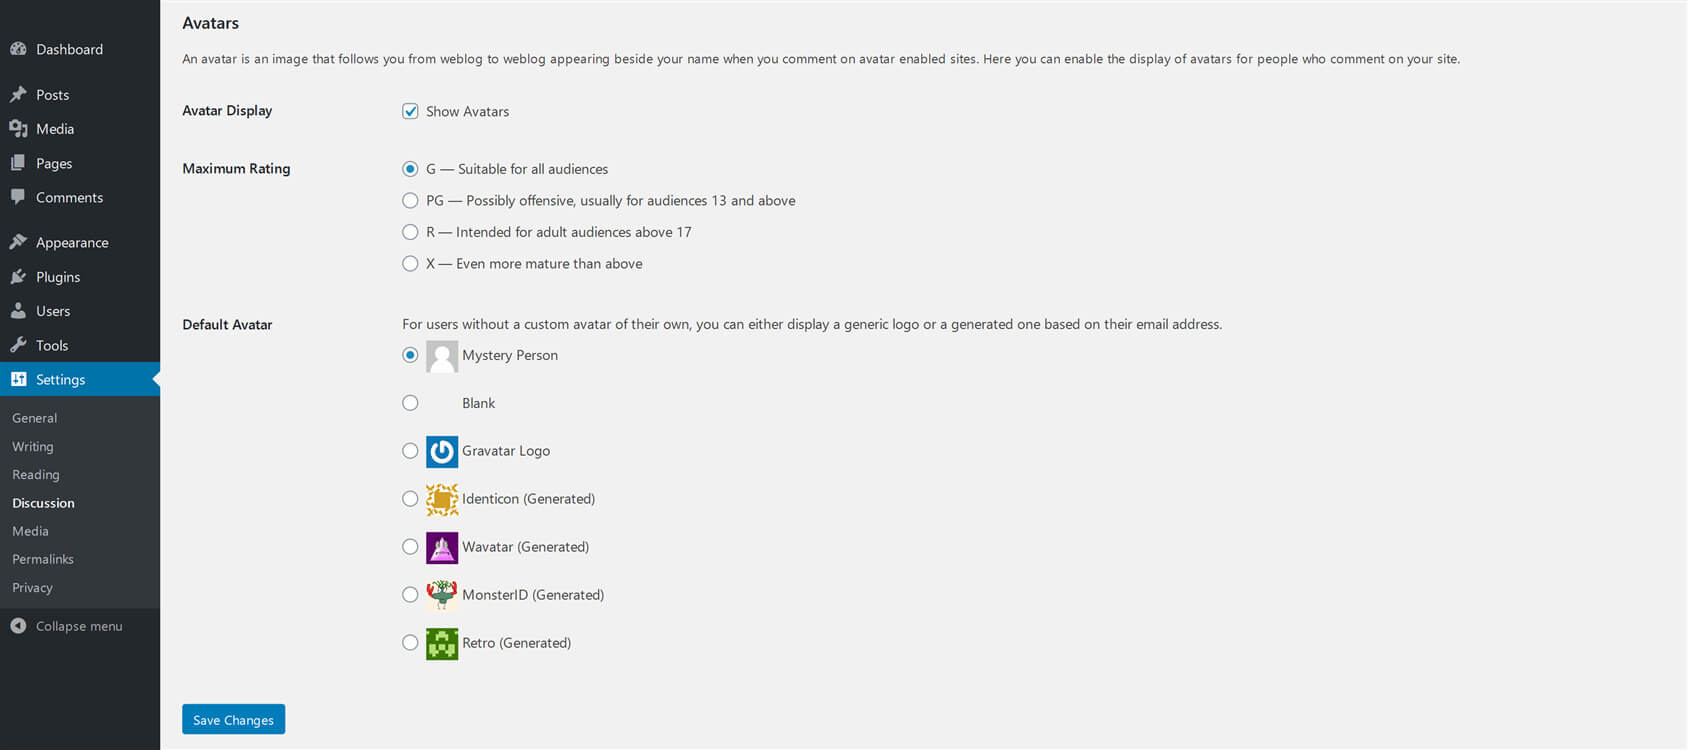
Avatars
These features are available at the end of the settings. An avatar is an image of you that appears alongside your name when you comment on avatar permitted websites. In this feature, you can allow people who comment on your blog along with their avatar. WordPress uses GRAVATAR (Globally Recognized Avatar) by default.
- Avatar Display.
If this box is checked, then the user avatar will display along with the name. - Maximum Rating.
In this feature, you have four options for avatars; they are G, PG, R, and X. In this section, you can select the level or rating of GRAVATAR based on what type of avatars you want to display on your website. - Default Avatar.
If a visitor doesn’t have an avatar of their own, you can set a default avatar for them. From the radio buttons, you can either use a generic logo as an avatar or you can use a generated one based on the email address of the visitor.
Media settings Screen
This Media screen setting is used to control different settings that are related to images and other types of media which are used while creating pages or posts.
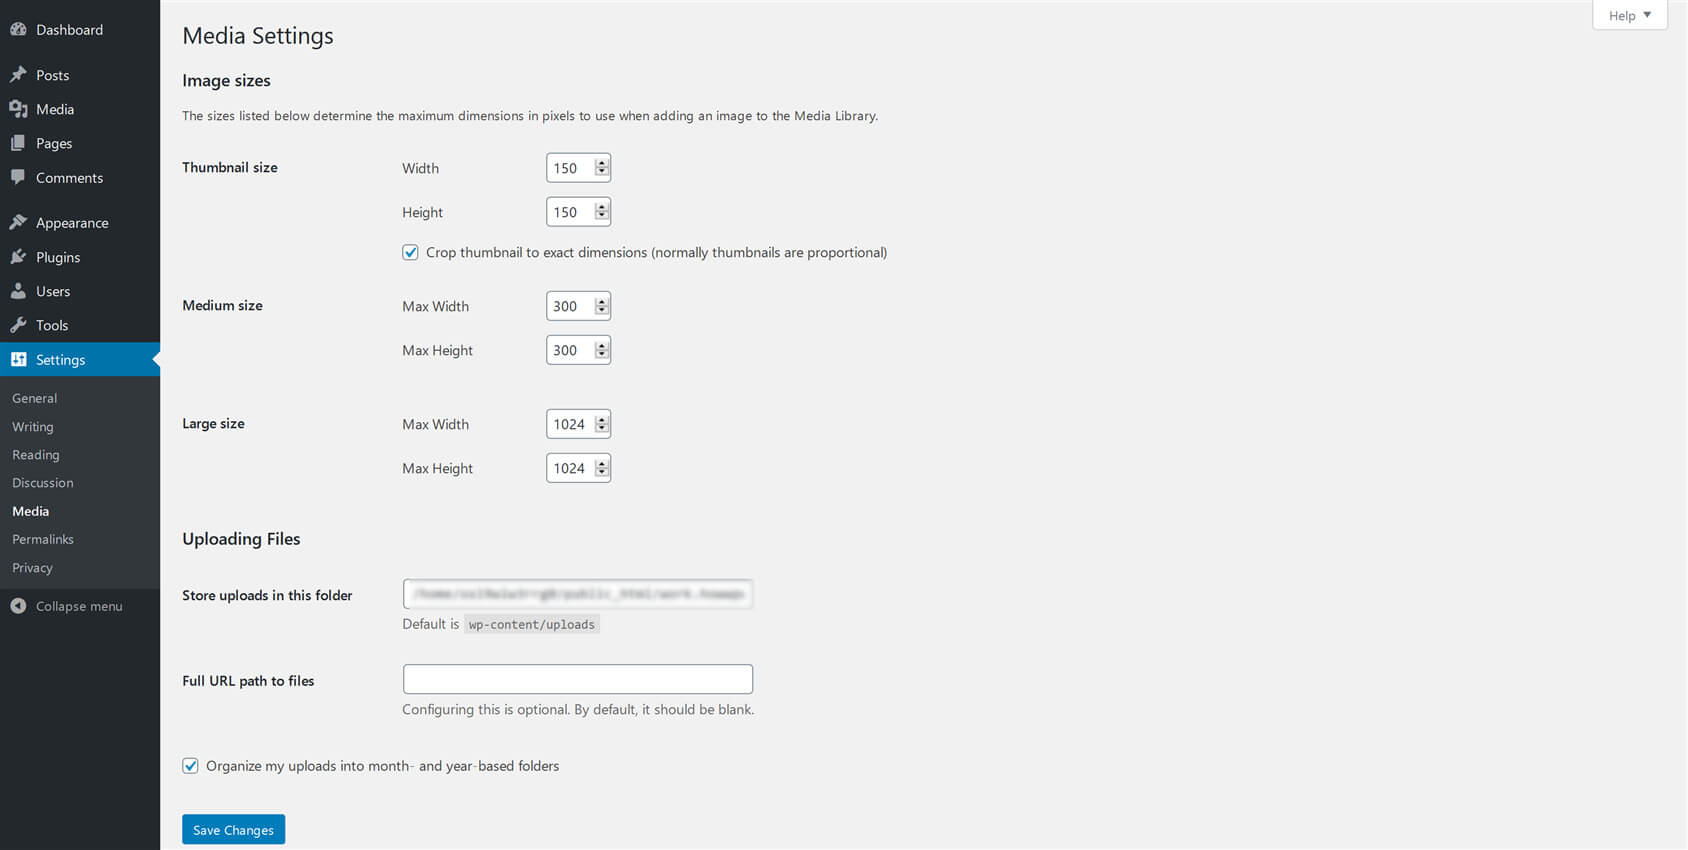
Image sizes
The media settings allow you to adjust the sizes of images that are being uploaded to the media library.
WordPress provides three sizes by default:
- Thumbnail size
- Medium size
- Large size
In the thumbnail size fields, set the thumbnail width and height. There is also an option to crop the thumbnail to exact dimensions, however, be mindful that it might remove some of the image section while cropping.
In the Medium and Large size fields, set the max-width and max-height for the images according to the website requirements.
Uploading Files
- Store Uploads in this Folder.
This field specifies where all of your media files will be stored on the server. Default value is wp-content/uploads. - Full URL Path to Files.
If you want to change the URL of media files on your website, you can change that by entering the URL in this field. By default, this field is left blank.
Organize uploads
At the end, there is a checkbox that allows you to organize your media files based on year and month.
Permalinks Settings screen
A Permalink is known as the web address. It is used to link your WordPress content. Permalinks are the URLs that are permanent and linked to your pages and blog posts along with your category and tag archives.
Usually, these URLs don’t change. From the permalink settings, you can select the default permalink structure for your website or you can also set custom URL structures for the website.
WordPress also allows you to create a custom URL configuration for your archives.
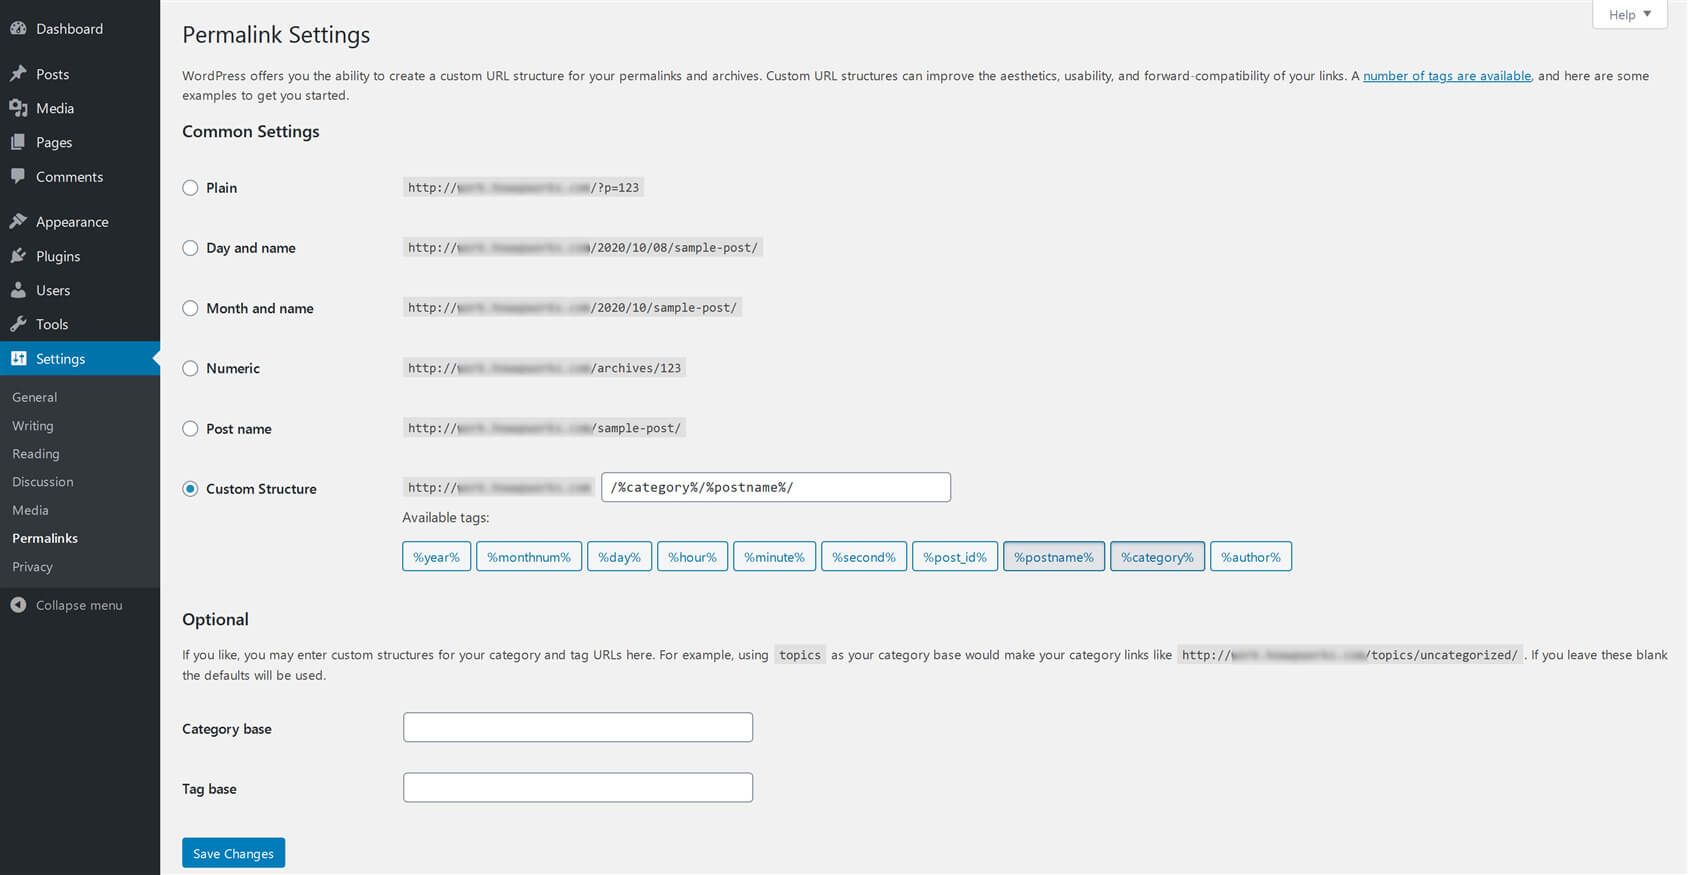
Common Settings
These Settings contain the following configurations and you can select your options using the radio buttons.
- Plain button.
This contains “http://www.mypersonalweb.com/?p=123” - Day and name.
This one contains an example of the day, date, and name-based configuration such as: “http://www.mypersonalweb.com/2020/01/01/sampleXYZpost/” - Month and name.
This contains an example of the name of the month and name-based configurations like: “http://www.mypersonalweb.com/2020/01/sampleXYZpost/” - Numeric.
This contains an example of the numeric configuration such as: “http://www.myperosnalweb.com/archives/123” - Post name.
This contains an example of your selected post name configuration such as: “http://www.mypersonalweb.com/sampleXYZpost” - Custom Structure.
This allows you to create your desired URL. After completing all of the required settings, click on Save Changes so that you will not lose the settings you selected.
Privacy settings screen
These are the new screen settings of WordPress which were introduced in version 4.9.6. These settings allow you to create a privacy policy for your blog/site. (GDPR) General Data Protection Regulation has implemented new requirements for site authors when it comes to transparency and privacy policy. So, a privacy policy page is a must for websites now.
In WordPress, there are two options available for creating a privacy policy page. Either you can select a privacy policy page from their existing pages or you can create an entirely new page for this purpose.
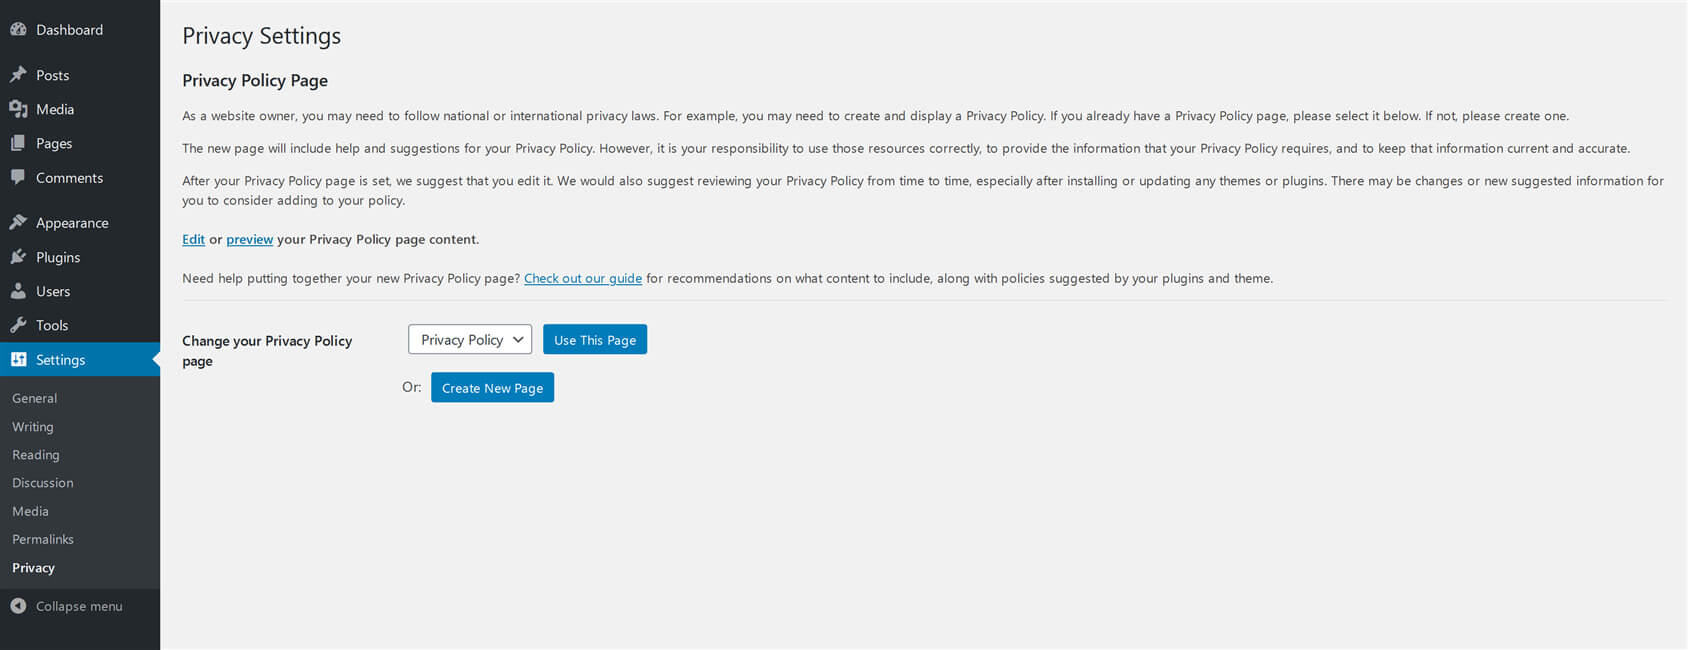
Change your Privacy Policy page
In this setting, there are two options given.
- Select an existing page – from this drop-down, you can select an existing page that you want to use as the privacy policy page for your website.
- Create a new page – If you want to create a new page for privacy policies, you can use this option.
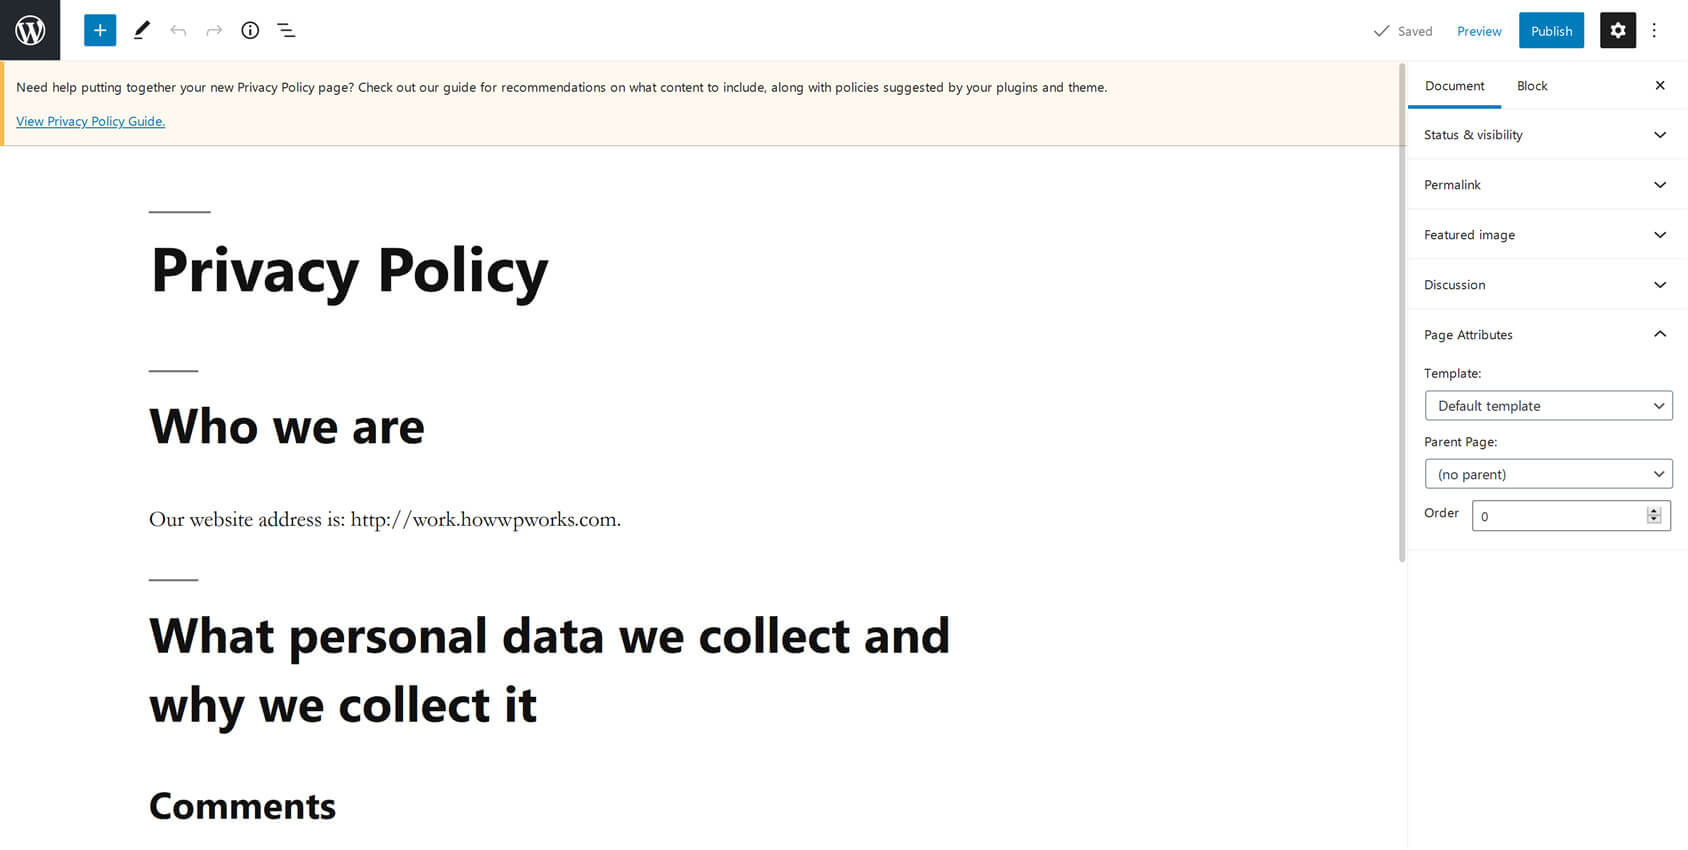
In both ways, you would have to edit a partially-filled out page. You can customize that page according to your needs.
And now, you have become familiar with WordPress Settings!
Conclusion
Since WordPress is a user-friendly platform, beginners can easily become familiar with its settings. Even longtime users or experts may not have discovered every setting that WordPress offers.
That is why it’s a good idea to spend some time gathering some knowledge for yourself about these options. Every day as new versions are released, many new things are being introduced.
