
WordPress is the most popular CMS (content management system) and there are millions of users worldwide who can vouch for that. One of the reasons for the popularity of WordPress is that it is relatively easy to start a WordPress blog.
If you are still not well-acquainted with WordPress, we invite you to learn more about it. Before showing you how to install WordPress, we will explain what you need to start the installation.
In this guide, we are going to show you how to install WordPress step-by-step by using a few different options:
- Installing WordPress software on your web hosting account using an easy auto-install option. It is available with most web hosting providers. We will show you how to get it done with the 5 most popular hosting companies.
Jump to “Installing WordPress with Bluehost (recommended)”
Jump to “Installing WordPress with GoDaddy”
Jump to “Installing WordPress with HostGator”
Jump to “Installing WordPress with SiteGround”
Jump to “Installing WordPress with DreamHost”
- Also, we will show you an advanced technique that will allow you to install WordPress manually. With this approach, you can install it on any server or local computer but you need to be somewhat tech-savvy.
Jump to “How to install WordPress.org manually”
The auto-install sections of this tutorial are made for Beginners and you will be able to install WordPress in 5-10 minutes (no technical or coding skills needed).
Users with little technical experience might be intimidated by this process. But before you start freaking out, we can reassure you that even a complete beginner can install WordPress in just a few minutes. It will take a few steps, but we will guide you through the entire process.
Things you need to know before installing WordPress
Although WordPress is an open-source platform (which means that you can use it for free), there are a few things that you should prepare prior to installing WordPress. To get your website up and running, you will need a web hosting service and a domain name established first.
How much does it cost to host a website?
Below is a 1-year starter plan pricing comparison table of the 5 most popular WordPress hosting services, with a custom domain name, and a custom professional email account.
| Bluehost | DreamHost | GoDaddy | Hostgator | SiteGround | |
| Hosting services discount price | 45% off $4.95 per month (billed for 1 year) | No discount $3.95 per month (billed for 1 year) | 89% off $1.00 per month (billed for 1 year) | 56% off $3.95 per month (billed for 1 year) | 53% off $6.99 per month (billed for 1 year) |
| Hosting services renewal price | $8.99 per month (billed for 1 year) | $3.95 per month (billed for 1 year) | $9.99 per month (billed for 1 year) | $8.95 per month (billed for 1 year) | $14.99 per month (billed for 1 year) |
| Domain name registration (.com) | First year free, $17.99 per year renewal price | First year free, $15.99 per year renewal price | First year free, $17.99 per year renewal price | First year free, $17.99 per year renewal price | $15.95 per year, $15.95 per year renewal price |
| SSL certificate | Free | Free | $6.67 per month (billed for 1 year) | Free | Free |
| Custom professional email | Free (4 email accounts) | $19.99 per year (per email account) | First year free (Office 365) | Free (unlimited email accounts) | Free (unlimited email accounts) |
| Storage space* | 50 GB | Unlimited | 30 GB | Unlimited | 10GB |
| Bandwidth* | Unlimited | Unlimited | Ideal for up to 25K monthly visitors | Unlimited | Unlimited |
| Total amount for the first year | $59.40 | $47.40 +$19.99 per email account (optional) | $12.00 + $79.99 SSL certificate (optional) | $50.53 | $83.88 + $15.95 domain name |
| Renewal prices per year | $125.87 | $63.39 +$19.99 per email account | $137.87 + $79.99 SSL certificate + $71.88 per year (per email) | $125.39 | $195.83 |
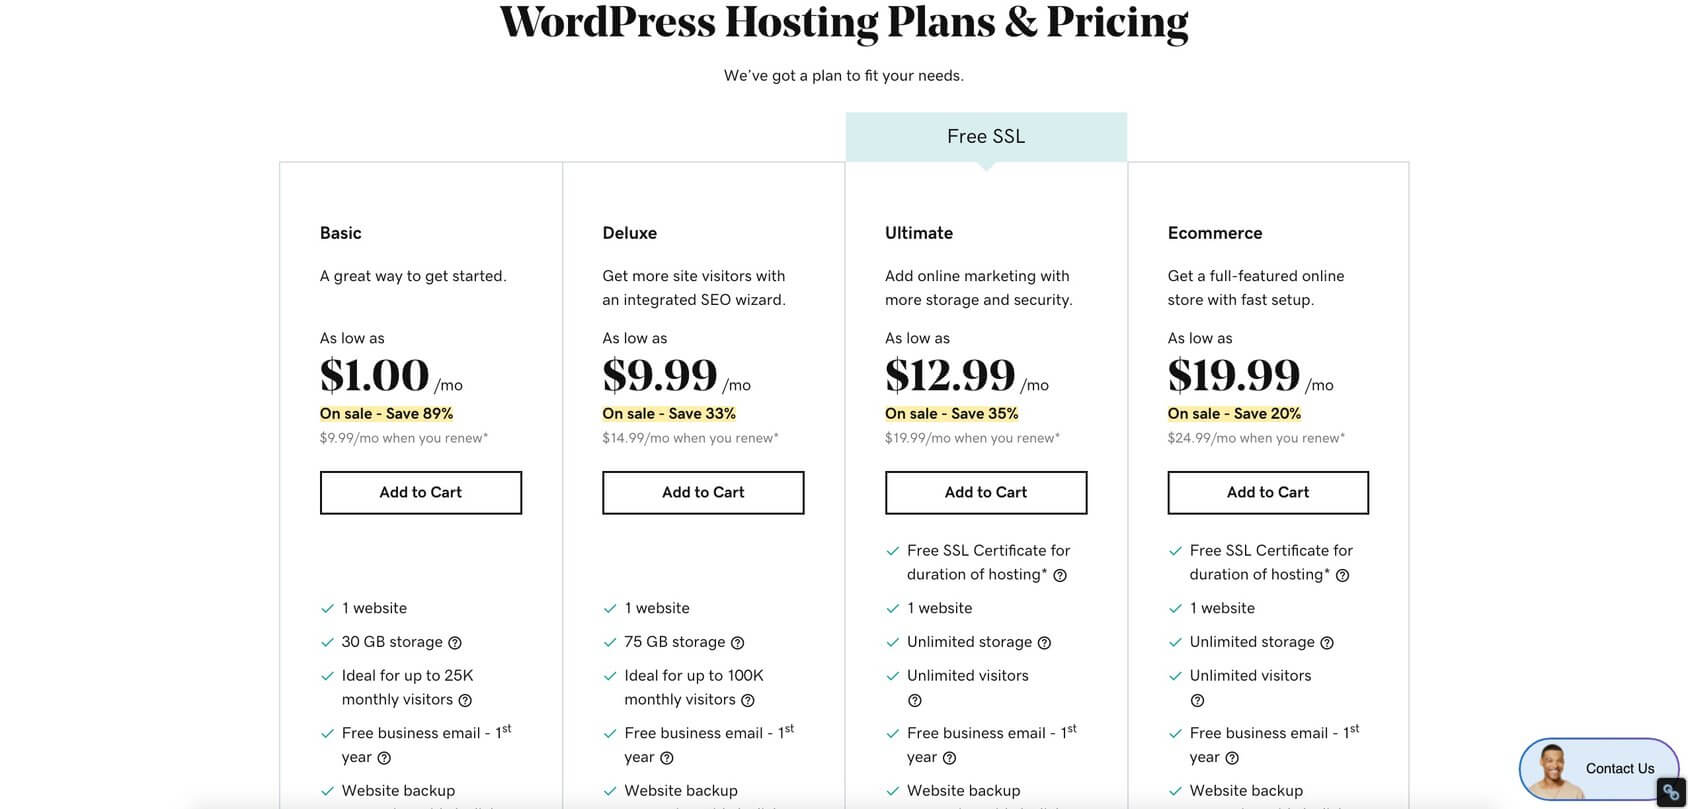
There are dozens of options when it comes to web hosting providers that support WordPress software. For as low as $1.00 per month, you can get space on a server to host your new website. We won’t be able to cover all of them in this tutorial but we will show you how to get it done with some of the most popular companies.
Not sure which web hosting company to choose? If you are just starting out, we recommend Bluehost (a company that powers over 2 million websites worldwide).
For our readers we were able to negotiate a special deal:
- Free domain name.
- 30-day money-back guarantee.
- Discount price of $2.75 per month.
Click Here to Claim an Exclusive 65% Bluehost Discount Offer
Installing WordPress with Bluehost
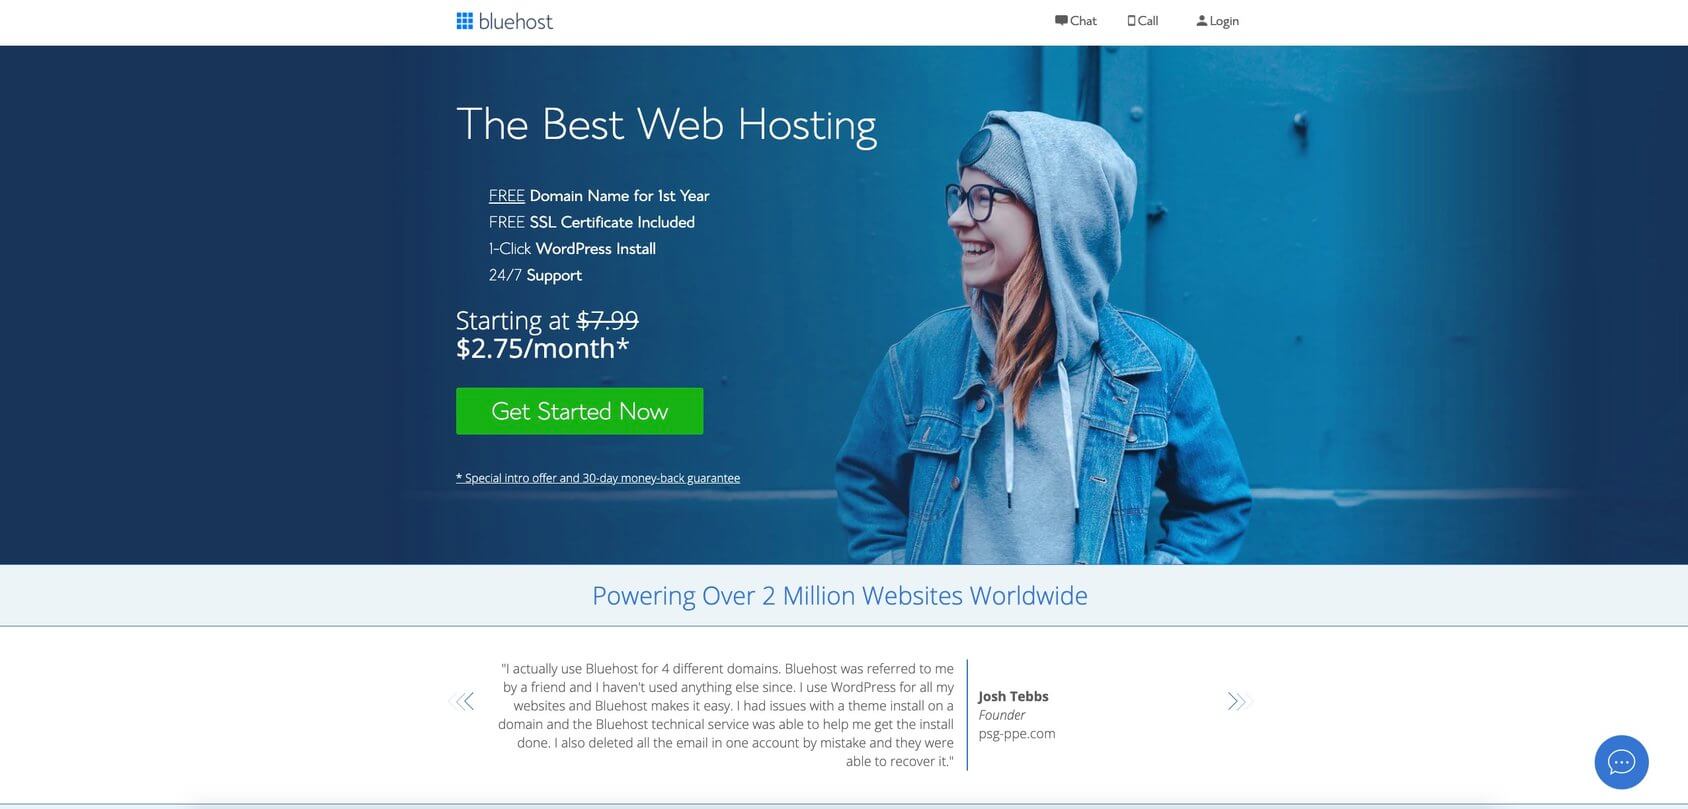
- Go to Bluehost’s homepage and click the “Get Started Now”.
- Select a hosting plan.
- Input your domain name.
- Register for Bluehost.
BlueHost will then take you to the registration form, where you’ll fill in the billing details along with your personal information.
- Select your hosting package.
- Package extras.
- Payment information.
Enter your payment information, check the box that you have read and agree to the TOS (Terms of Service), and click on the green “Submit” button.
Bluehost will send you a confirmation email when the payment goes through.
Next, you will set up the Bluehost account. You are one step closer to installing WordPress!
- Step 1. Click the “Create your account” button.
- Step 2. Enter your password and complete the account set up.
- Step 3. Your account is ready to go. Click the “Go to login” button.
- Step 4. Login to your account by entering “Email or Domain Name” and “Password”.
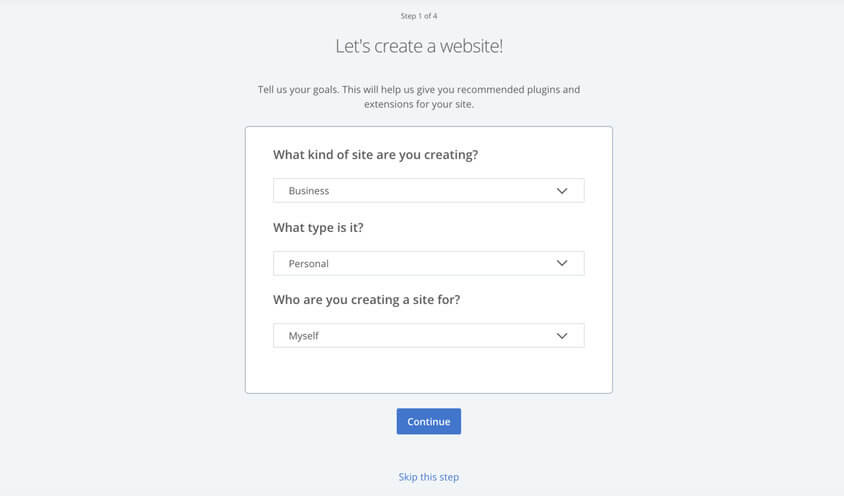
After you log in to the account, Bluehost will offer a 4-step process to help you install WordPress and create your website. If this is your first time creating a WordPress website, I suggest you go through these steps.
You can also click the “Skip this step” button if you are familiar with the website building processes and you can install WordPress software yourself inside your Bluehost account.
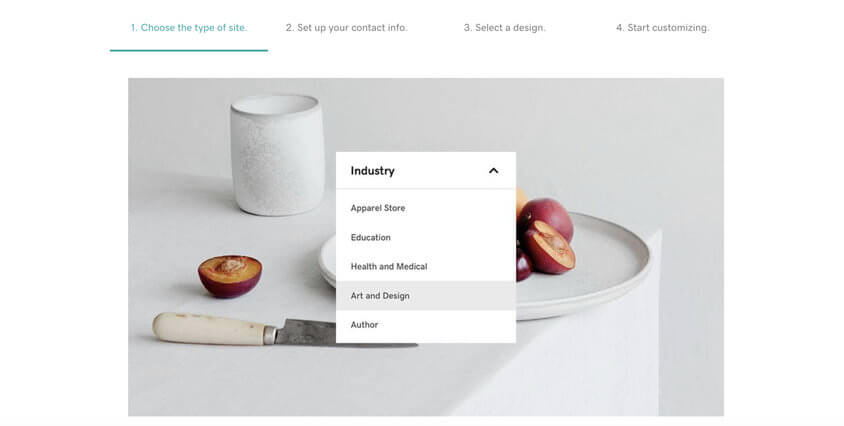
- Step 1. Answer 3 questions: What kind of site? What type is it? And who is it for?
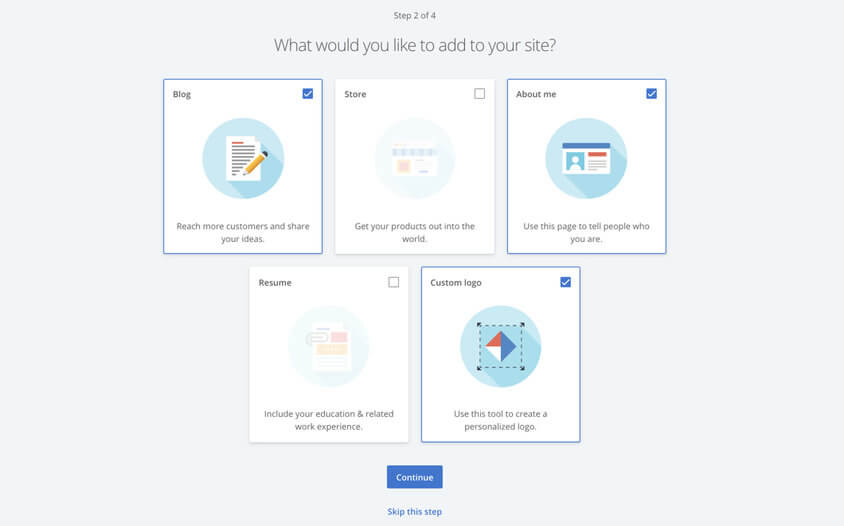
- Step 2. Pick what else would you like to add to your site. There are five choices: Blog, Store, About Me, Resume, and Custom logo.
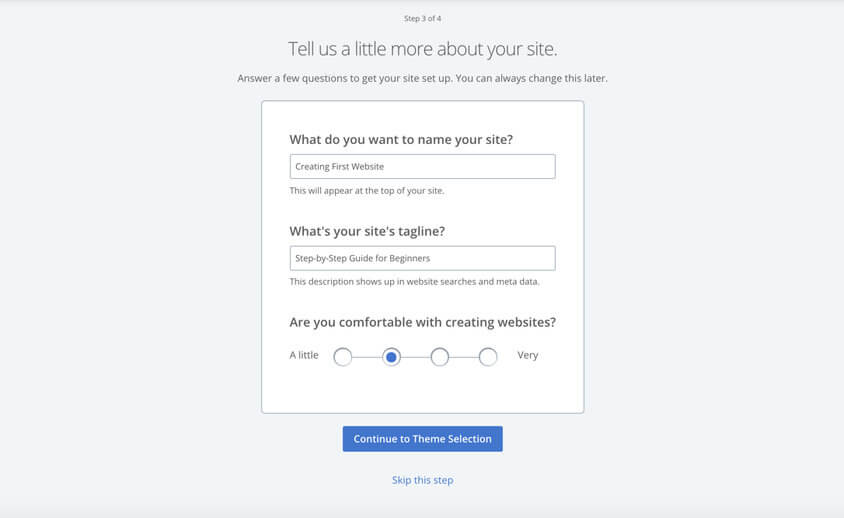
- Step 3. Answer a few questions: What do you want to name your site? What’s your site’s tagline? Are you comfortable with creating websites? Note, you can always change this later.
- Step 4. Picking a free or premium theme.
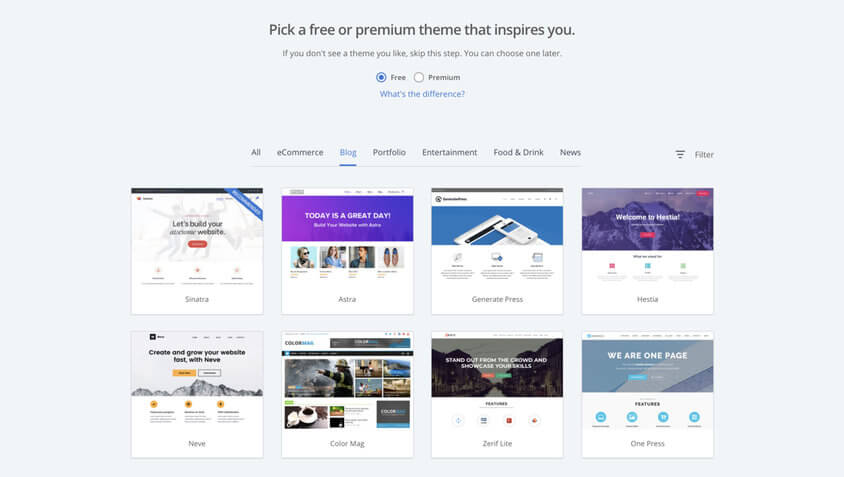
Once you complete these 4 steps you will be taken to your Bluehost account page. At this point, the WordPress software is installed!
Right now, if you enter your domain into the web browser you will see a “Coming soon” page. Let’s finish the process together and launch your website!
Inside your Bluehost account, you will see options to further customize your WordPress website based on Bluehost’s recommendations. These options are here for you to do some pre-launch customizations.
After you click the “Launch My Site” button, your website will go live!
Now you can log in to the WordPress dashboard and start working on your website.
Installing WordPress with GoDaddy

If you don’t have an account with GoDaddy you will need to create one. For new users GoDaddy offers a great way to get started, the WordPress hosting Basic plan with a price as low as $1.00 per month. Before you start installing WordPress and creating your first website, signup with one of the plans available.
- Pick one of the products by clicking the “Add to Cart” button.
- Select term length (1 month, 12, 24, or 36 months).
- Choose your domain name (a Free domain included with hosting order).
- Review your order and go through the checkout process.
- With the checkout process you will also create the GoDaddy account.
Once, you have web hosting and a domain name. It’s time to install the WordPress software. Depending on what type of hosting services you’ve picked WordPress installation could be slightly different.
If you signed up with the Basic WordPress Managed hosting, GoDaddy will let you install WordPress and create your website via the Quick Start Wizard process (handy to the first-time users). You will have to follow the steps and answer a few questions to launch your WordPress website.
- Log in to your GoDaddy account.
- You will see a list of all products and services.
- Find your WordPress hosting account and click Manage.
- Now you can install WordPress and customize your website.
- Go through the steps and answer questions.
When you complete the process the WordPress software will be installed and you can start customizing your website.
If you signed up with the standard shared web hosting plan on GoDaddy, you will be installing WordPress through cPanel (industry-standard control panel to install any apps).
Here are the steps you need to go through to install WordPress using cPanel:
- Log in to your GoDaddy account.
- You will see a list of all products and services.
- Find your web hosting account and click Manage to open cPanel.
- Inside cPanel, under web applications, find and click on WordPress.
- On the WordPress overview page click the “install this application button”.
- Fill out the information about your website and click the “Install” button.
If you get stuck, watch this useful video with all the steps provided by GoDaddy.
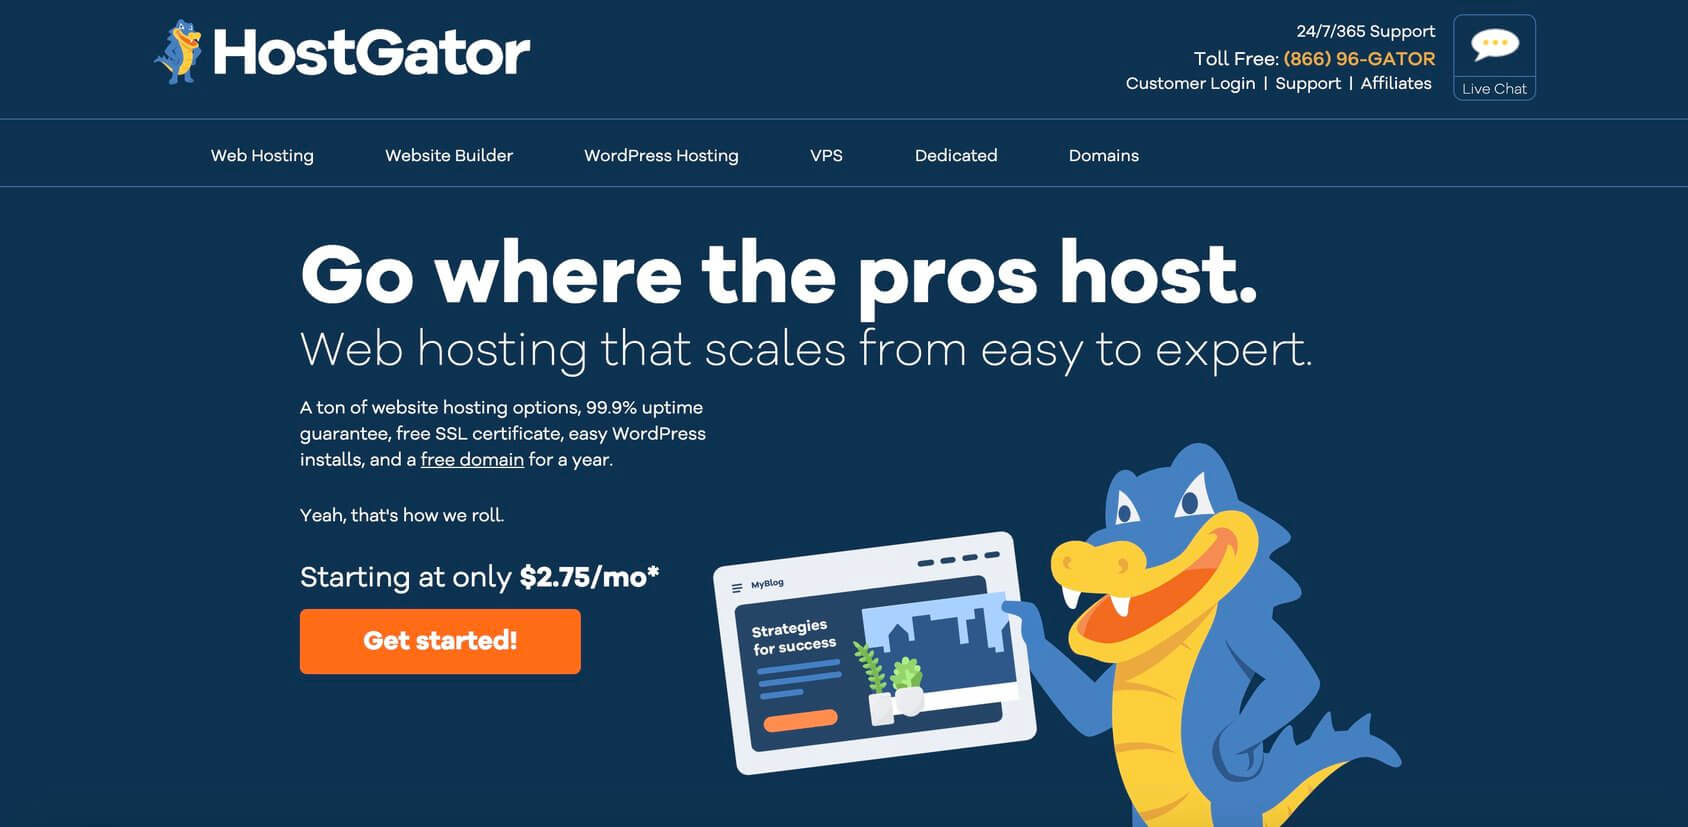
Installing WordPress with HostGator
Before installing WordPress with HostGator you will have to sign up for one of the web hosting plans they offer. Once you have your hosting account you can get started.
With HostGator, you can install WordPress in three different ways. They offer QuickInstall, Softaculous, or manual install.
Let us show you the fastest and the easiest one using QuickInstall:
- Log in to cPanel.
- Find the Software section.
- Click on the QuickInstall icon.
- Click on the WordPress tile.
- Choose the domain that WordPress should be installed on.
- Click “Next” and fill out the form with your details.
- Wait for the progress bar to complete, and you can log in to your new site.
Note: Hostgator is adding Softaculous to their Shared, Reseller, VPS, and Dedicated hosting plans. For now, you can still use QuickInstall for installing apps. But they suggest if Softaculous is available in your account, then you should use this application installer.
Here is their step by step video tutorial on how to install WordPress using Softaculous.
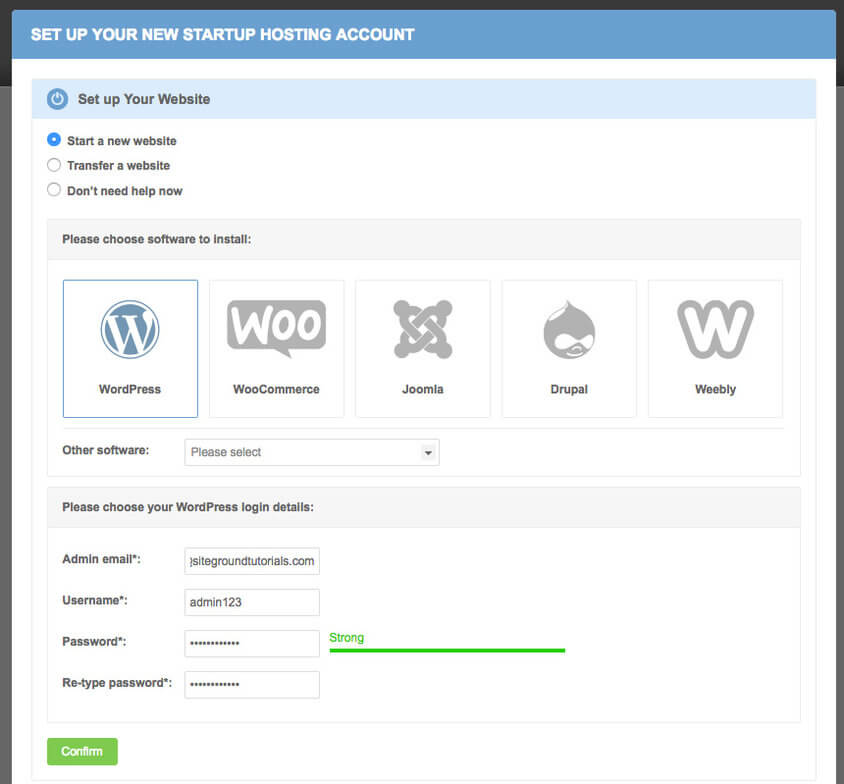
Installing WordPress with Siteground
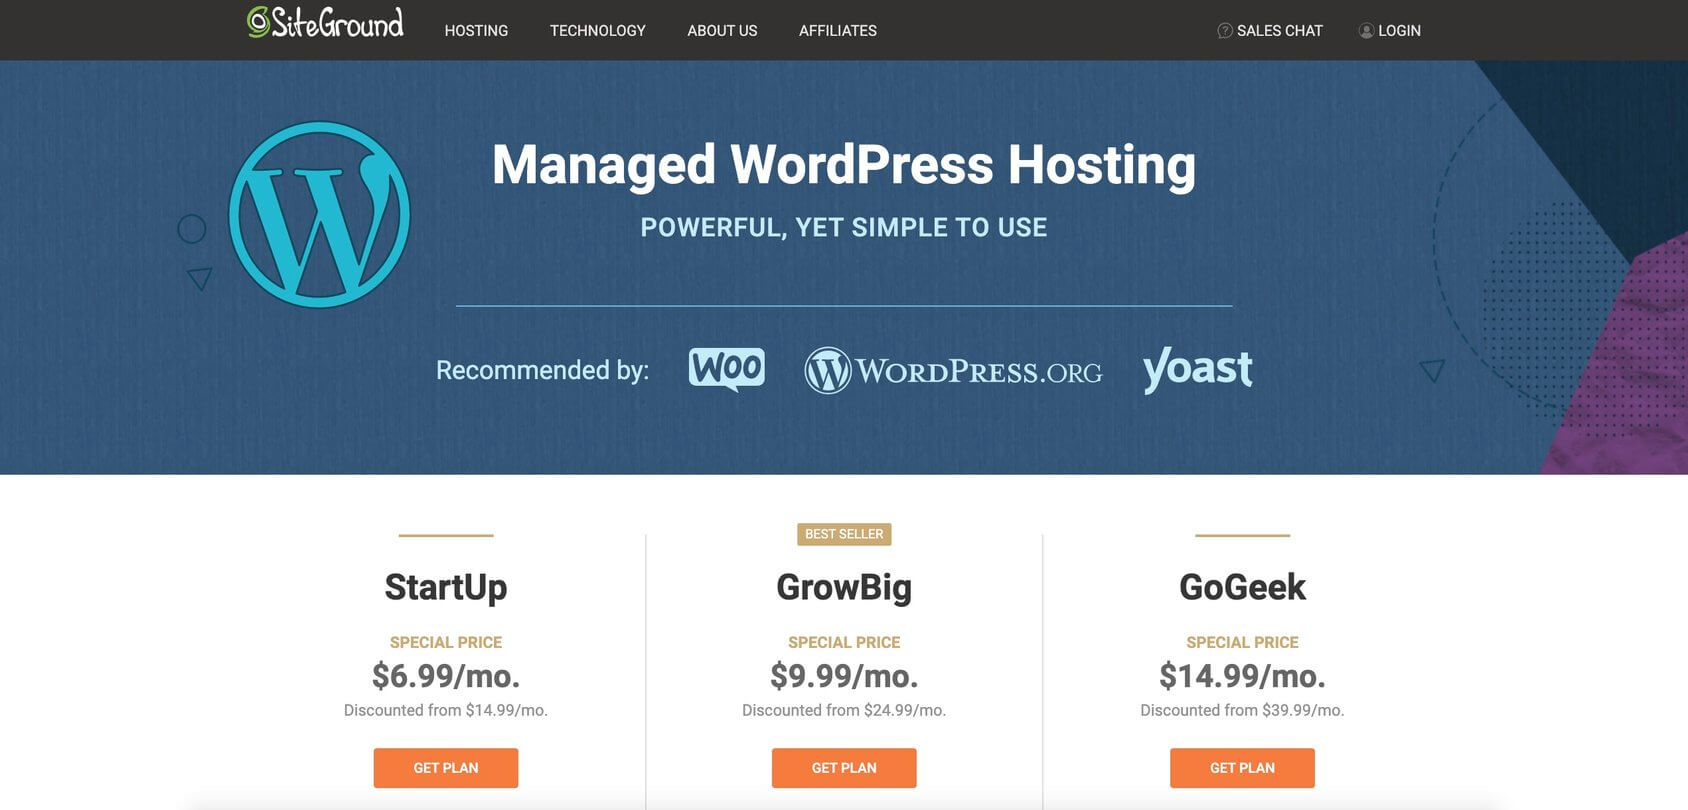
Siteground comes with a user-friendly Customer Area that lets you install WordPress with a few simple steps:
- Log in to the Customer Area.
- The popup window will show up asking you to “Start a new website”.
- Select the option and then click on the WordPress icon.
- Enter the login information for your new site.
- Click the confirm button.
- Choose if you want to add enhancements, and click the “Complete Setup” button.
Here is how to install WordPress using the SiteGround Wizard.
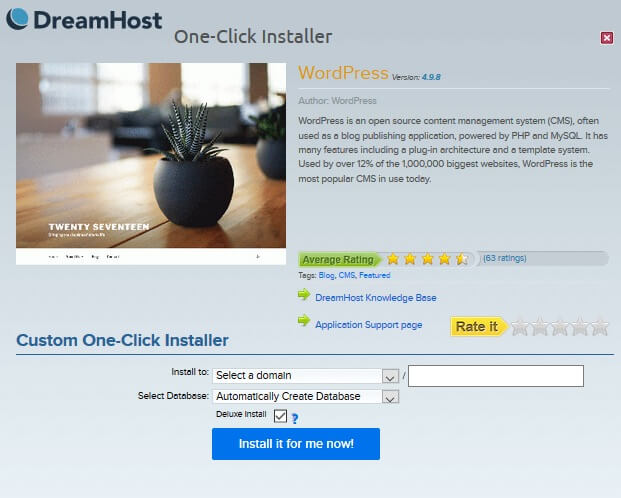
Installing WordPress with DreamHost
DreamHost allows everyone to install WordPress with their one-click method.
All you have to do is to start the installer and follow a few simple steps before you can log in to your newly installed WordPress site:
- Go to your DreamHost control panel.
- Navigate to Domains -> One-Click Install.
- Choose WordPress from the list of available software.
- Fill in the fields.
- Select your domain where to install WordPress.
- Leave the Database fields on the automatic setting.
- Choose if you want the Deluxe Install option.
- Click on the “Install it for me now!” button.
Read their step-by-step guide on how to install WordPress using the one-click installer.
How to install WordPress manually
Just like with any other software, WordPress can be installed manually by transferring necessary files and setting up the environment. But, because of its popularity, experienced people have developed a variety of browser applications that can install WordPress for you just through a few user-friendly steps. In this tutorial, we are going to show you how to install WordPress manually and also how to do it by using one of the most popular installers.
- Installing WordPress manually with Softaculous
- Installing WordPress manually anywhere (advanced)
Installing WordPress manually with Softaculous
Softaculous is one of the most popular script libraries that allows users to quickly install various commercial and open-source software without any technical knowledge. Among more than fifty applications available with the free version, WordPress can be found in the first position.
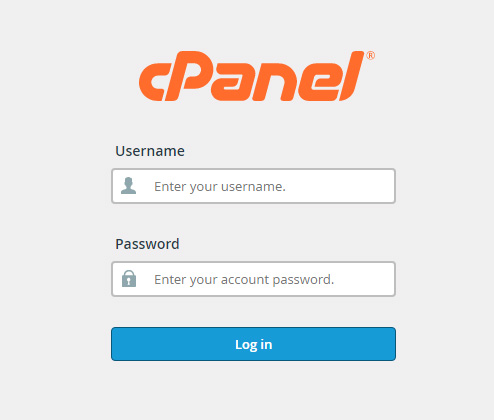
Since Softaculous needs an administrator area like cPanel to work properly, the first thing to do is to log in to cPanel:
- Go to https://www.yourdomain.com/cpanel, https://www.yourdomain.com:2083 or https://server-ip-address:2083
- Enter username and password.
- Click on the “Login” button.
After a successful login, try not to get intimidated by the dimensions of cPanel. This control panel usually contains numberless settings that grant you access to everything server related. Just for now, forget about all other options and focus on the Softaculous installer that will help you install WordPress.
To find the Softaculous tab, please scroll all the way down (in most cases, Softaculous will be one of the last tabs in cPanel) and open the WordPress script.
If you are interested in the details, you can switch between tabs to see screenshots, demo, ratings, and more about the WordPress script on the installer. When ready, click on the “Install Now” button or switch to the first “Install” tab.
Software setup
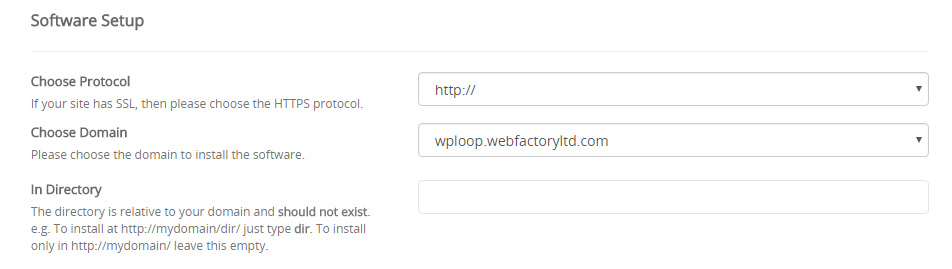
Choose a protocol that will be used for your new site. By default, the setting will show the HTTP protocol. But if you have an SSL certificate for your site to make it more secure, you should choose HTTPS protocol here. You can also decide if you are going to use “www” in front of the address. If you are not sure about all this, ask your provider for details or simply leave the HTTP protocol for now as you can to change these details later on.
Select the domain on which you want to install WordPress. If this is your first site, you probably have just that one domain that you purchased so keep it selected. But in case you have more than one domain, be careful when deciding where to install WordPress.
Pick a directory where you want to install the files. To install WordPress in the root directory, leave this field empty. If this is the only site you are going to have on the server, we suggest leaving this field empty.
Site Settings
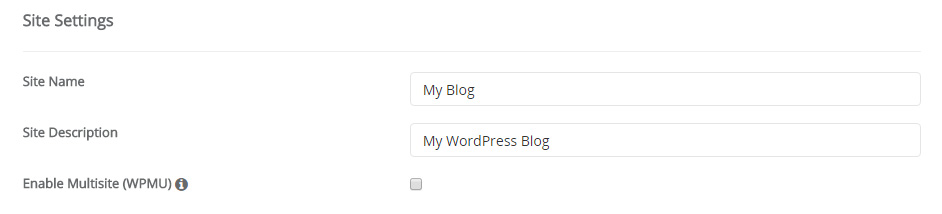
Choose a name for your site and give it a short description. Since these are options that you can quickly change in your WordPress settings at any time, don’t stress too much about what to write.
If you plan on activating a WordPress Multisite, this is the place to check the box. If you don’t know what a multisite is and this is the first WordPress blog you’re creating, just leave the option unchecked.
Admin Account
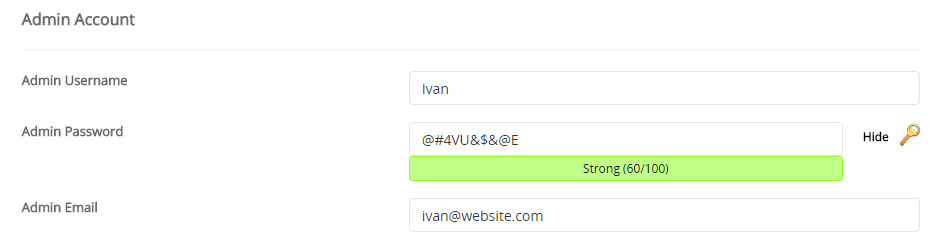
Quickly create the admin account that will enable you to log into your site and start working on it. We suggest to replace the standard “admin” username for security reasons and choose a unique one that will represent you. Use your name or nickname for example.
Generate a password for your profile and make sure that you keep it private. If you are not creative enough to come up with a strong password, click on the little key icon on the right side. WordPress will then automatically generate a strong password that contains various letters, numbers, and characters in order to create a secure password that’s hard to guess.
Before adding your email address in the next field, make sure to remember or write down the username and password as you will need to use them to log into the blog after the installation.
Choose language

Although English is the default language for WordPress, you can change it here. Select any other language available from the list if you want to.
Select Plugin(s)

The Softaculous installer might offer one or several plugins that can be installed simultaneously with WordPress. We suggest that you skip this option as you can always install plugins manually. But if there’s a plugin that you have previously used on other sites and want to continue using, tick the box next to its name.
Advanced Options
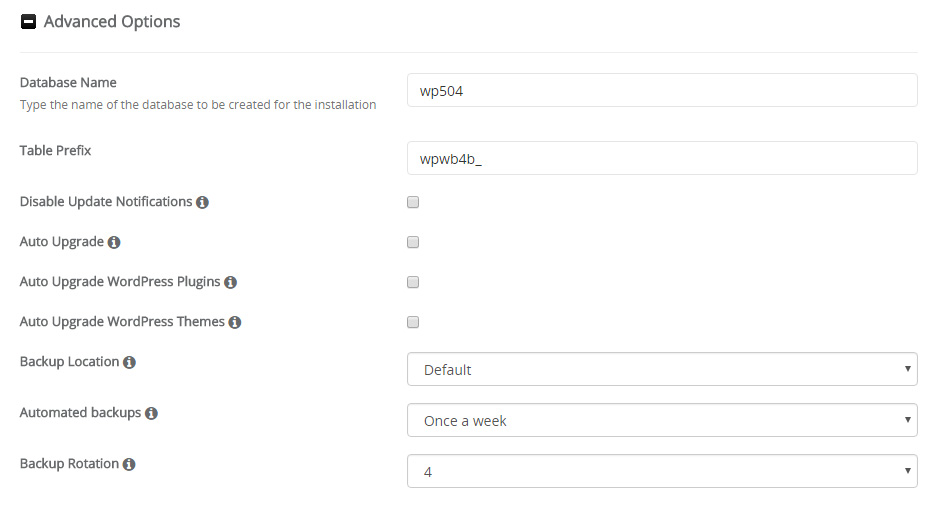
These extra options affect the databases that WordPress uses to function properly. By default, Advanced Options will be hidden. If you are a beginner and don’t understand these options, we suggest skipping them altogether.
Here you can write a custom database name and prefix. However, the ones that Softacoulus generates are more than adequate and safe to use, so there’s no need to change them.
If you don’t want to receive notifications about updates, choose that option.
The installer allows you to select options to automatically upgrade WordPress, plugins, and themes. While it might sound like a good idea, we strongly suggest keeping these options unchecked. Automatic updates may sometimes cause problems, and you may lose all modifications that you’ve done to specific themes and plugins. You can always turn them back on if you need to.
Choose a backup location (we suggest leaving the default one) and select if you want the installer to generate backups of your site automatically. If you have the option, feel free to check it. Once you decide how often you want to create backups, you can relax knowing that you can periodically revert to old settings just in case something bad happens to your site. If you select a number next to the backup rotation, Softaculuos will keep track of the number of backups. If the limit is reached, the oldest backup will be automatically deleted to make room for the new one.
Select theme
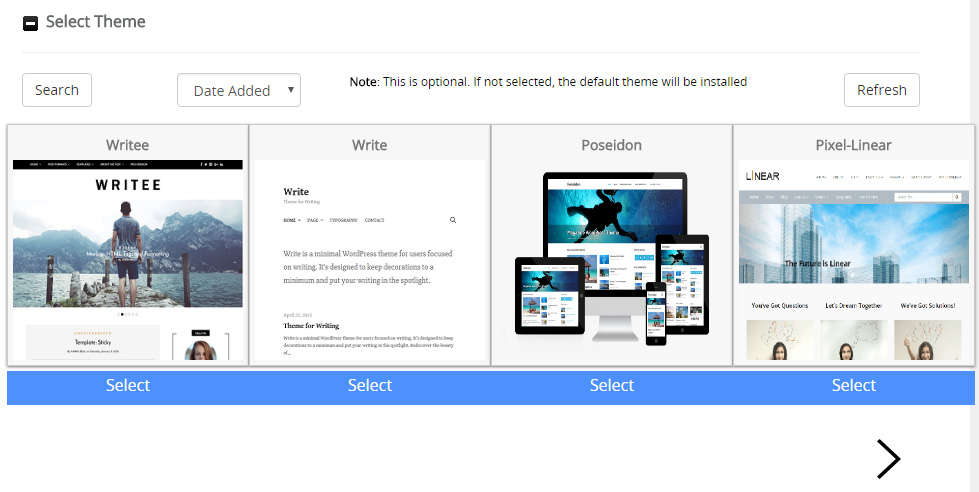
Even before installing WordPress, the application lets you choose a theme that will become active on the new blog. While you can choose one here, this is optional as you can always install new themes via WordPress at any time.
Install
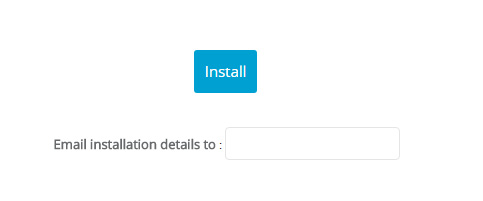
Before clicking on the “Install” button, go through all of the options one more time and confirm that every piece of information is correct. Then scroll back down, enter your email address if you want to receive confirmation, and click the button.
You are now free to navigate to http://yoursite.com where you should see the new website. To log in to your site with the admin credentials you created, please open http://yoursite.com/wp-admin.
Installing WordPress manually anywhere (advanced)
Unlike using the installer that does practically everything for you, it is possible to install WordPress on your own. It only takes a few steps to install WordPress manually, but it is just a little bit more complicated than using an installer like Softaculous.
Since the process of manual installation can be divided into a few segments, let’s go one step at a time to make everything easier. Ready?
Download the latest version of WordPress
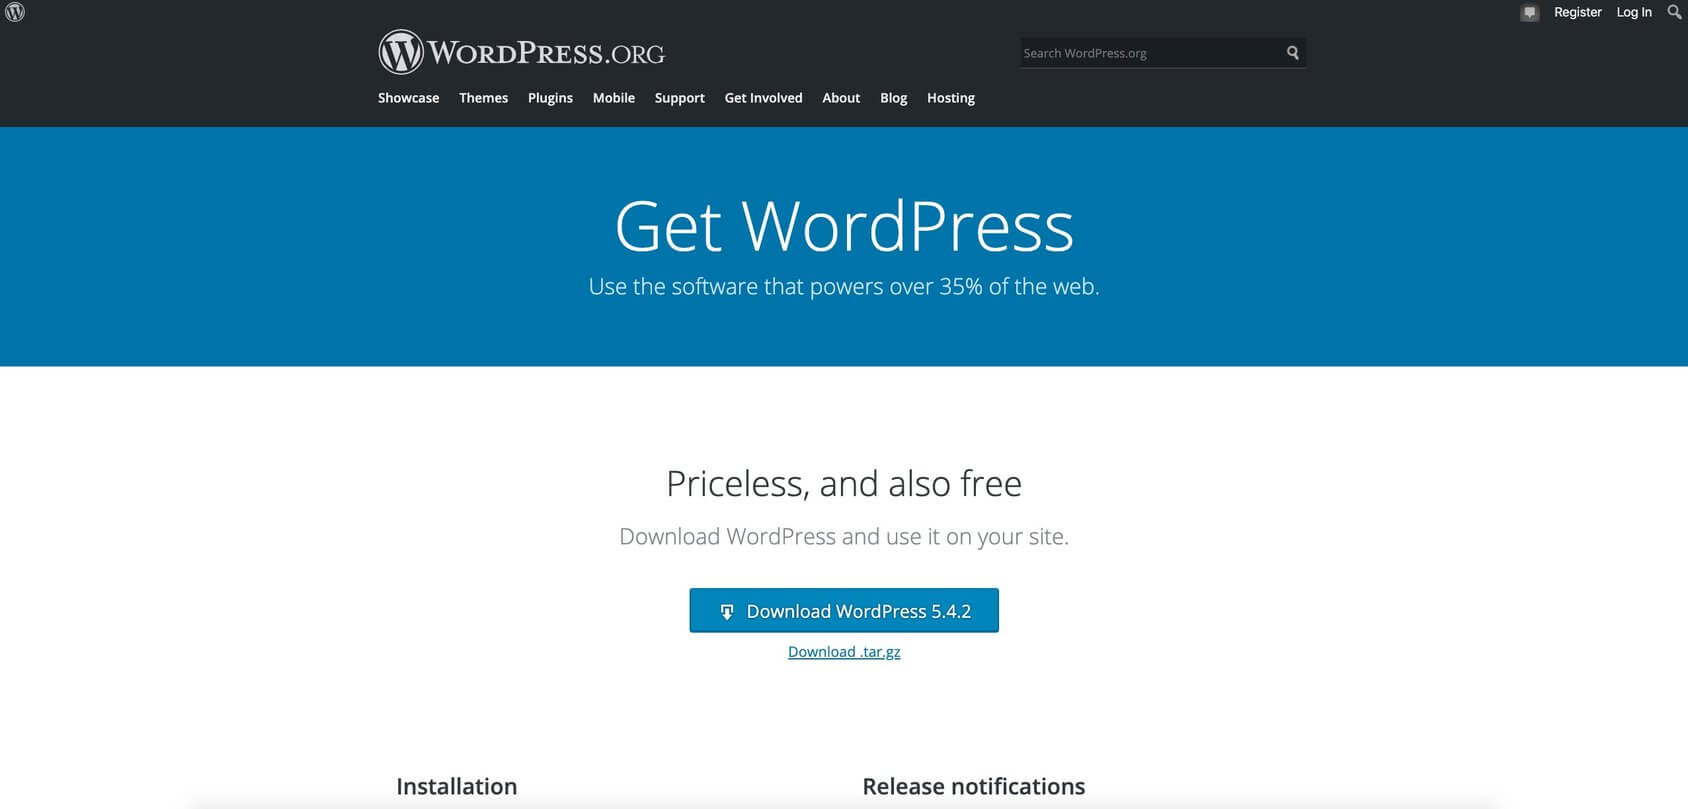
- Go to WordPress.org/download.
- Click on the blue “Download WordPress” button.
- Save the latest version of WordPress to any location on your computer.
- Wait for the download to complete.
- Extract the ZIP file (you should have one folder named “WordPress”).
Upload WordPress to your server
This step requires you to connect to the FTP server. Before connecting, you should have FTP credentials from your hosting provider. Usually, you will receive all of these details in the welcoming email once you register an account with a hosting company. If you can’t find the email, the information should be available in cPanel.
- Visit https://www.yourdomain.com:2083 or https://server-ip-address:2083.
- Log in to cPanel.
- Navigate to Files category.
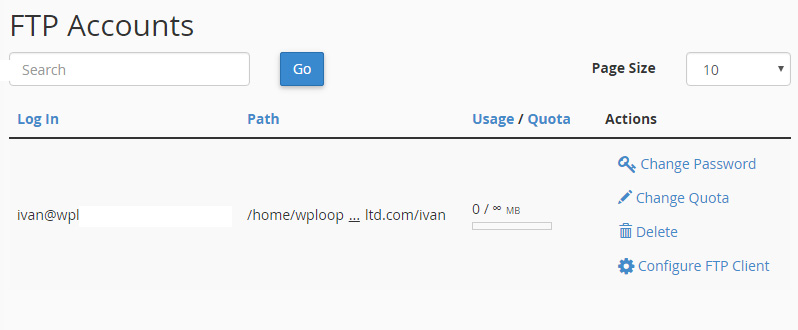
- Open FTP accounts tool.
- Scroll down to the list of all FTP accounts.
- Find the admin FTP account.
- Click “Configure FTP Client” to see the credentials.
If you don’t have an FTP account, you can create one from the same page.
When you have the credentials ready, it is time to upload WordPress files to a new server:
- Open FileZilla or any other FTP client.
- Connect to FTP server.
- Select all files from the “WordPress” folder you downloaded and extracted earlier.
- Drag selected files from the computer to a “public_html” or “www” folder located on the server.
Create a MySQL Database
WordPress uses databases to manage your content. So, to make everything work, the next step is to create a MySQL Database and User:
- Go to cPanel: http://yourdomainname.com/cpanel.
- Open MySQL Databases.
- Enter the Database name of your choice.
- Click on the “Create database” button.
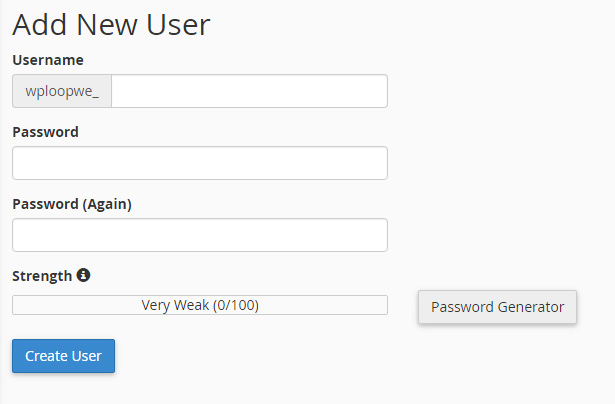
- Scroll down to MySQL Users interface.
- Enter a username, password and click the “Create User” button.
Completing the installation
This is the last step. You will need to input a few details about the database and your site.
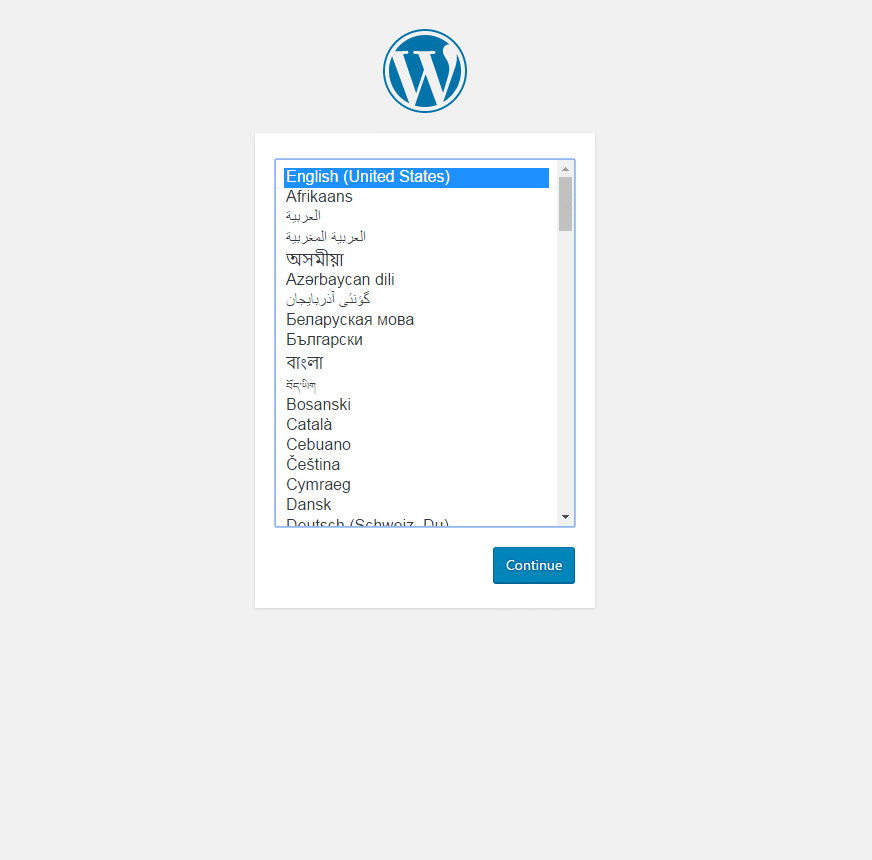
- Open a browser and go to http://yourdomain.com.
- Select the language you want to use for the site.
- Prepare the following information: database name, username, and password you created.
- The host should stay “localhost” for most hosting companies.
- Choose any table prefix or leave the default one.
- Click the “Let’s go” button.
- Enter all the details about your database and click “Submit”.
- Click the “Run the Install” button.
- Enter the title of your site, choose a username and password for WordPress login. Fill in the email address and check whether you want search engines to index your new website.
- Click “Install WordPress”
- Log in and enjoy your new site
Conclusion
Although installing WordPress might seem complicated, the truth is that everyone is capable of starting a blog on their own. Whether you decide to use an installer like Softaculous or to transfer the files manually, you should have the new site up and running in a matter of minutes.
After WordPress is installed, the fun can begin and you can start customizing the website in detail. Good Luck!
3 comments on “How to Install WordPress CMS (Step-by-Step Tutorial)”
Leave a Reply

Best instruction! Clear and thoroughly explain. Cheers!
Thank you Dean!
[…] have finished installing WordPress. You might have even chosen a perfect theme for the new site and started to customize the details. […]