How to Use Categories in WordPress
WordPress categories are a way of grouping posts on your WordPress blog. They are just one of the taxonomies that WordPress uses to organize content on the website. Since we are talking about taxonomies, this is the perfect time to get acquainted with the term, before you get scared of it.
Basically, that’s all you have to know – taxonomies are a way of grouping things together. You can create as many taxonomies as you need, but that requires custom code or plugins. Default taxonomies, that are used to group posts, are categories and tags.
Even if you are not aware of that, you have already encountered categories on other sites. Usually, they are the central part of navigational menus, and they allow you to find content that’s interesting to you. For example, online stores usually have categories that group products that fit into clothes, shoes, technology, art, sport, etc.
Before you start physically adding and managing WordPress categories (which is the easier part), take your time to organize the content in your head and also on the paper. If you’re about to make a website with numerous topics of interest, it is crucial that you think about the structure of your site in advance. To follow the same example of an online store, do you need just the clothes category or should you have separate subcategories for shirts, pants, dresses, and so on? We will leave the planning part to you, and focus on how to work with categories and tags in WordPress.
How to add categories in WordPress

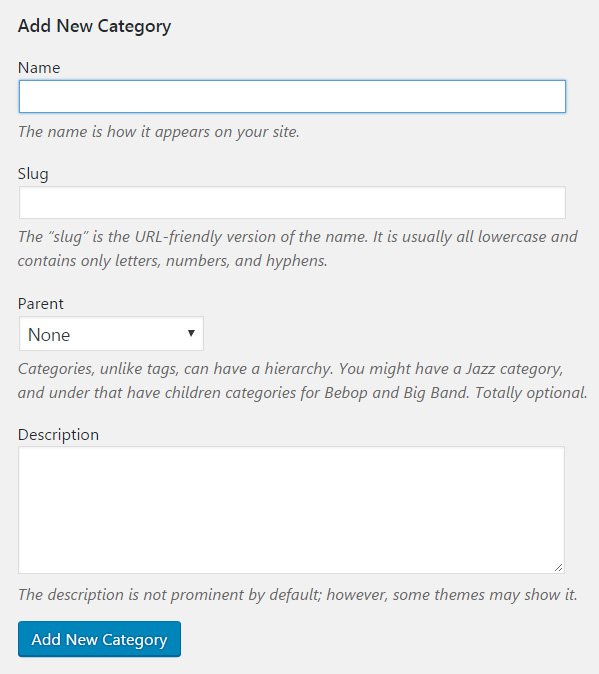
When you’re ready to work with WordPress categories, please navigate to Posts -> Categories. Creating your first one requires you to fill in just four fields:
- Name – the name how it appears on your blog
- Slug – URL-friendly version of the name. It is usually all lowercase and contains only letters, numbers, and hyphens (leave it blank and WP will auto-generate this field from the name you enter)
- Parent – Since categories can have a hierarchy, choose the order of categories and subcategories by selecting their parent items, if you want to
- Description – describe the topic. Depending on the theme you use, it may be shown on categories pages; this is an optional field
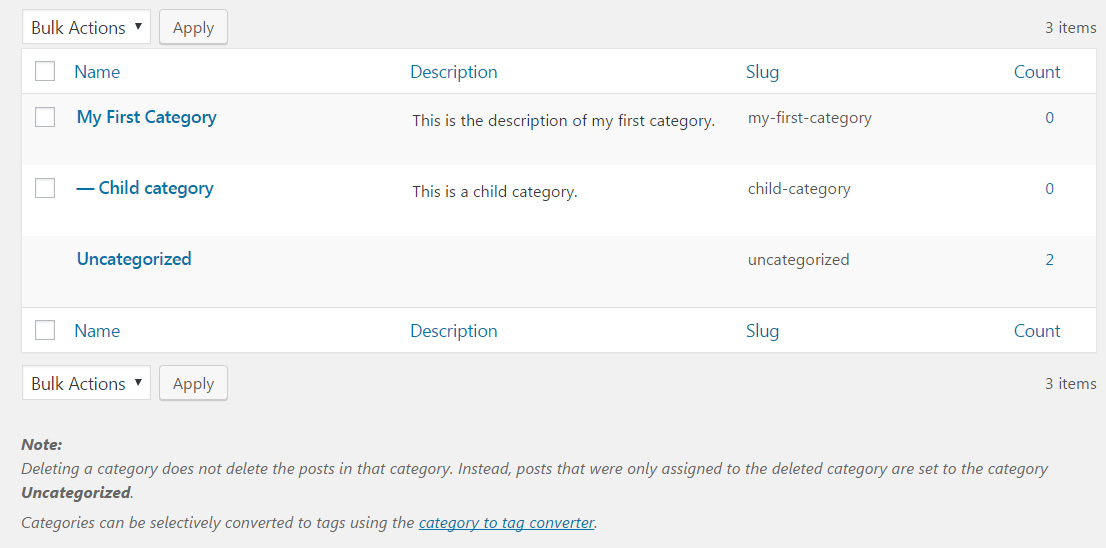
Once you’re happy with it, click the “Add New Category” button at the bottom of the screen. After that, your new WordPress category will appear on the list on the right side of the screen.
This list will display all the categories you currently have. Besides the information you have just filled in, you will see the number of posts that fall into that particular category.
Alternatively, you can add new categories directly from the post edit screen. In this case, WordPress will show you a simple form that lets you enter the name and parent for your new category. While this is a faster way of adding new taxonomies while writing posts, you should still manage the new category to edit its slug and description.
Child categories
Child categories are categories that “depend” on another category known as their parent.
If you have a broader group that needs to be segmented into smaller sections, you should use child categories. Those are subordinate to the parent ones.
For example, if you publish a “Clothes” category, you can create “Shirts” as a child one, “Pants” as another one, and so on.
It will have a different permalink structure as it will contain the parent slug in it. In this example, a parent category would have a permalink www.yoursite.com/clothes while the child one would be accessible from www.yoursite.com/clothes/shirts.
How to manage categories

On the same page where you created a new category, put the cursor on any listed item. Three new links should appear just below the name of the selected group:
- Edit – opens a page where you can change the name, slug, parent, and description
- Quick Edit – without opening a new page, modify the name and slug
- Delete – permanently remove the category. You can’t remove the default one
- View – opens a page which lists all the posts assigned to that category
Deleting a category does not delete its posts. Instead, articles that were only assigned to the deleted category are set to the default one.
Bulk options can help you with managing multiple items at once. Select those you wish to delete and choose “Delete” from the “Bulk Options” menu.
Default category
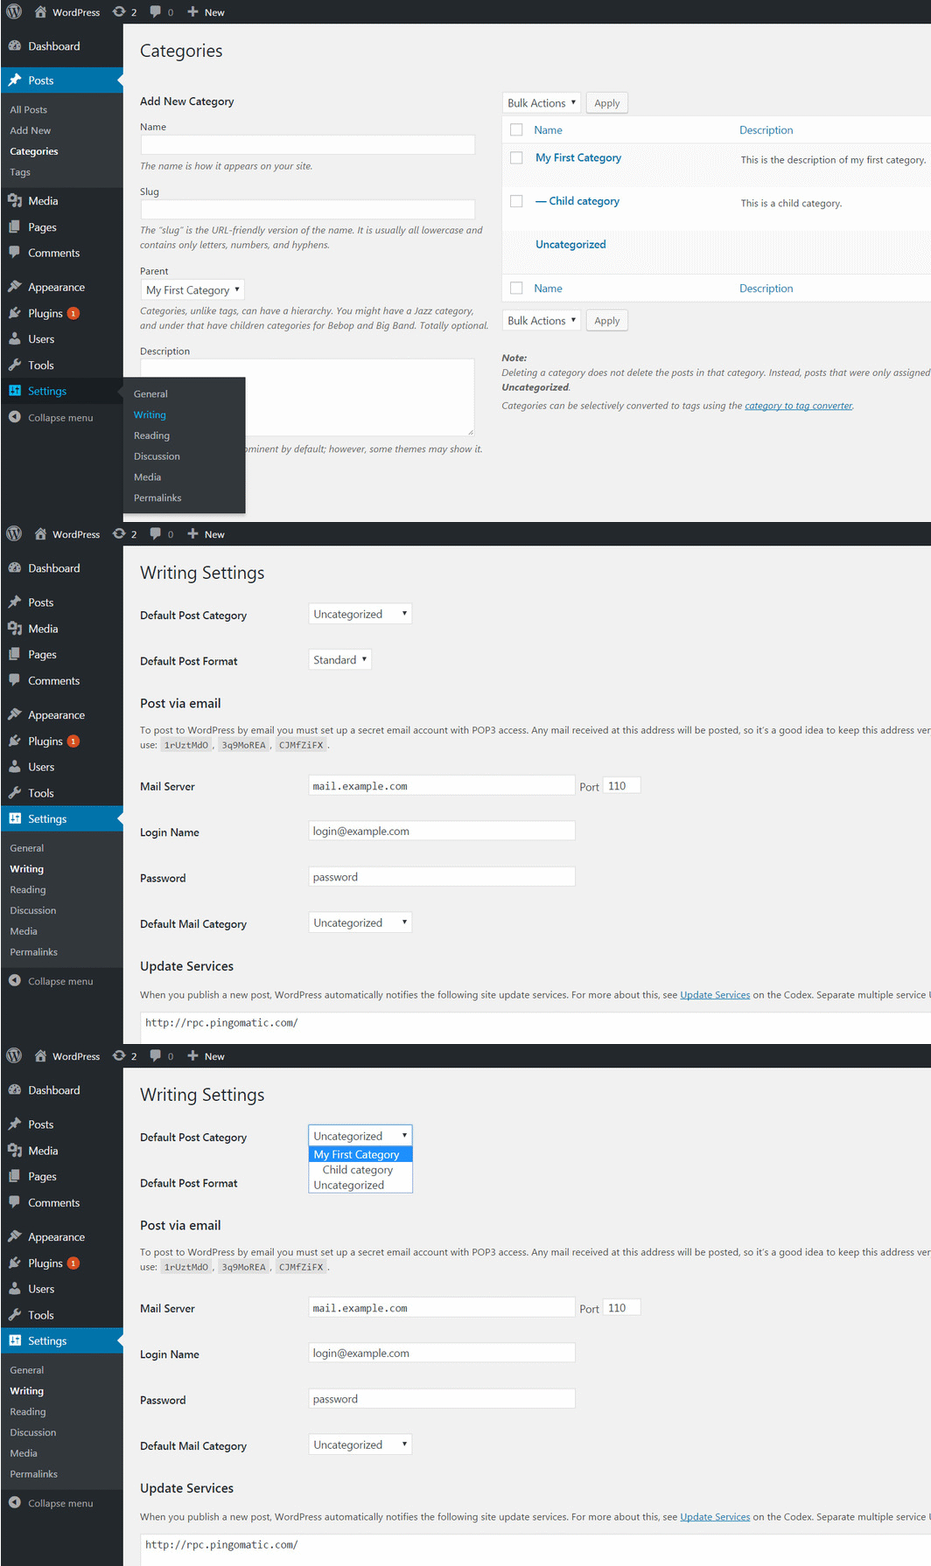
In order for WordPress to work correctly, there has to be at least one available category. By default, that’s the “Uncategorized” category which cannot be deleted, but you can easily rename it. If you publish a new post and forget to select a category for it, WordPress automatically assigns it to the default one.
The default category can be changed. When you create at least one new category, navigate to Settings -> Writing. The topmost option lets you change the default post category for your blog, and we strongly suggest that you change it or at least rename the “Uncategorized” one.

How to display categories on your WordPress site
Usually, WordPress displays categories in the navigational menu or widget. You can show them both if you want to. Please see how to work with WordPress menus and widgets to learn how to manage them.
How to convert categories to tags
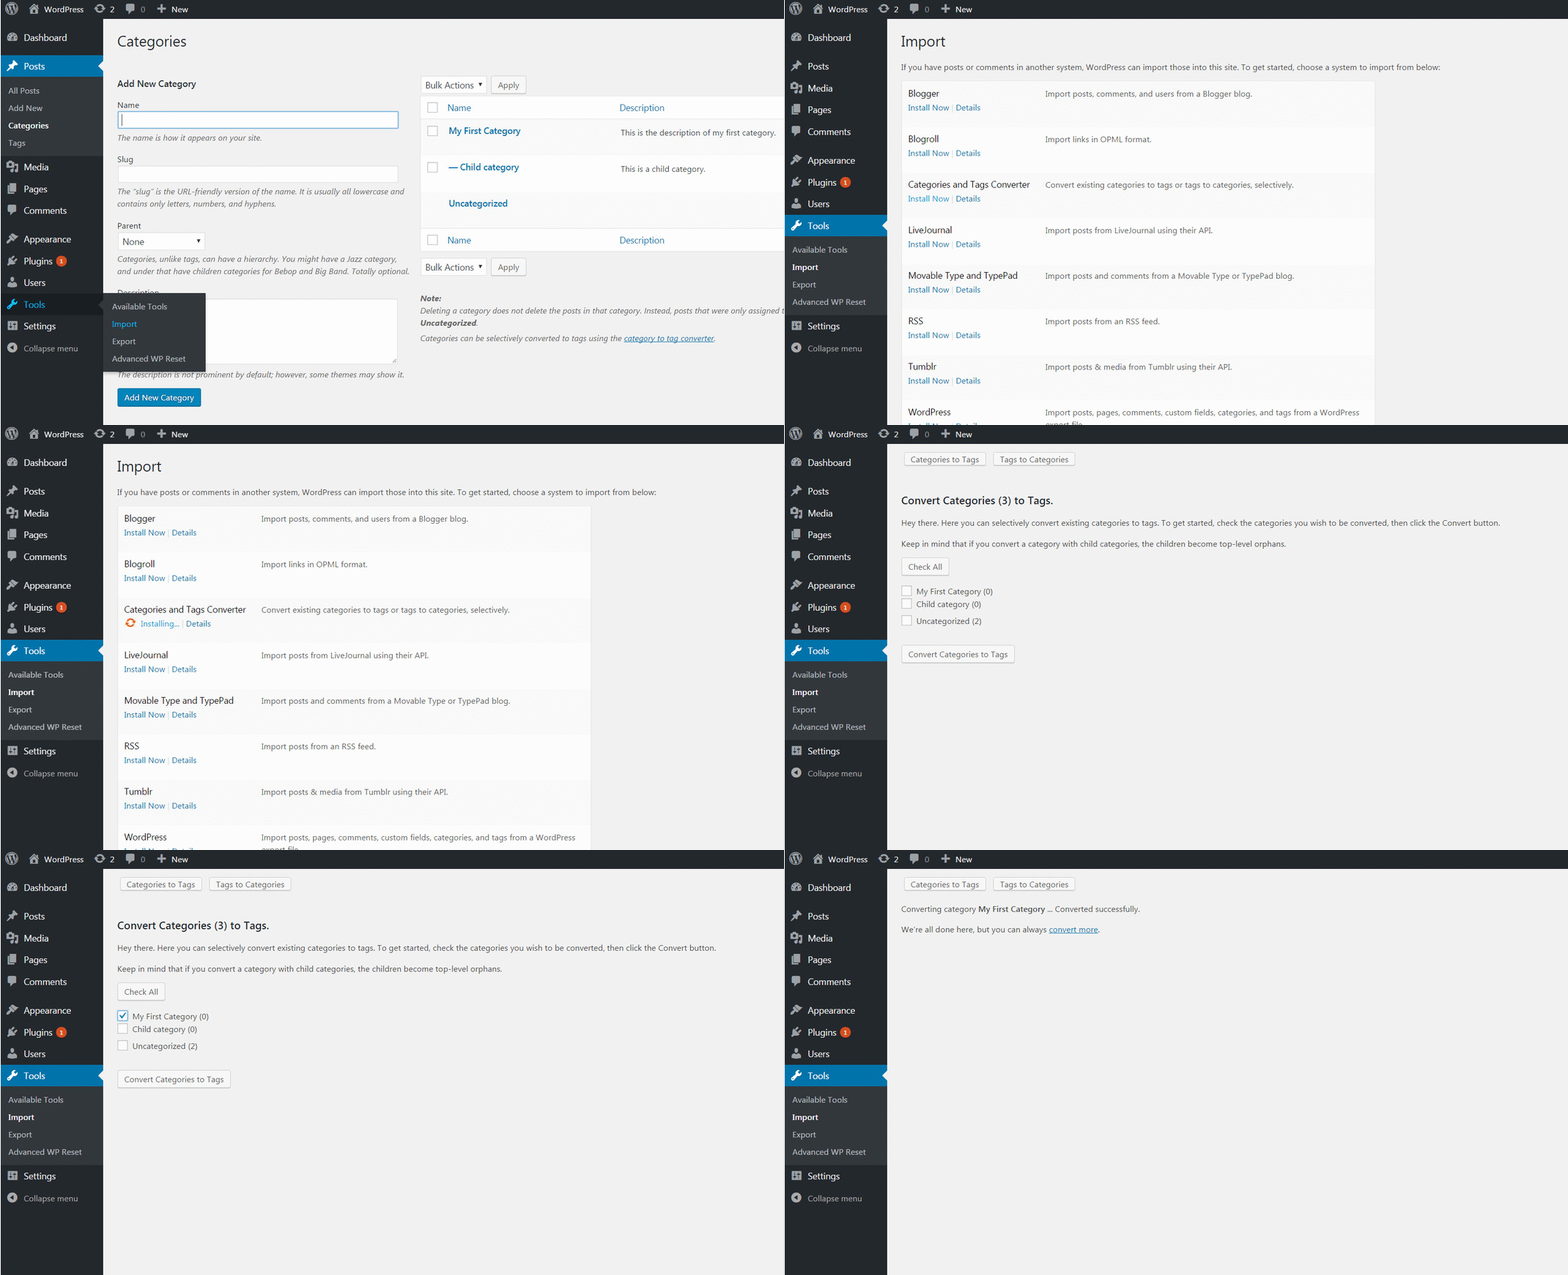
There are two default WordPress taxonomies that you can use to organize content into groups. Since there are slight differences between categories and tags, it is good to know that you can convert categories to tags and vice versa. For this to happen, you will have to install a plugin:
- Navigate to Tools -> Import
- Find “Categories and Tags Converter” (should be the third one from the top)
- Click “Install Now”
- Wait for a few seconds until new link appears
- Click “Run Importer”
- Select categories that you want to convert to tags
- Click “Convert Categories to Tags” button

What have we learned
Categorizing content is important for every website. It’s crucial not only for SEO but for the usability of the whole site. Plan your categories ahead so that you don’t need to change them all the time. And unless you have thousands of articles we suggest having a limited number of categories, ten at most. In this article, you’ve had a chance to learn how to add new categories and manage them through a single page. Once you add all categories that you wanted, you should display them in your navigational menu or a widget. As there are differences between categories and tags, WordPress allows you to convert one to the other just by clicking a button.