
Did you know that an active comments section helps users to engage and interact with your blog posts and one another? Blog comments have been recognized as an essential part of the WordPress core service. It is a perfect way for WordPress users to know whether their content is useful for their readers or not.
Blog comments are essential because readers can provide their perspective about a topic, like with news articles. Also, if your readers are sharing their thoughts and insights about your site, that will ultimately enhance your site’s value in the long run. Most visitors love to read the comments section first to know if your blog is worth reading.
You might not know how to handle the comments section in WordPress. It is essential to understand how to manage WordPress comments, avoid spam comments, and many other related things to make your comments section more friendly and interactive.
In this article/guide, you’ll learn how to manage and approve comments, edit and moderate comments, enable and disable comments, and what is an avatar. Before moving into details, let’s discuss what is meant by comments in WordPress and why comments are essential for your WordPress blog.
What are the comments in WordPress?
With WordPress comments, your readers can leave written comments on blog posts and pages to interact with site owners and other visitors.
In WordPress, comments are enabled by default to let readers/audience share their thoughts on content quality and usability.
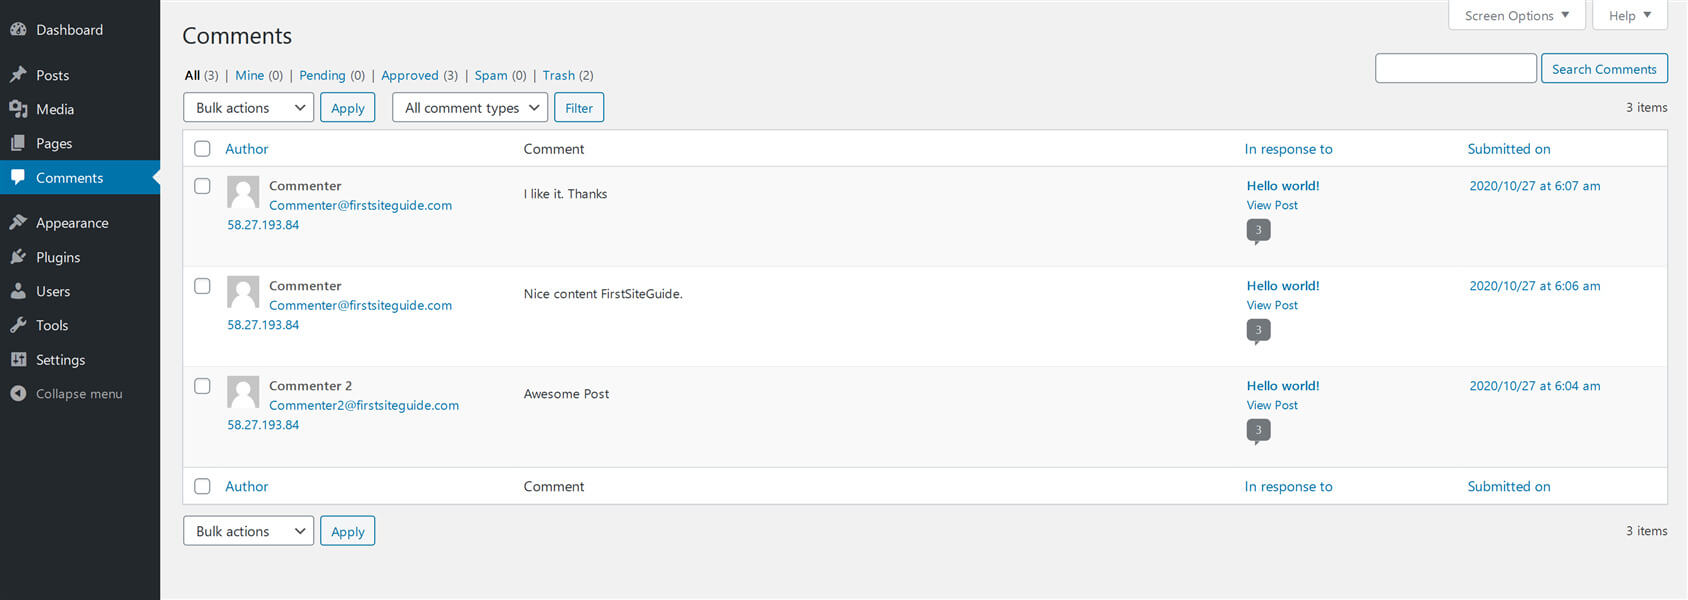
Comments appear on your website under the blog posts, along with the user’s name, the date, and the time they wrote the comment.
An engaging and interactive comments section helps to build a strong community or a network of people who can provide feedback/opinions (positive/negative), ask queries, expert discussions, and much more, thereby increasing your blog’s credibility.
If you’re responding to readers promptly, your website will appear lively, thereby creating more value for the users. It is essential to manage your comments section effectively to prevent inactivity and keep the conversation going.
[VIDEO] Managing Comments: ► Subscribe for more useful videos
Let’s discuss how to manage and approve comments.
How to manage and approve comments – The comments screen in WordPress
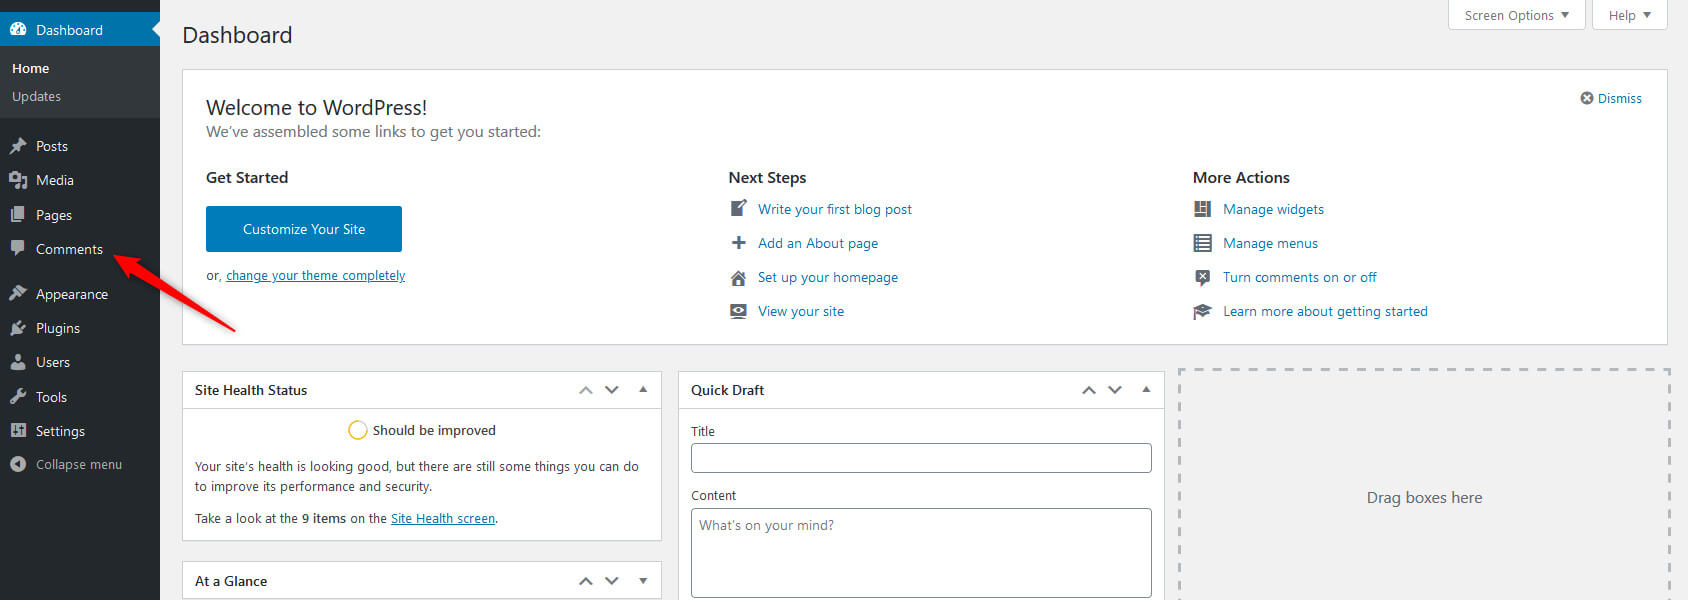
To access website/blog comments, hover your cursor over the left-hand sidebar of the Dashboard/admin area and click on “Comments.”
By default, it shows all comments.
However, you can view Pending, Approved, Spam, and Trash comments by clicking on them one by one.
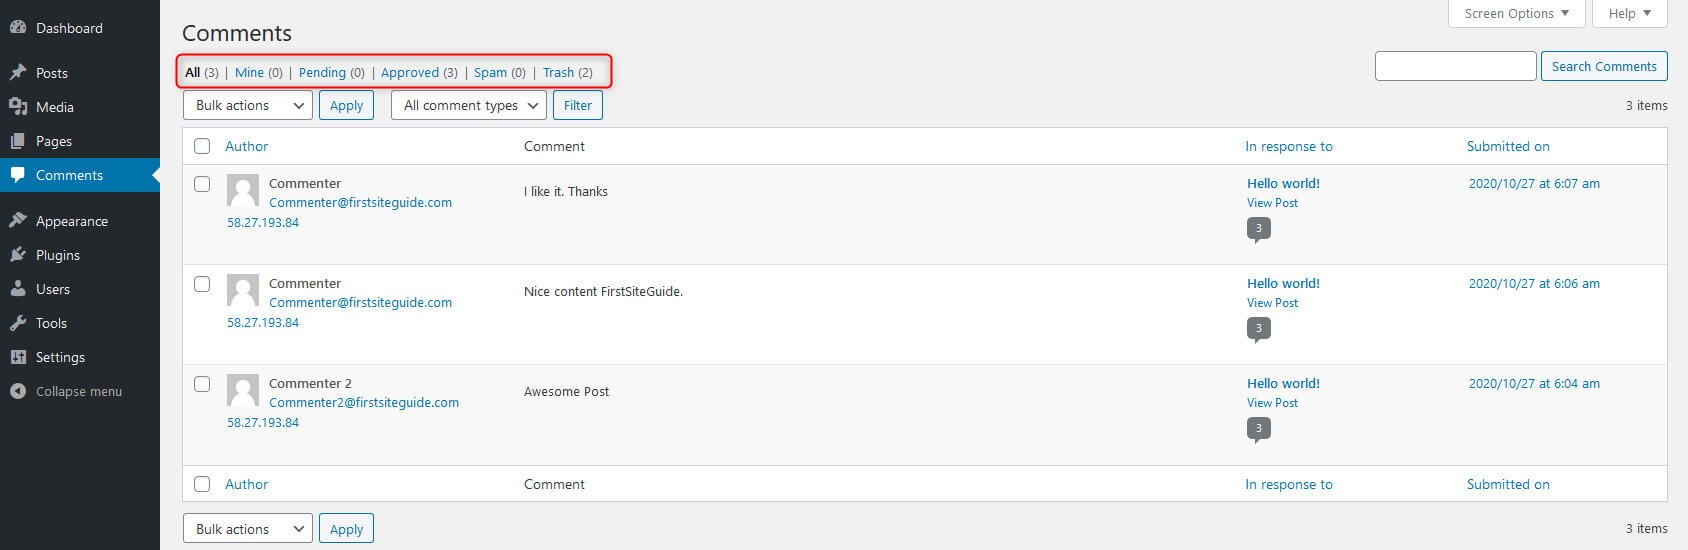
The comments that have been written by readers but yet not approved by the admin move to the Pending comments section. WordPress doesn’t show these comments on your posts unless you approve them.
Once Approved, comments become visible to all website visitors.
The irrelevant comments have been marked as flagged and aren’t published under your blog posts. WordPress displays those comments under the Spam folder as relevancy is vital in blog commenting. If a user comes to your site to add a link to his site, it might go into the spam folder.
If you see real comments displayed under the spam folder, you can mark it as Not Spam by hovering your cursor over it.
Any unwanted comments that have been deleted by the admin go to the Trash folder and will be permanently deleted by WordPress after 30 days.
If you accidentally delete a comment, you can still restore it from the Trash section, as it displays all of the comments deleted by admin.
Hovering the cursor over a particular comment displays options to approve or unapprove that specific comment to make it visible to all readers or put it into pending status, respectively.
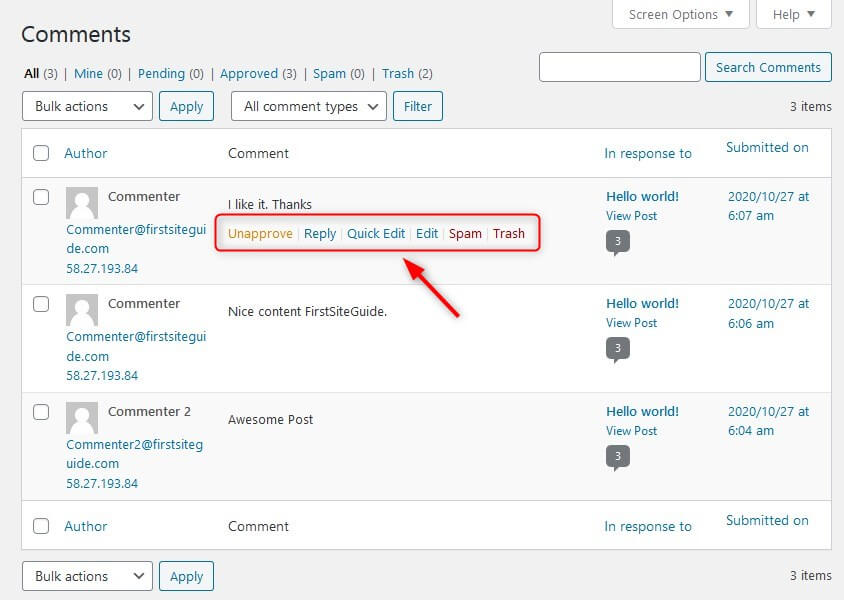
WordPress also lets users reply to other users’ comments to make your blog lively and engaging. When a site owner responds to a specific query or comment, the reply becomes visible below that comment. This is known as “threaded” or “nested” comments.
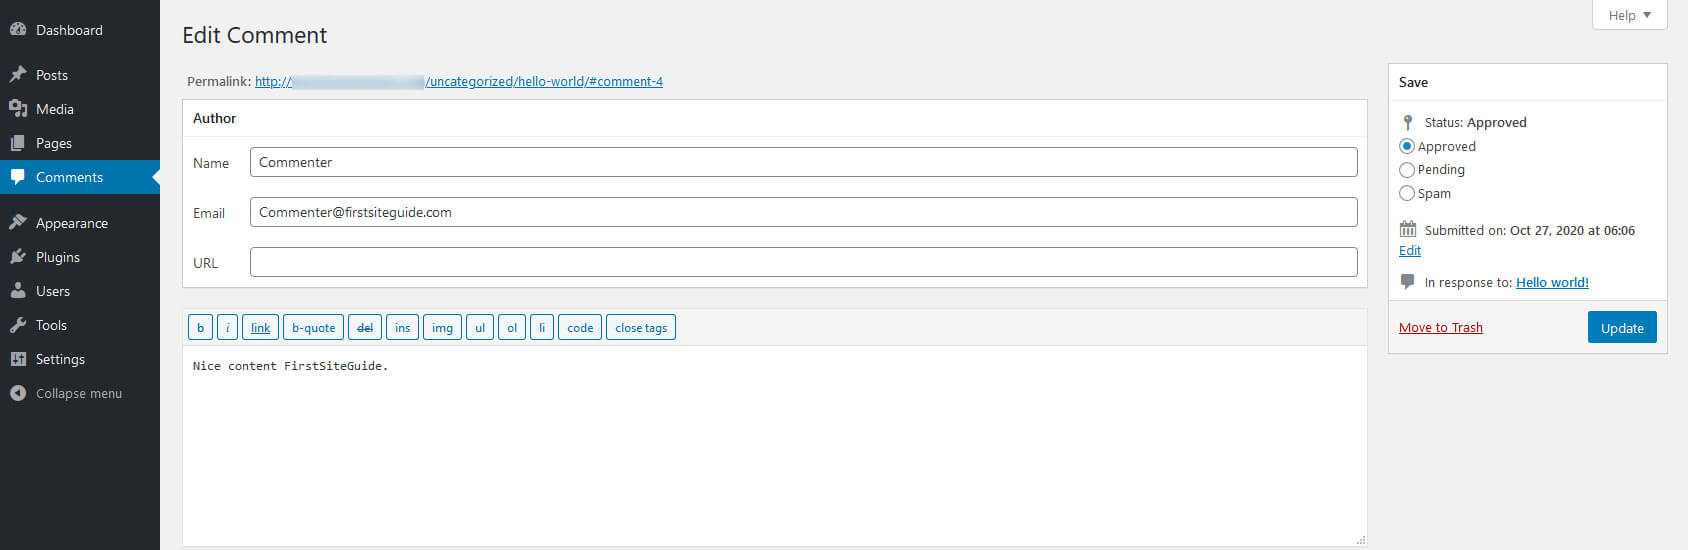
WordPress also permits you to edit users’ comments on your website via two options: Quick Edit and Edit.
The Quick Edit opens a screen that lets the admin edit the comment without reloading the page.
However, the Edit option gives you more options to edit the name, user email, and more.
Discussion settings in WordPress
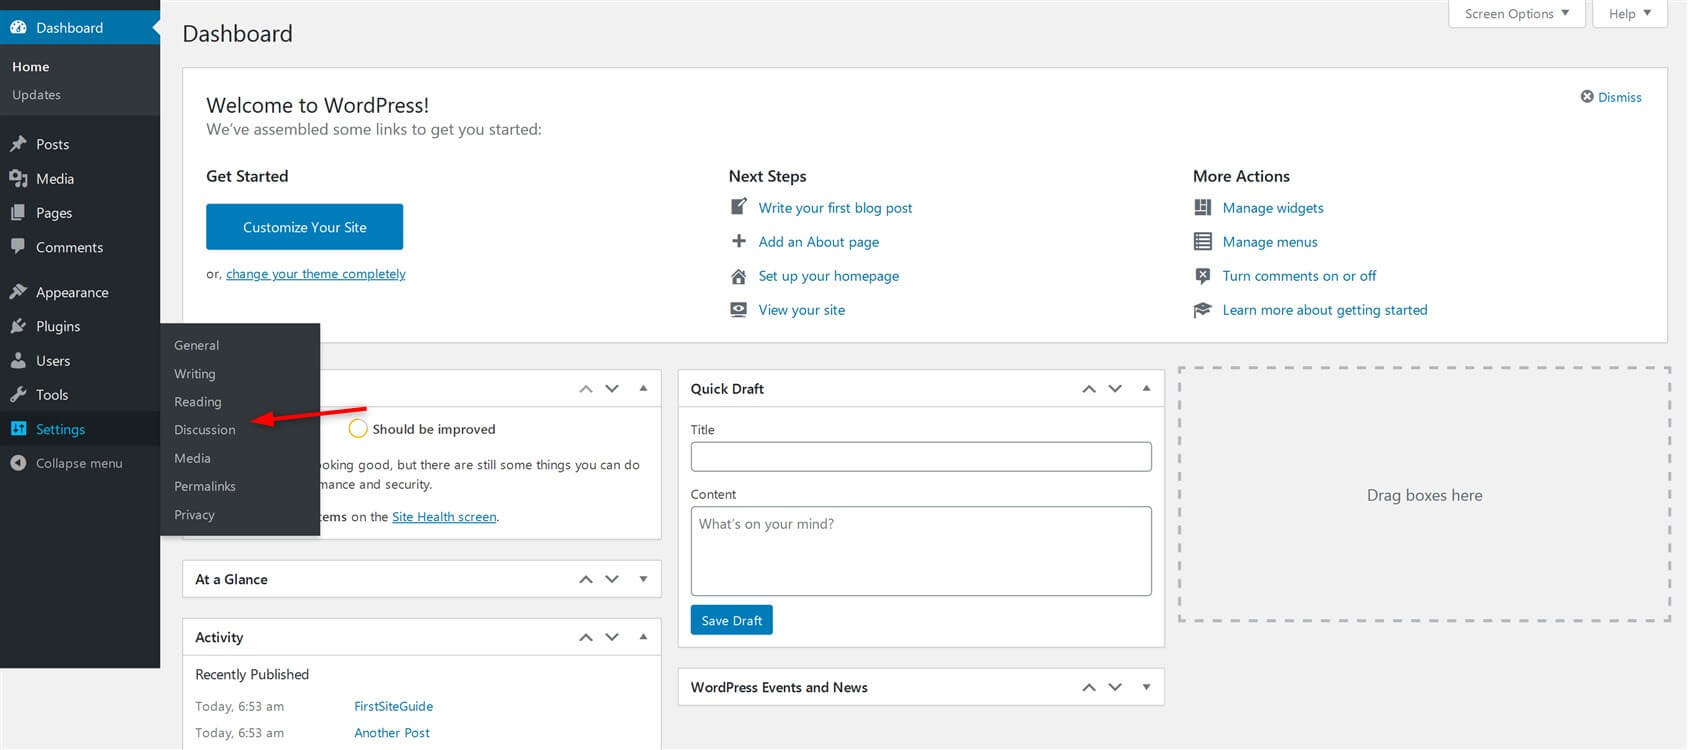
You can configure settings for WordPress comments from the Settings tab on the dashboard’s left-hand sidebar. Go to Settings > Discussion.
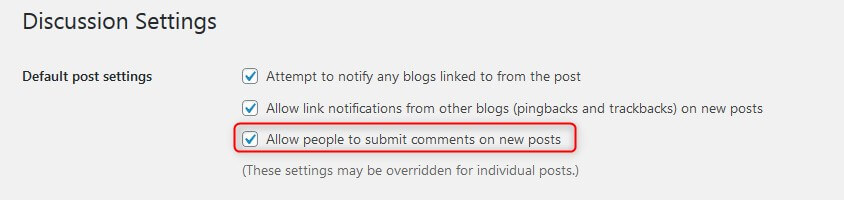
The first section includes Default post settings.
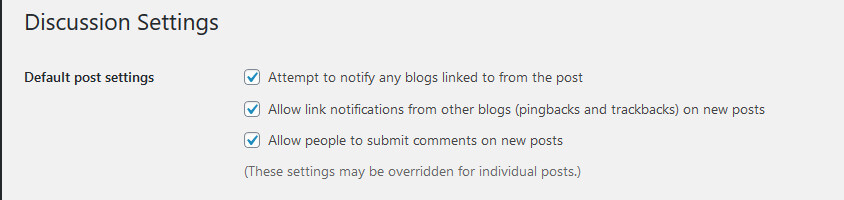
Enable/Check “Attempt to notify any blogs linked to from the post” means you’re linking to another site article on your site. Checking this box also notifies the site owners that you’ve linked to their content. In turn, they have an option to tell their visitors that your site is linking to them via trackback or pingback.
If the article/blog post you’ve linked to is employing a pingback-enabled system like WordPress, then the site will be notified with a link to your post. Then that site owner can decide whether they are willing to show your trackback in their site’s comment section or not.
Checking “Allow link notifications from other blogs on new posts” enables your site to receive pingbacks and trackbacks from other websites. These pingbacks will be displayed below the comments screen. Whenever you link any of your content in a new post, pingbacks will be visible there too.
Not every WordPress website needs to have the comments section enabled. Uncheck the box next to the “Allow people to post comments on new articles” option to disable comments on your site.
However, keep in mind that disabling comments will not remove the older or already published comments from your site. It will simply not let users post new comments going forward. Also, you can re-enable them comments at any time if you wish. This option can also be overridden for specific posts or pages. How? We will explore that a little later in this article.
How to moderate comments in WordPress
A WordPress feature that lets the site owners approve or delete comments posted by people on their site is known as Comment Moderation. Change Comment moderation settings from Settings » Discussion screen.
Go to Settings » Discussion and check the box “Comment must be manually approved” to enable moderation.

This function is essential to avert harmful, abusive, or spam comments from getting published on your website. Comment moderation and plugins like Akismet can considerably reduce the chances of any spam comment getting posted on WordPress sites.
Who can comment on a site (Registered users/anyone)
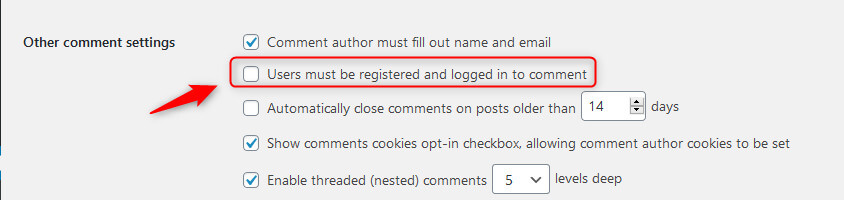
Hover your cursor over settings on the left-hand sidebar of the dashboard screen and click on the discussion. From “Other comment settings” on the Discussion settings screen, check the box after “Users must be registered and logged in to comment” to allow only registered users to comment on your posts. However, if you leave the box unchecked, then any user (registered or non-registered) can comment.
Receive email notifications for WordPress comments
There is one more setting on the discussion settings screen named “Email me whenever.” This will enable the author to receive an email notification whenever a visitor comments on the post.
Check the box for “Anyone posts a comment” so that every comment posted will create an email to the writer of that post.
If you want to receive email notifications for comments that are being held for moderation, check the box “A comment is held for moderation.”

If you’re not receiving email notifications after enabling these settings, then go to Settings » General page to double-check that the provided email address is correct. If the email address is valid, then check your email spam folders.

How to Enable/Disable comments on WordPress posts
In settings
A WordPress site owner can enable/disable comments on blog posts under default article settings on the discussion settings screen.
Check/Uncheck the box next to the “Allow people to post comments on new articles” option to enable/disable comments on your entire site.
In a post
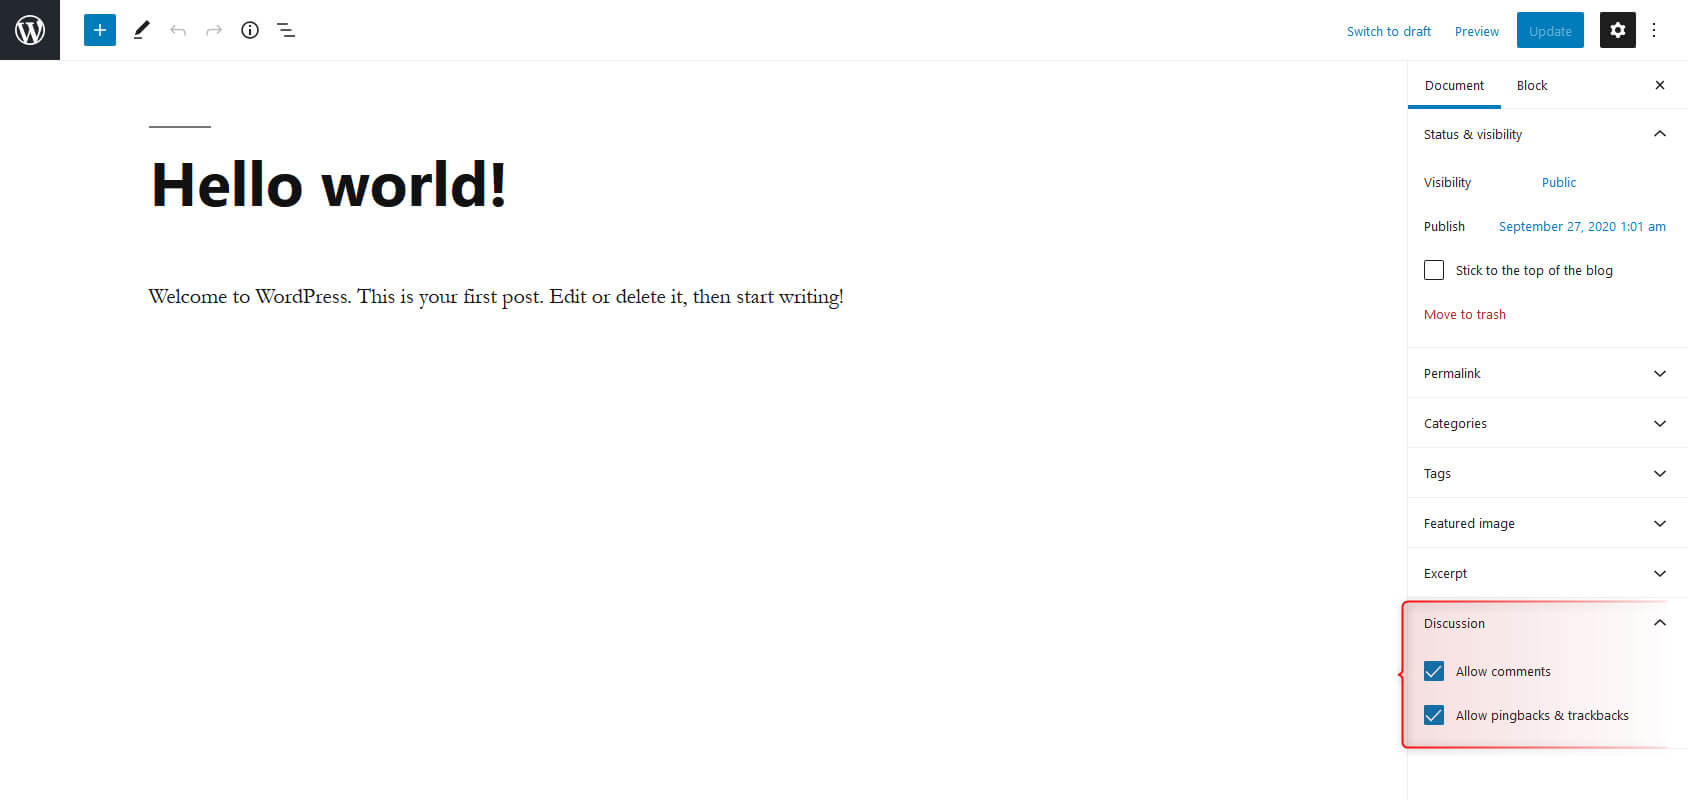
You can enable/disable comments on a specific post you’ve already published or even while editing that particular post by hovering your cursor over the document sidebar and then clicking on the “Discussion” tab to enable/disable comments. Check/Uncheck the box to enable and disable comments, respectively.
For a group of posts
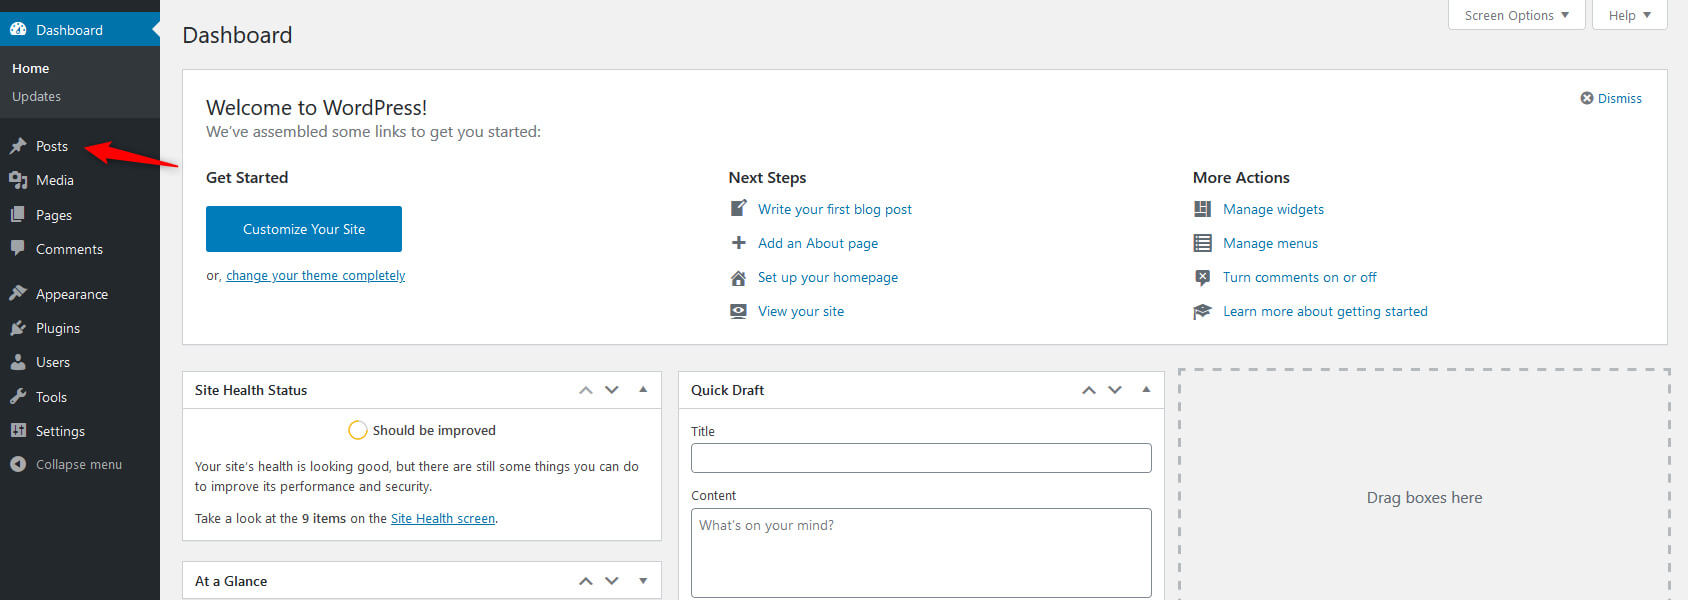
To Enable/Disable comments on multiple posts at once, you can use the bulk edit option that is provided by WordPress. To do this, go to the posts section by clicking the “Posts” menu item present in the left-hand sidebar of the dashboard/admin.
Select multiple posts for which you want to enable/disable comments by checking the checkbox field. After that, select “Edit” from the “Bulk actions” dropdown above and click on the “Apply” button. An edit screen will appear where you can edit different settings for the posts. You can enable/disable the comments on the posts from the “Comments” dropdown.
What Is an Avatar or Gravatar?
In the online world, an avatar represents the graphical identity of a user. It can either be the person’s profile image or a random sign representing that specific user’s identity.
For blog commenting on other sites, it is essential to have a commentator’s identity (avatar). To get recognition on any site as an active user, you need to register yourself on that site. Then you can add a picture (“avatar”) to your profile.
What happens in a case where blog commenting doesn’t ask for a subscription? How do we identify users? Well, that is where Gravatar comes in.
Gravatar (Globally Recognized Avatar) is a web-based service that allows users to use the same avatar image to brand their WordPress site on thousands of websites that use Gravatar. Gravatars.com is owned by a company named Automattic, established by Matt Mullenweg (WordPress co-founder).
WordPress will search for a Gravatar corresponding to an email address when visitors sign up on your site or leave a comment. If the user has already registered a Gravatar account with an image, WordPress will display this custom image in their profile picture next to their comments.
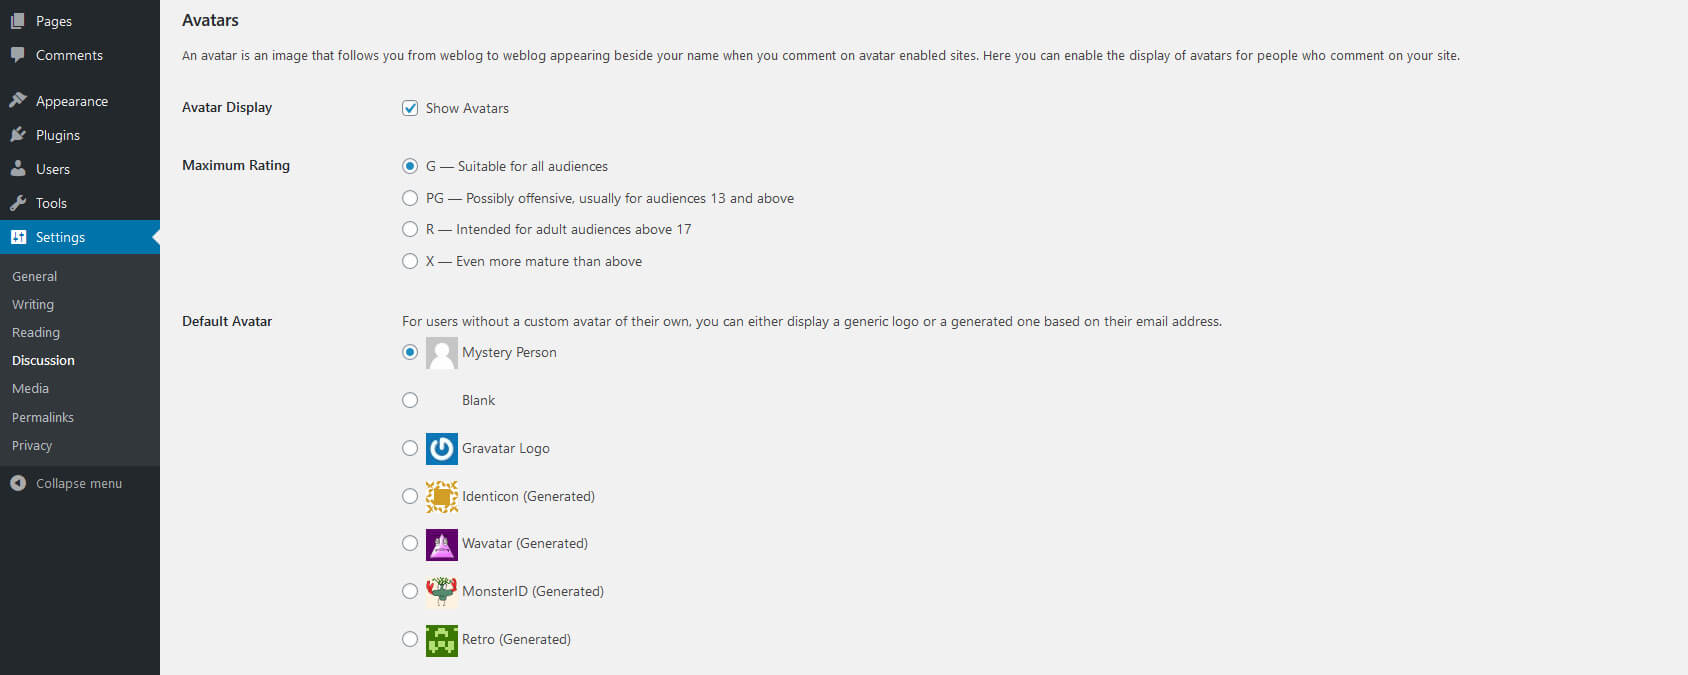
However, suppose a visitor’s email address doesn’t match a Gravatar account. In that case, WordPress shows a default Avatar image, also known as Mystery Person. You can change this in Settings » Discussion under the Avatar section.
Uncheck the “Show Avatars” option if you don’t want to use Avatar images on your website. When users register a profile on Gravatar, they are provided with the opportunity to choose the maximum rating for an Avatar image to display.
Users can rate their Gravatar image as G, PG, R, X by selecting the desired radio button. The default option is G, suitable for all visitors. However, suppose a user has been using an offensive Avatar image. In that case, Gravatar will automatically display the Gravatar image that you have set as the default on your website.
Conclusion
In this article, you’ve learned about WordPress comments and their importance, WordPress comments moderation, how to edit comments, what is an Avatar or Gravatar and how other comments settings work.
We hope that this complete guide can help you to enable and disable WordPress comments manually and configure comments using discussion settings. If you have any questions related to WordPress comments settings, hit the comment section below.
